Blog
Bailey Custom Bandsman Build – Norwegian Wood – Part 4
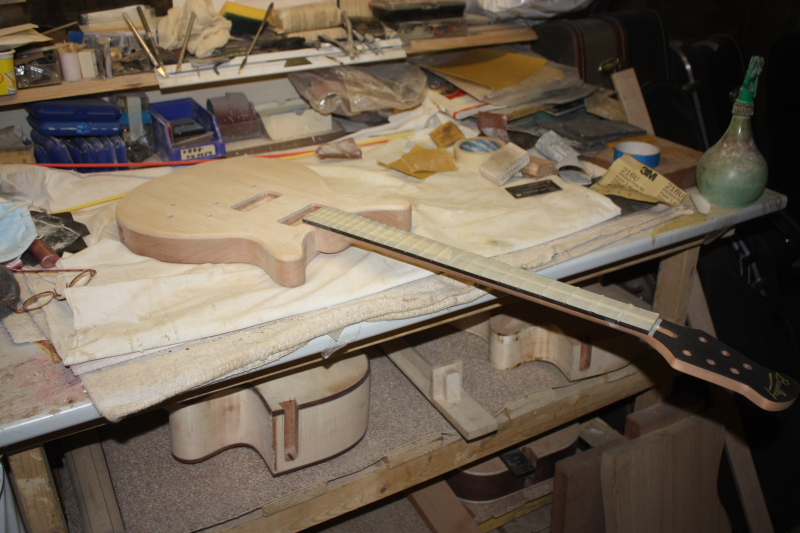
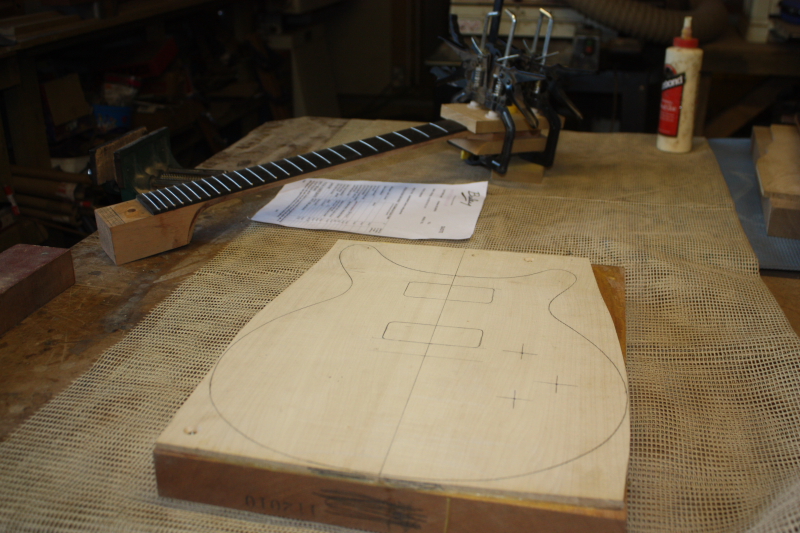
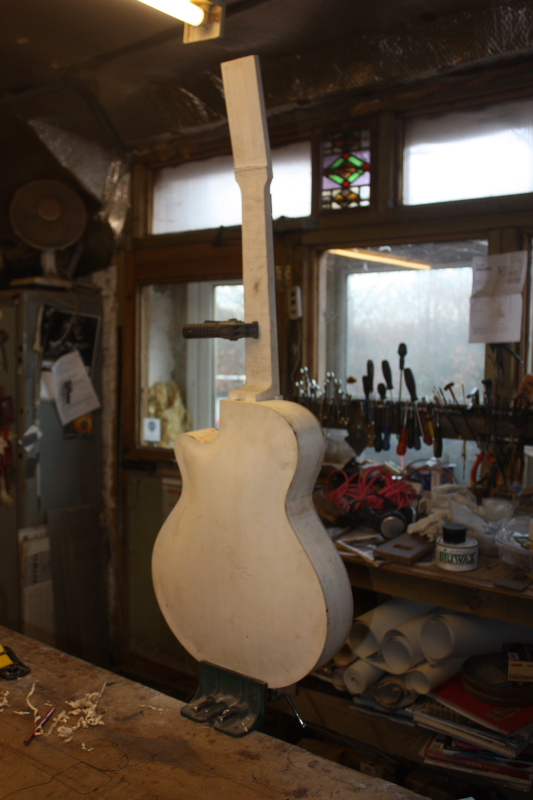
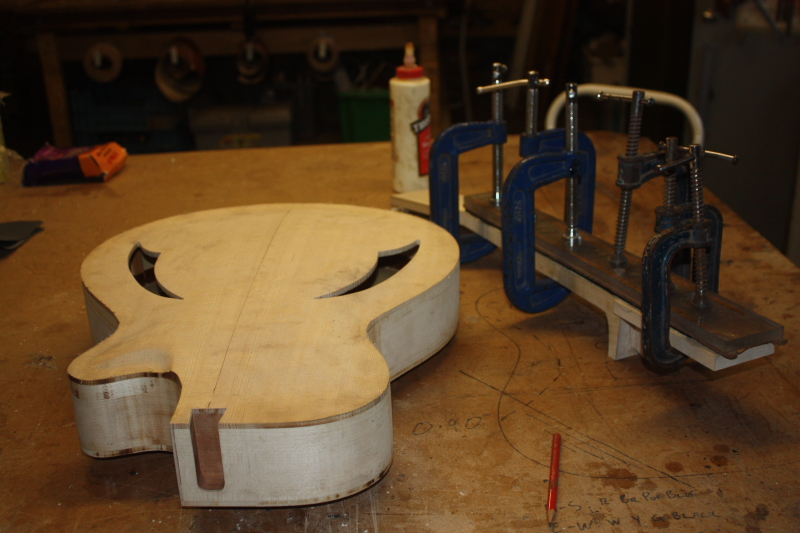
Kristian’s custom Bailey Bandsman guitar – woodwork completed and ready for spraying
-

- The guitar is ready for spraying
-

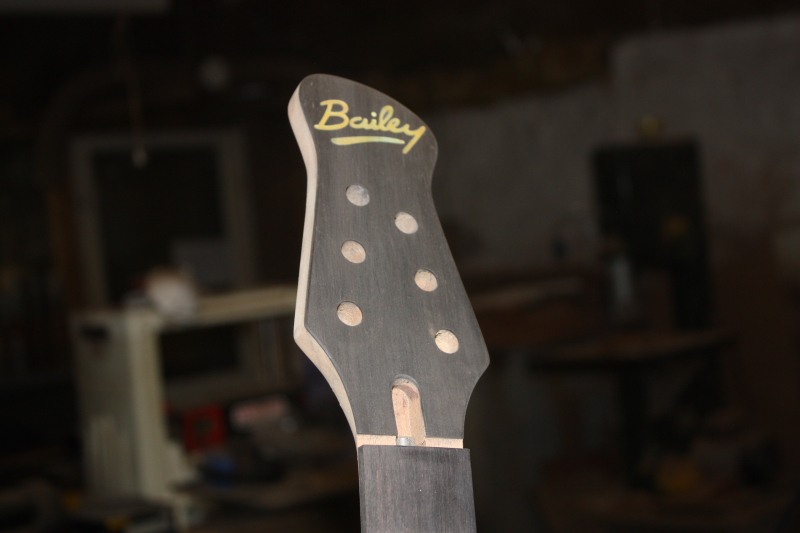
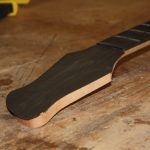
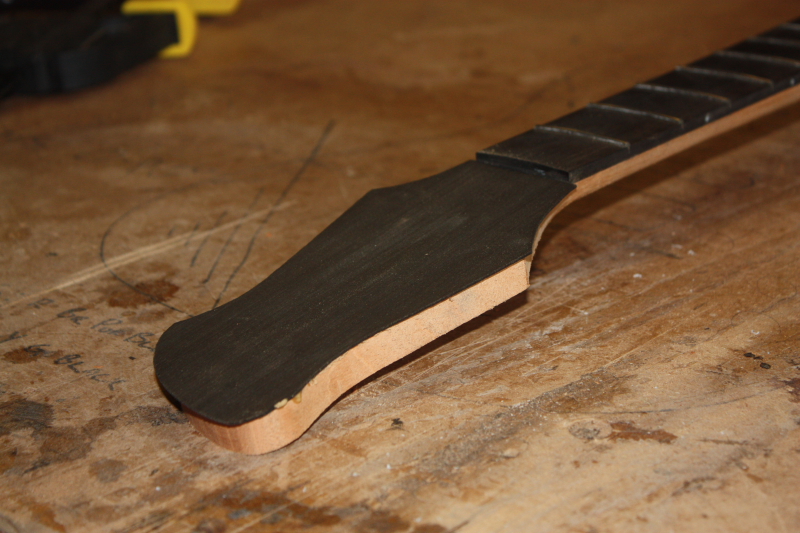
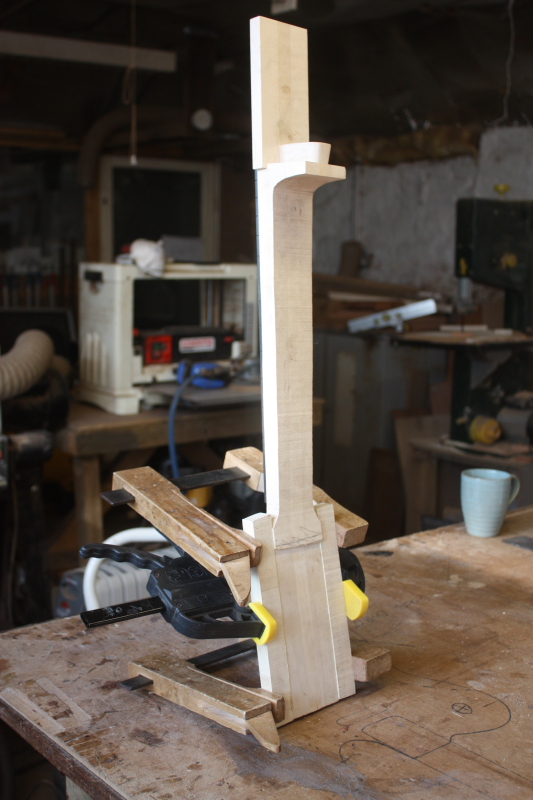
- The headstock is completed
-

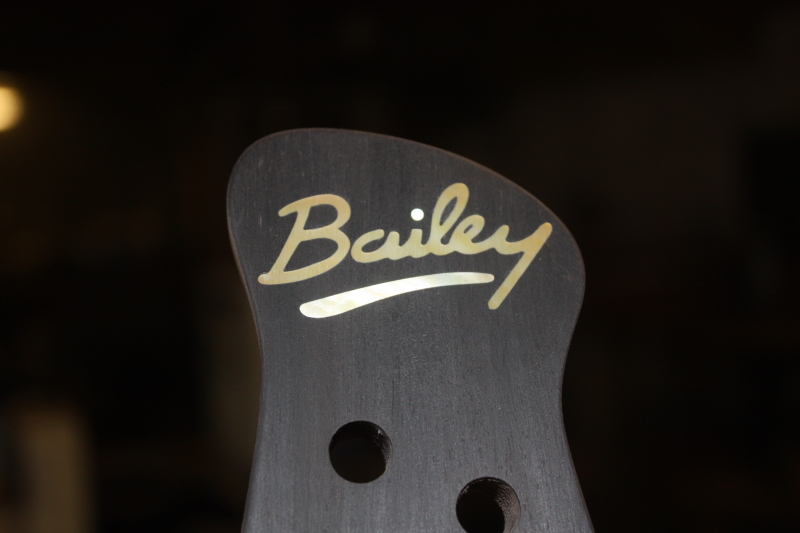
- Bailey gold MOP headstock logo
-

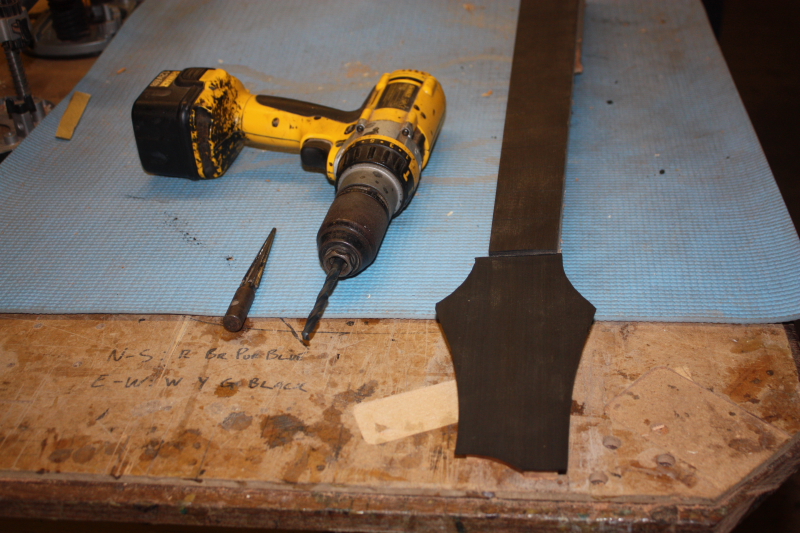
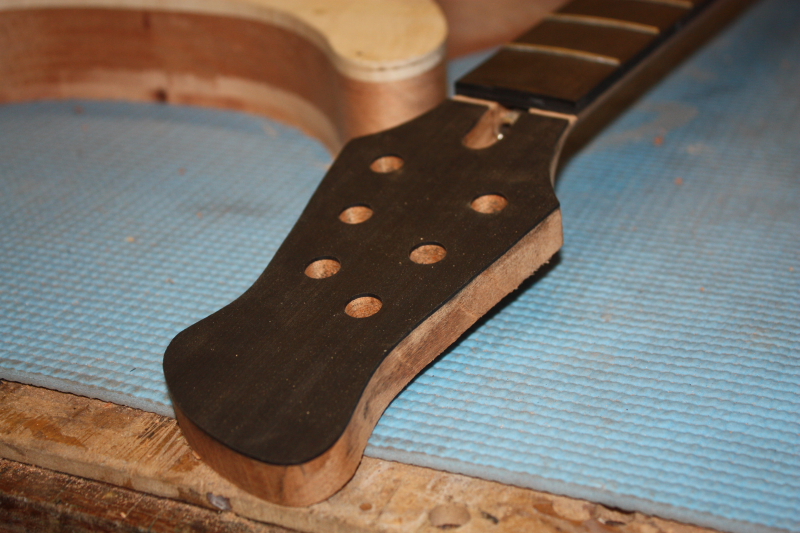
- Bridge mounting holes are drilled
-

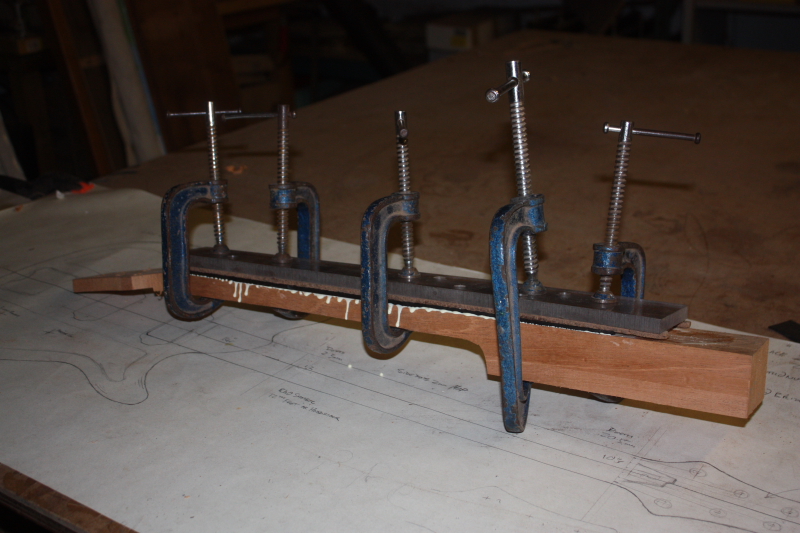
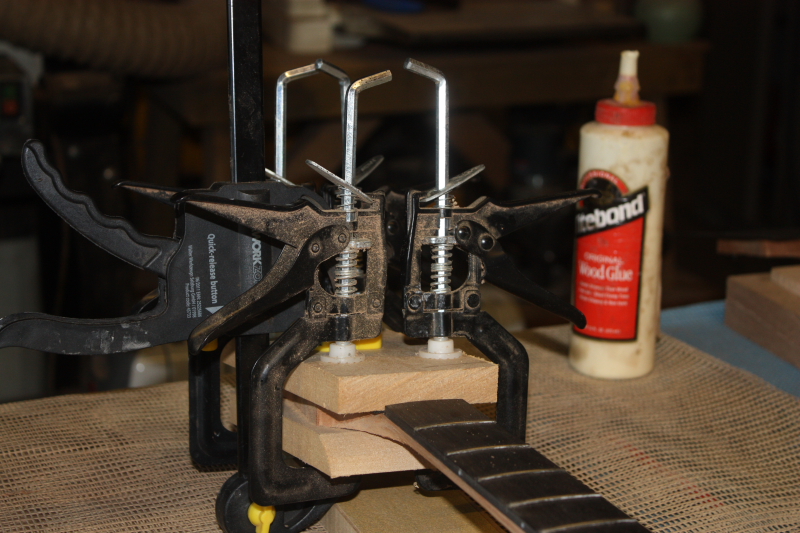
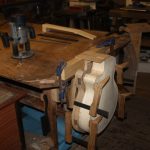
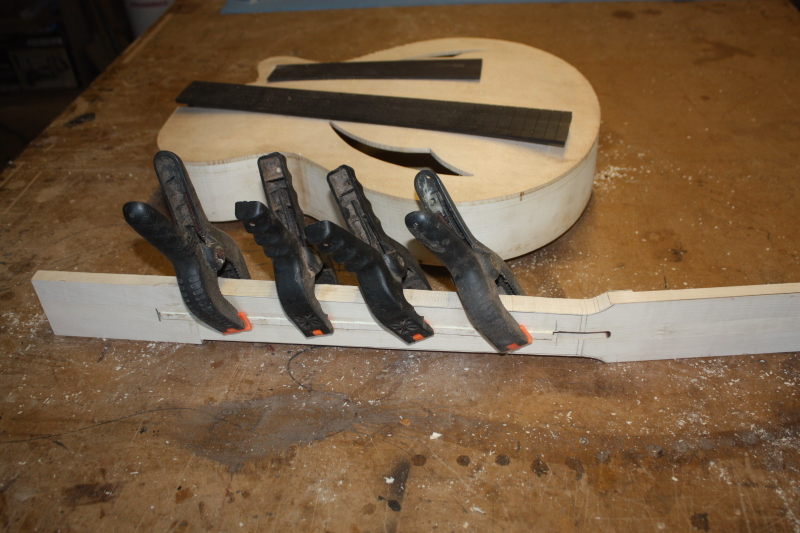
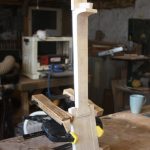
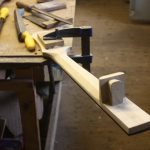
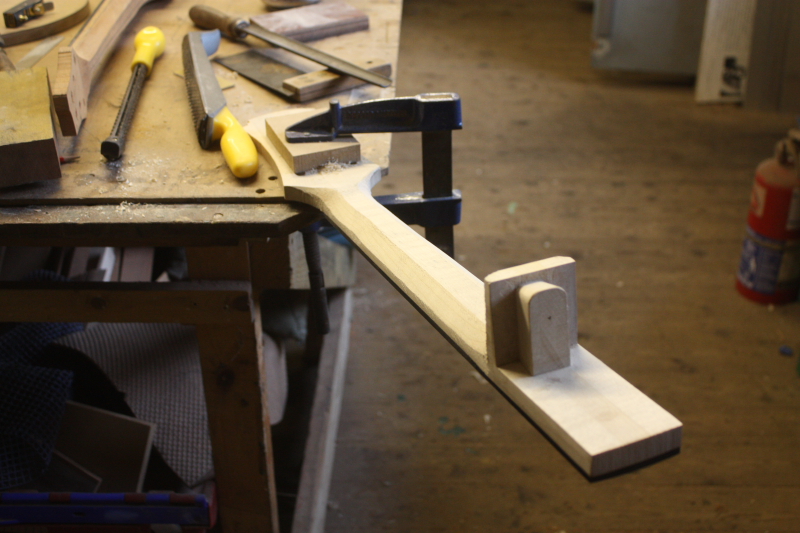
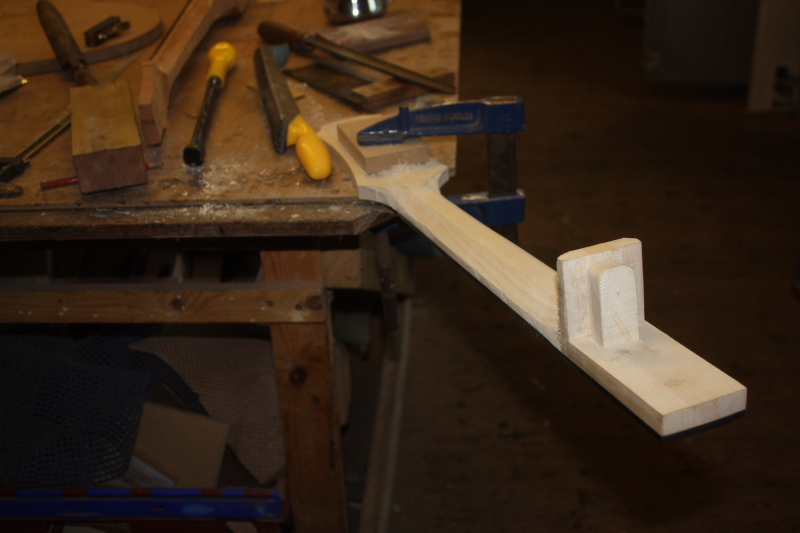
- Clamping the neck
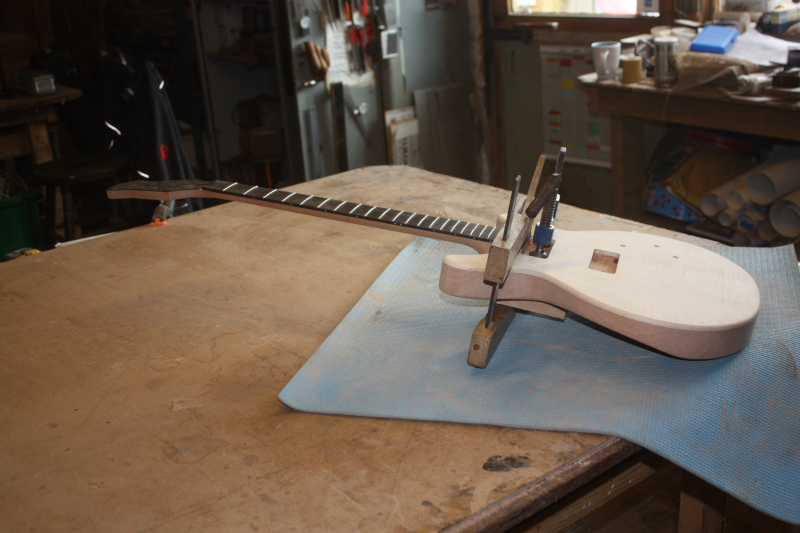
-

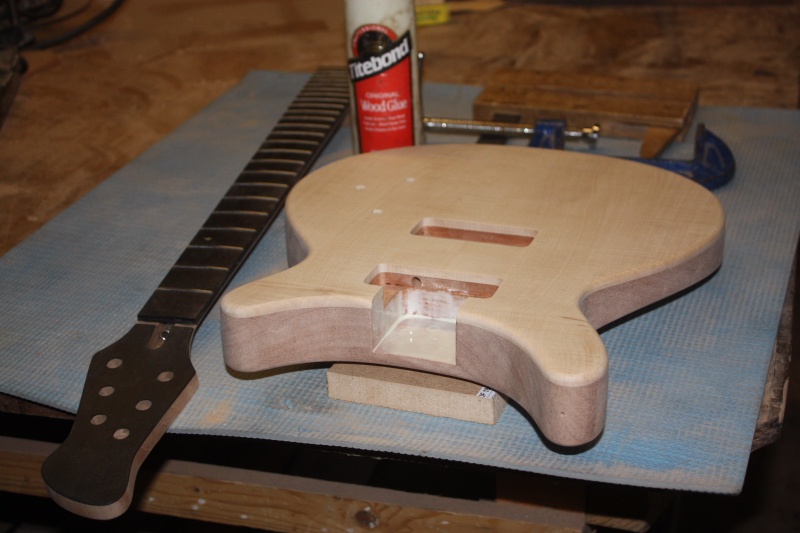
- Ready for gluing the neck in
-

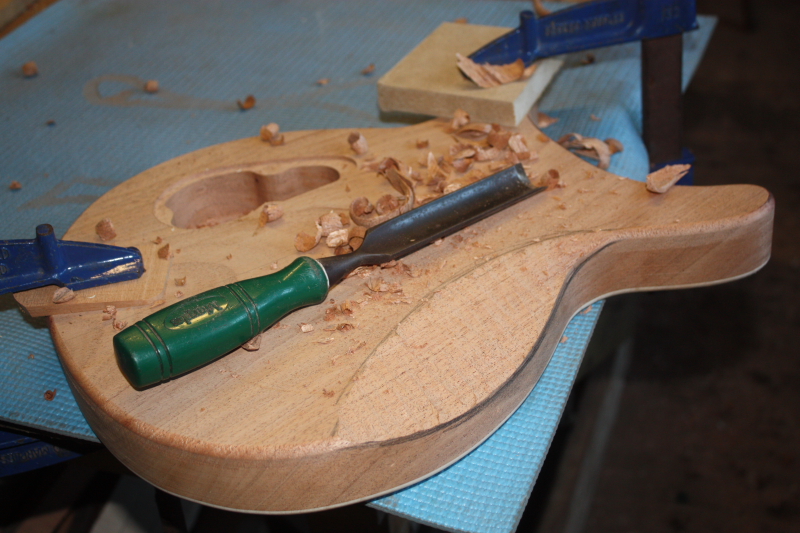
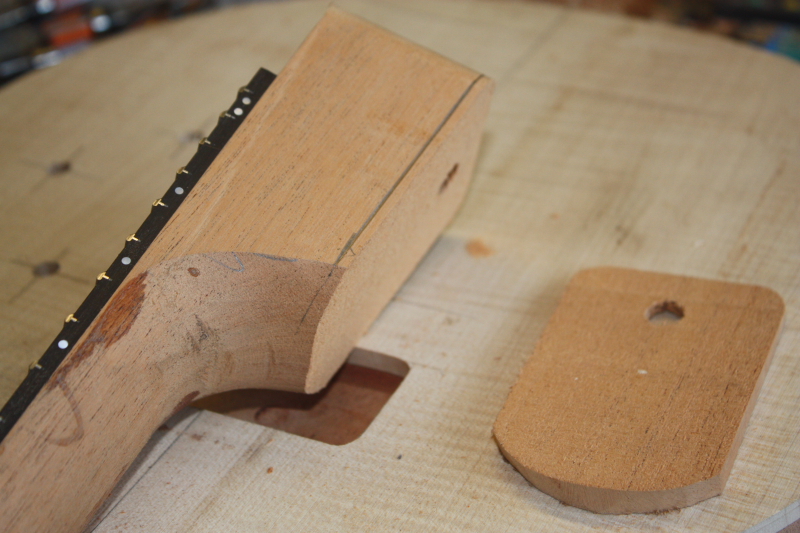
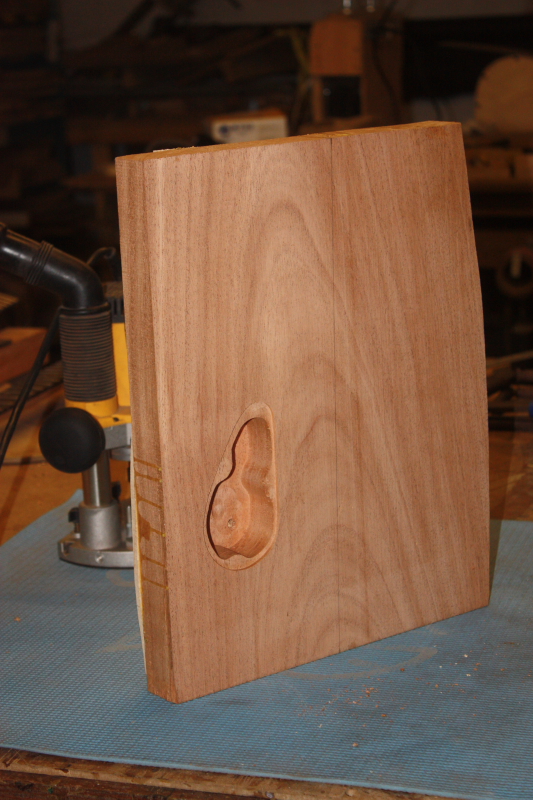
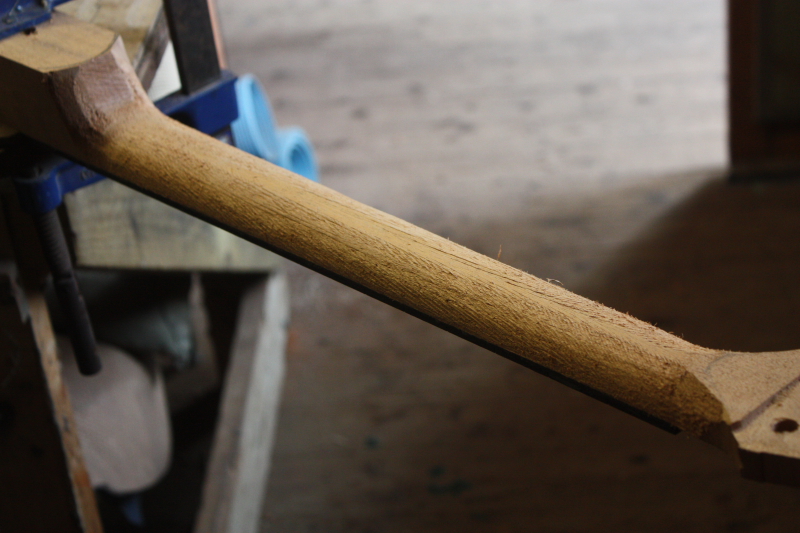
- The belly carve
-

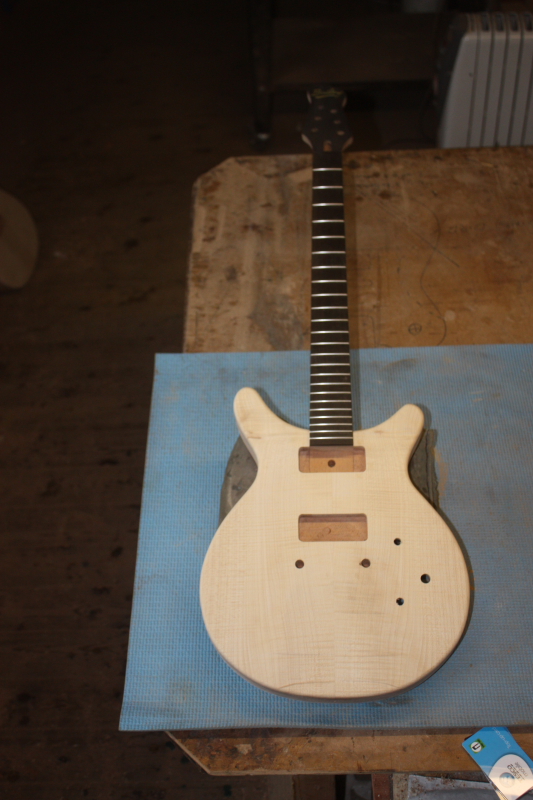
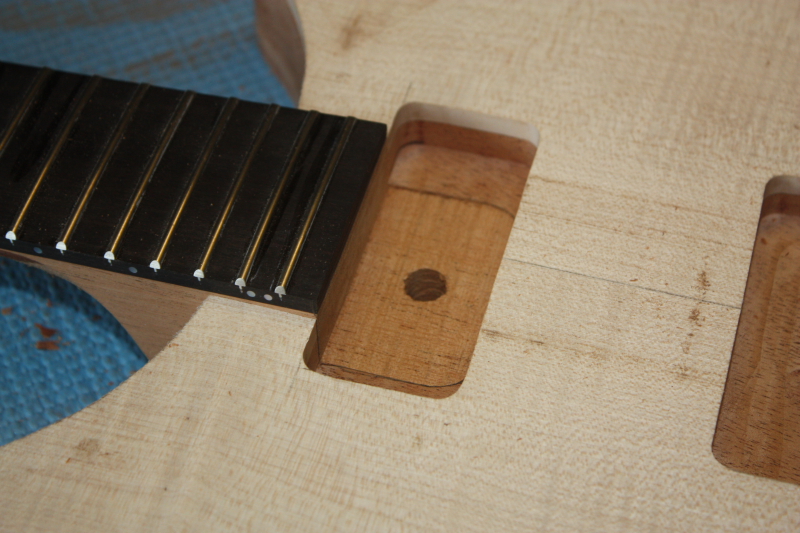
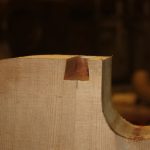
- Now the neck fits perfectly
-

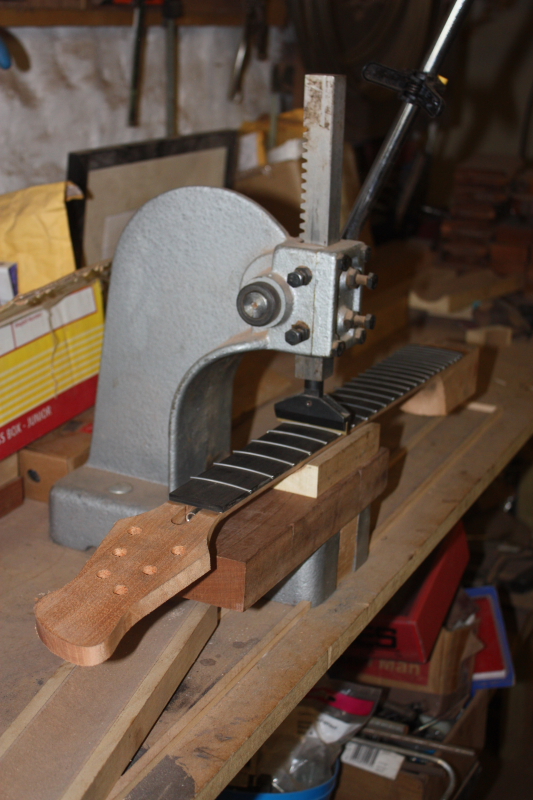
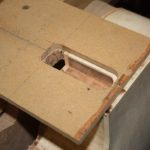
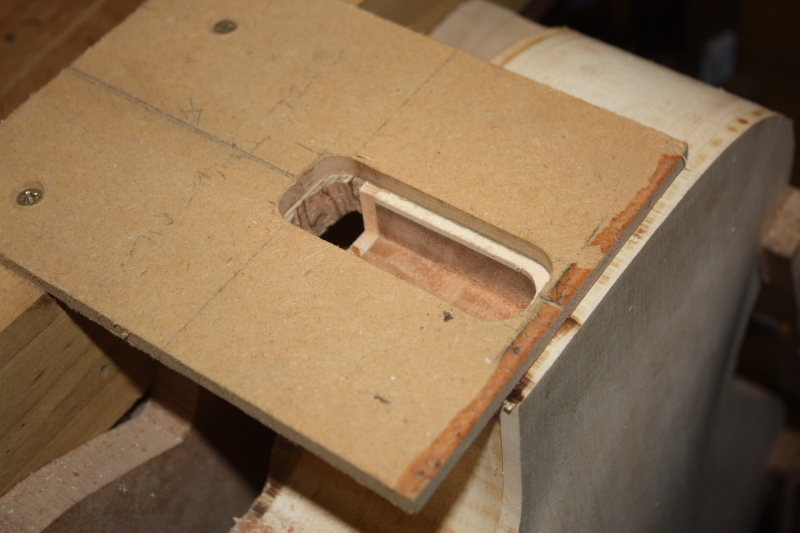
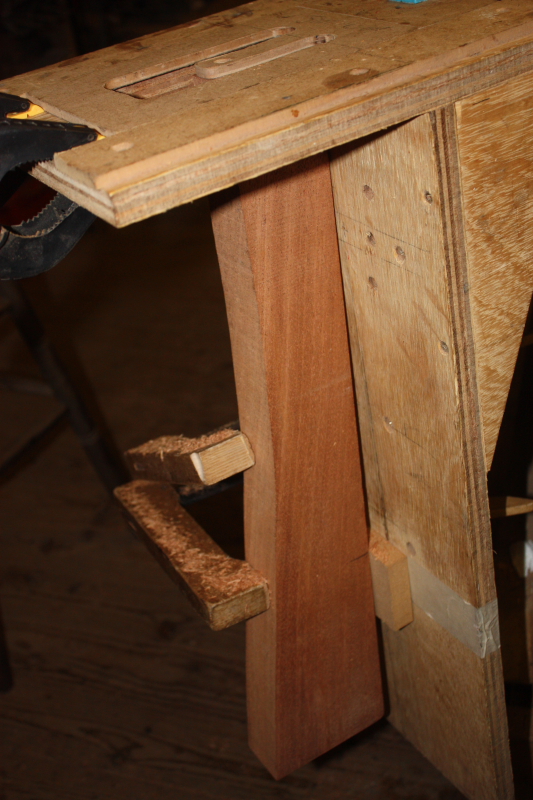
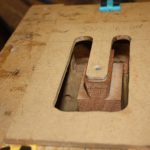
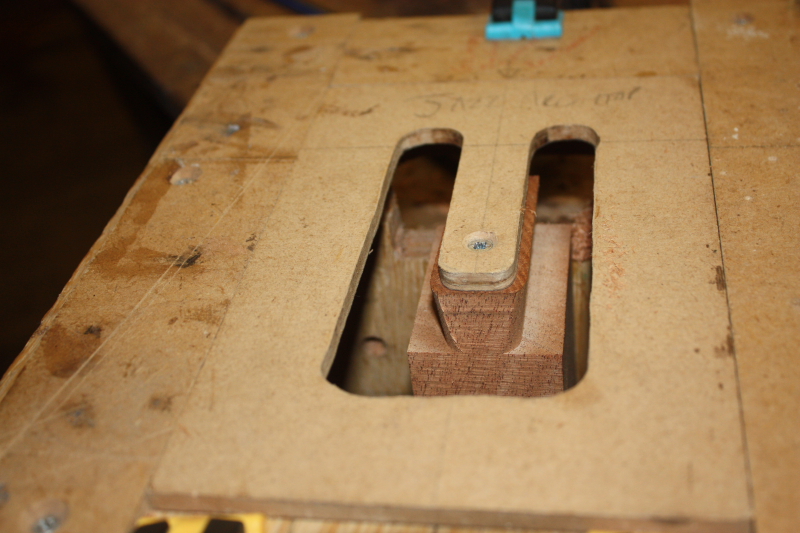
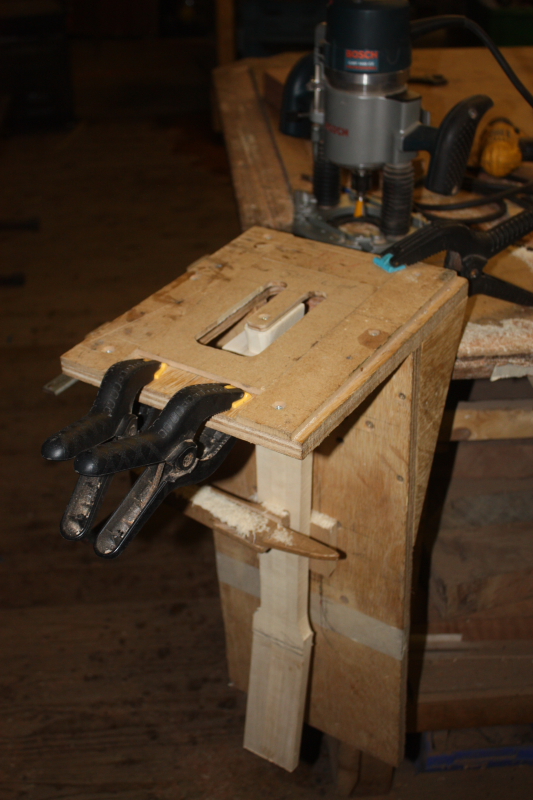
- Routing the neck angle

-

- Neck angle jig
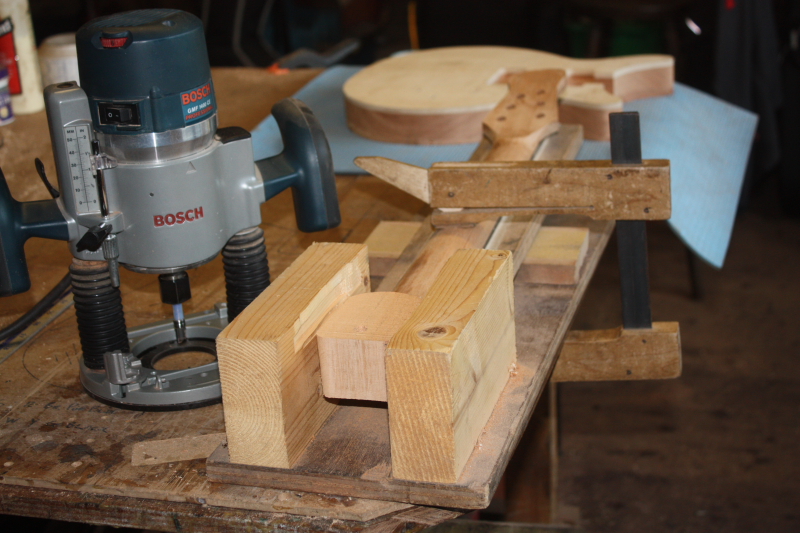
-

- Neck angle cut into heel
-

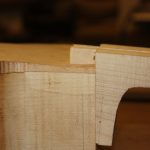
- The neck is fitted into the body
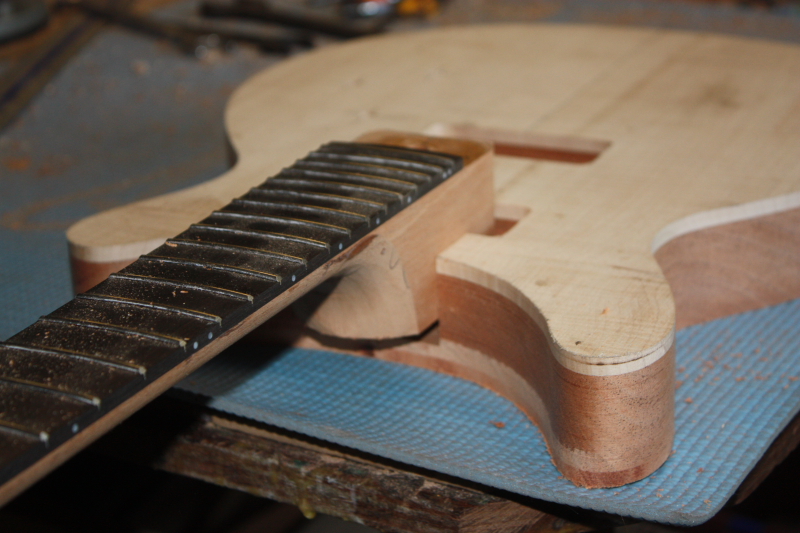
Fitting the neck is a two part job.
First the slot is made in the body for the neck to fit into, then material is removed from the bottom of the heel to make the neck angle.
After this there are a few jobs which need doing before the neck can be glued. I used a gouge to make the belly carve- I could have used the same rasp I use for carving the neck but the gouge is quicker and feels more crafstmanlike…
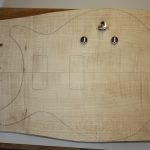
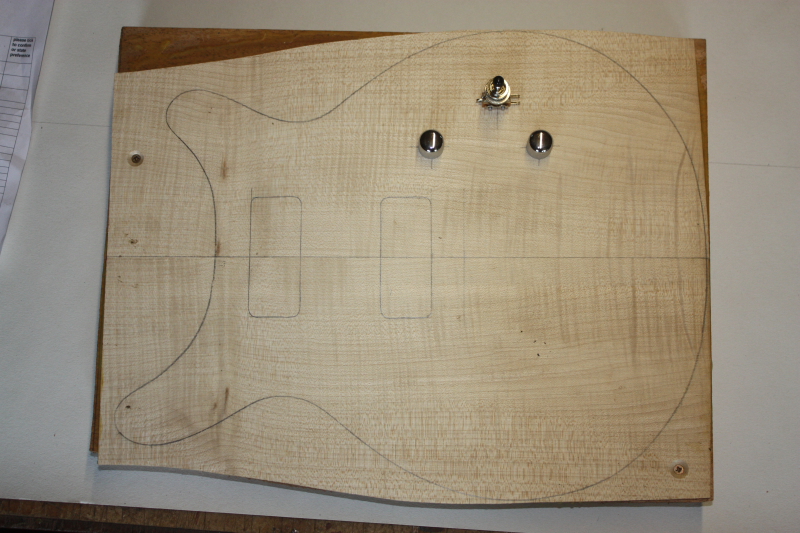
All the holes are drilled for the pick up wires, jack socket, and strap studs, but I leave the bridge mount holes until after the neck is glued.
The edges of the body have been radiused and the neck and body are both sanded thoroughly.
Now the neck can be glued using two clamps to hold it in place until dry.
The next morning I drilled the bridge mount holes and the hole for the earth link wire.
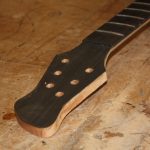
The headstock was inlaid with a gold mother of pearl Bailey logo, and after a few more hours judical final sanding, the guitar is now hanging in the back room ready for spraying.
The finish will be tobacco burst with satin lacquer which should really bring out the figure in the wood- I will make a blog about this next week.
Contact us to commission your own Bailey Custom guitar, check out our full range of instruments and have a look at our online shop for other instruments ready to ship today.
New ‘Little Eye’ video with Euan Malloch playing his Bailey Acoustic
Euan is playing his Bailey Bootlegger with his band ‘Little Eye‘.
I love these guys! They make it look easy don’t they…
From a guitarmakers point of view this is what is all about at the end of the day – my guitars are not the finished product, it’s the music.
Watch out for the close up of the headstock at the end – my favourite part:)
It’s a buzz to see one of my guitars in such a brilliant video – Thanks guys!
If you would like a Bailey Guitar of your very own contact us and we’ll build it for you.

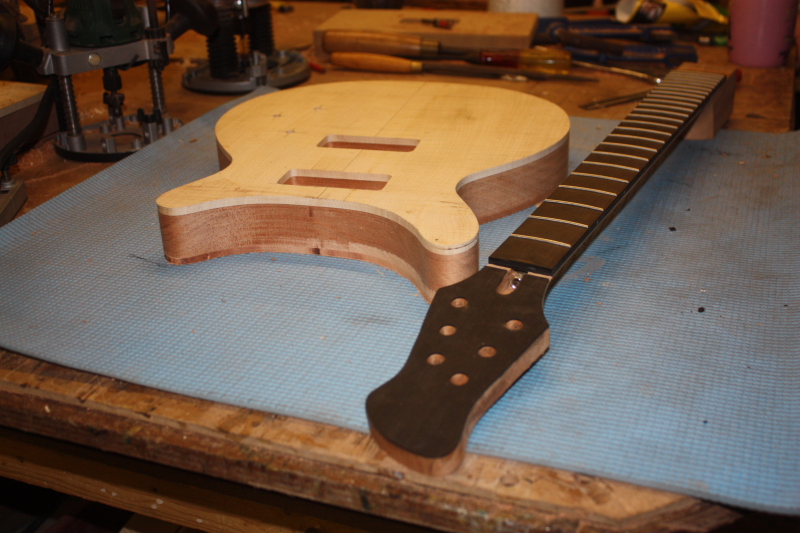
Custom Guitar – Rohan – Build Part 1


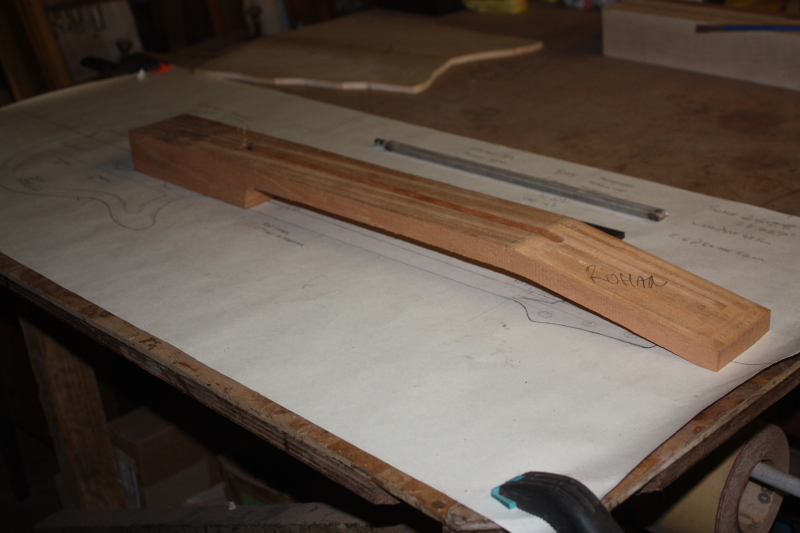


Kristian’s guitar will be the next to be finished but while waiting for glue to dry, wood to settle, and parts to come, I had a chance to get stuck into Rohan’s, which is the star of the design session video I posted recently.
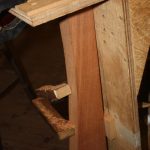
As usual I like to start with the neck. The mahogany I have been getting for necks recently has been exceptionally good quality- perfectly quartersawn, nice weight and a great tap tone which translates to a solid, stable and reliable neck.
I also glued up the Sycamore for the cap and Meranti for the back, but won’t be able to glue the cap on just yet until after I have made the chambers in the body.
The order of events here should be familiar to my avid regular readers…
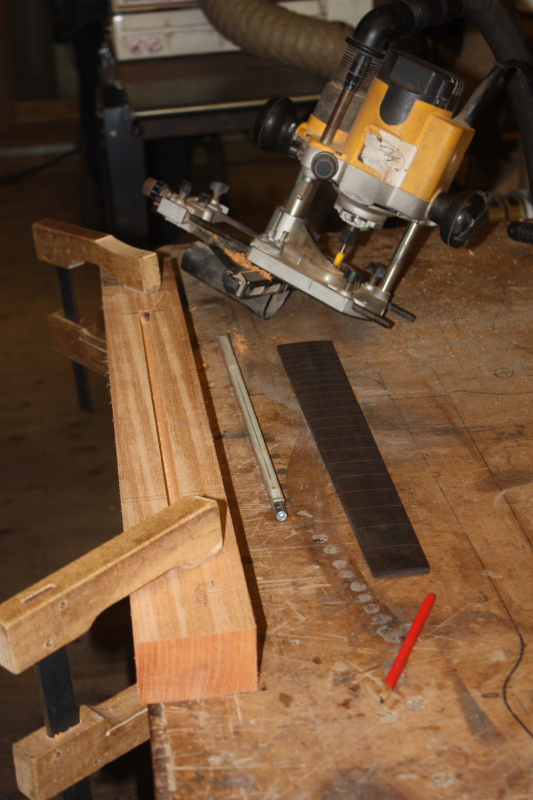
Mark out the Neck
Truss rod slot
Headstock angle
Side Profile
Front Profile
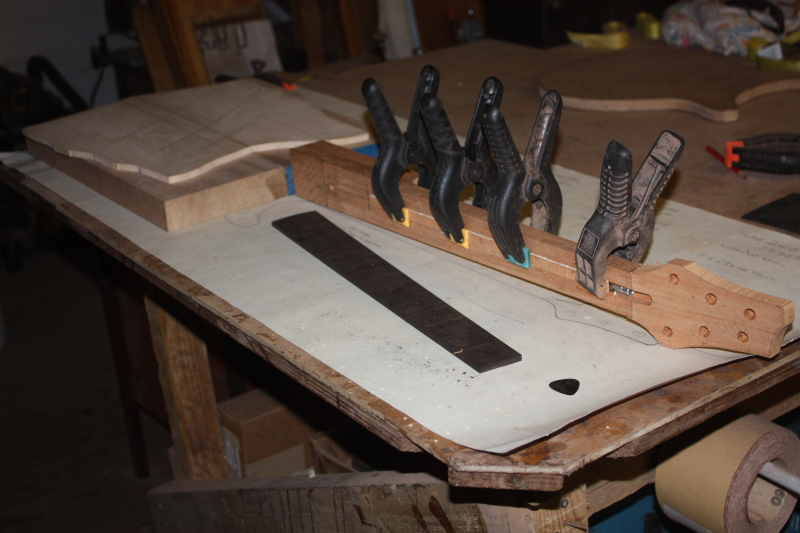
Install truss rod
Glue fretboard
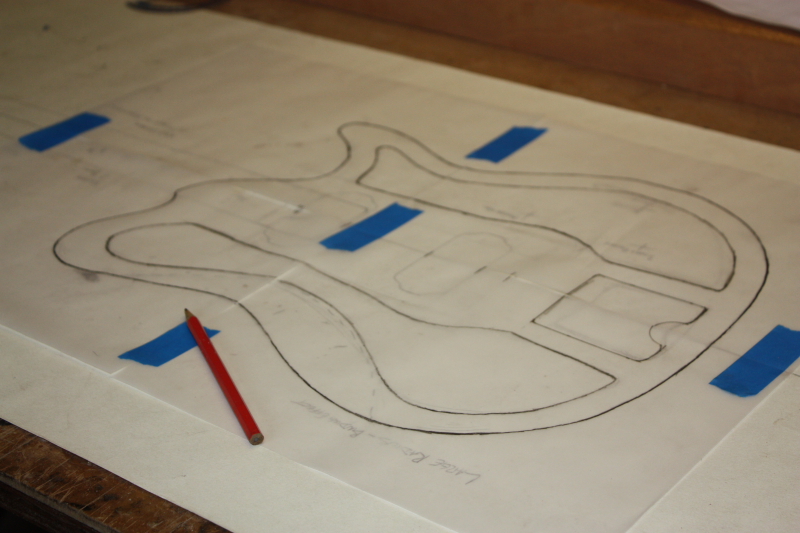
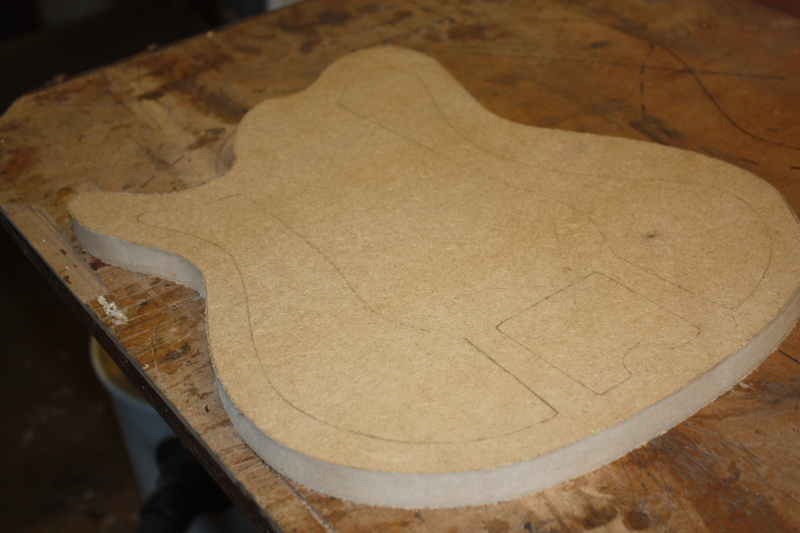
While the glue was drying I started to make the body profile pattern. I will cut the shape of the body chambers into the same pattern, for copy routing into the body before I glue on the cap.
Rohan designed every detail of this guitar including choosing the wood, the scale length, number of frets, pickups, hardware, and custom body and headstock shapes. If you are interested in having a custom guitar made for you contact us or have a look at some finished guitars in the Bailey Online Shop.
Full Spec and Design Session | Rohan Custom Build Part 1 | Rohan Custom Build Part 2 | Rohan Custom Build Parts 3 | Rohan Custom Build Completed Pictures
Bailey Custom Bandsman Build – Norwegian Wood – Part 3
Completing the neck and making the body
-

- Neck and body almost complete
-
- The headstock is ready for inlaying
-
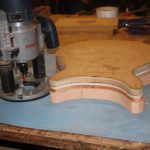
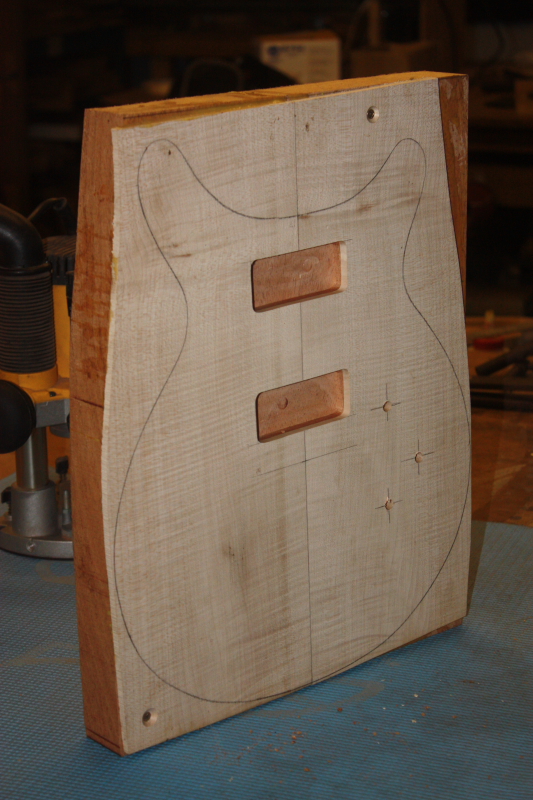
- Routing the body profile
-

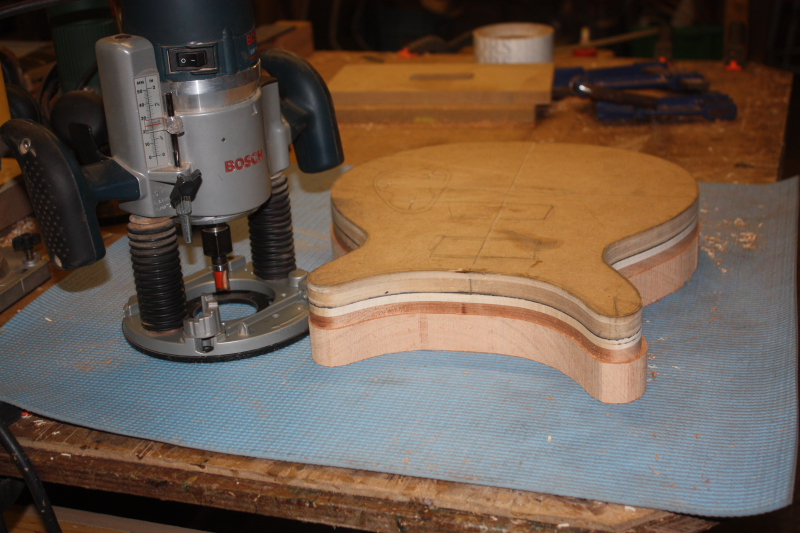
- Bandsawing the body shape
-

- Control Cavity and Coverplate Recess
-
- Most of the routing is done before cutting out the shape…
-

- Routing the pickups
-
- Starting work on the body
-
- The headstock is cleaned up
-
- Ebony headstock veneer
-
- The ebony covers fit almost perfectly
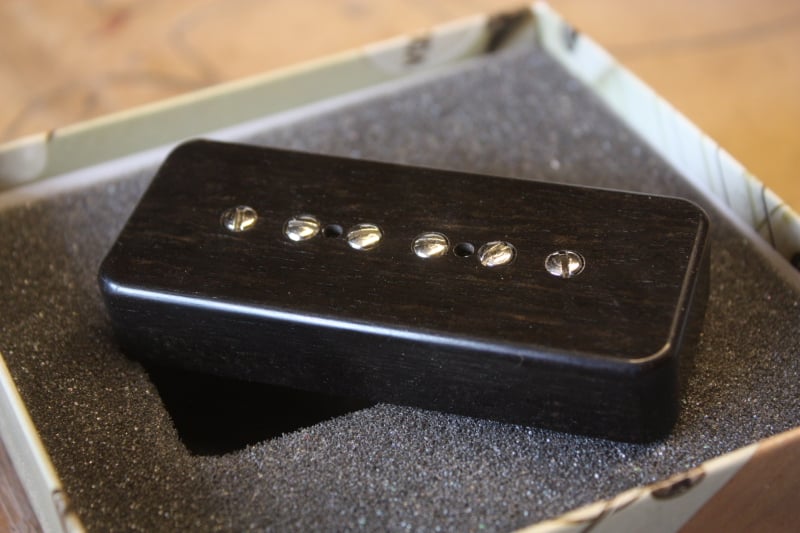
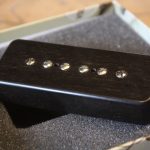
-
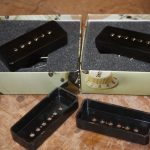
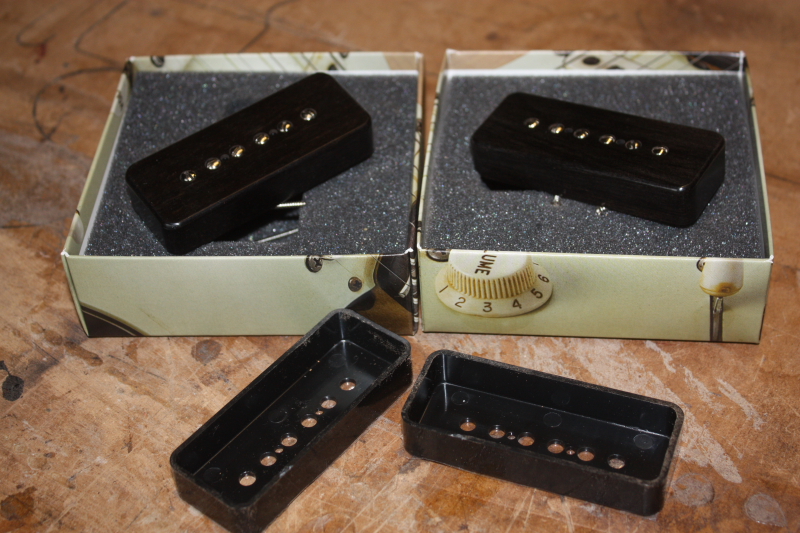
- Bareknuckle P90s with Ebony covers
Kristian’s custom Bailey Bandsman is coming on very well indeed…
Do the Ebony Pickup Covers fit Bareknuckle P90s?
The covers arrived earlier this week and I was a bit worried that they wouldn’t fit so the first thing I did was test that. If anyone wants to know, they do fit (almost) perfectly and look awesome. They are just a tad tight but with a little gentle pressure they popped on without any problems. I will include the original plastic covers just in case the ebony ones ever break…touching wood….
Last time I got as far as gluing the headstock veneer. This was glued on oversized, then filed and sanded down to clean up the excess..
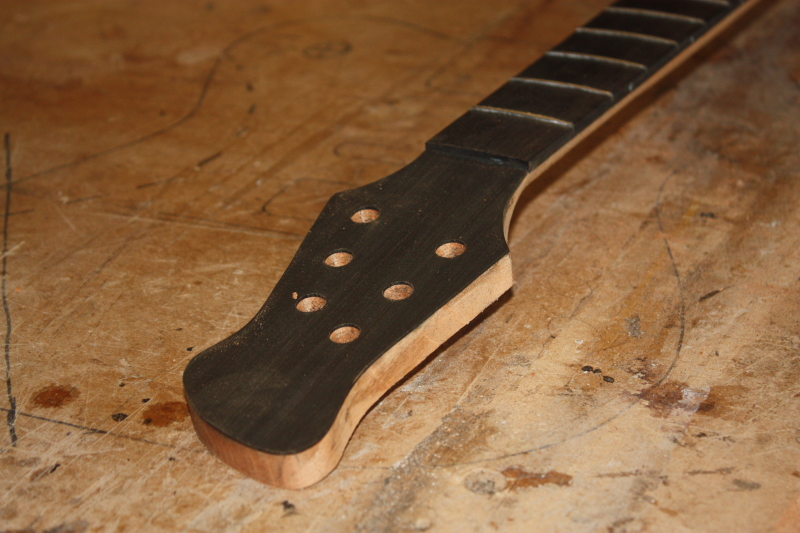
The tuner holes have to be re-made through the new veneer by drilling first with a smaller drill (I used a 7mm) before reaming them to size.
At this point I decided to make a start on the body. I glued up the body blanks last time so I was able to get straight on with it.
I usually start by routing the pickups, then I drill the control holes right through the body and use those to position the pattern on the back.
The body is now almost complete apart from shaping the belly carve, drilling for hardware, and sanding, but first I will cut the neck slot and set the neck angle. That is a pretty major job best done with a fresh head so I finished with an easier job, cutting the nutslot and truss rod access.

Bailey Custom Bandsman Build – Norwegian Wood – Part 2
Kristian’s Custom Bandsman
-
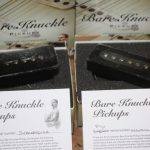
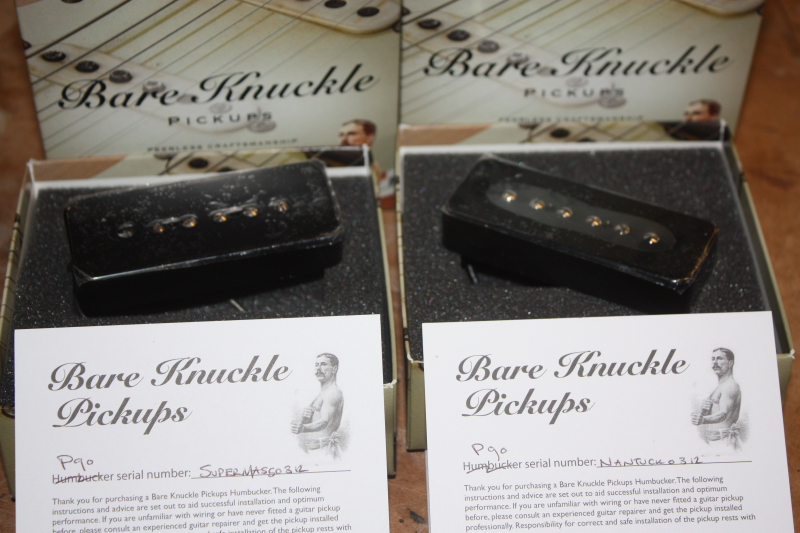
- Kristian’s pickups have arrived
-

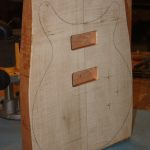
- The body is marked out
-

- Gluing the headstock veneer
-

- Side dots installed

-

- The frets are pressed in
-

- Blending in the facets
-

- Carving the neck facets

-
- Compound fretboard radius 2
-

- Compound fretboard radius 1
-

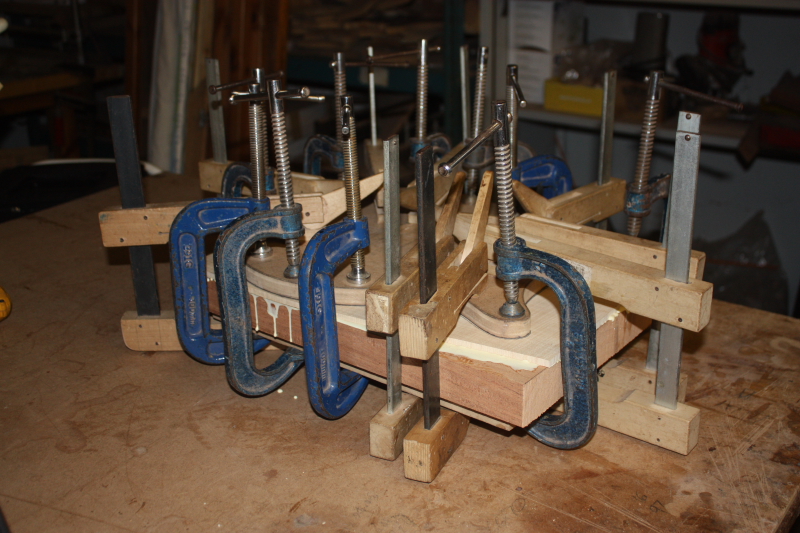
- Gluing the cap onto the body
-

- Gluing the fretboard

-

- Preparing the neck for the fretboard

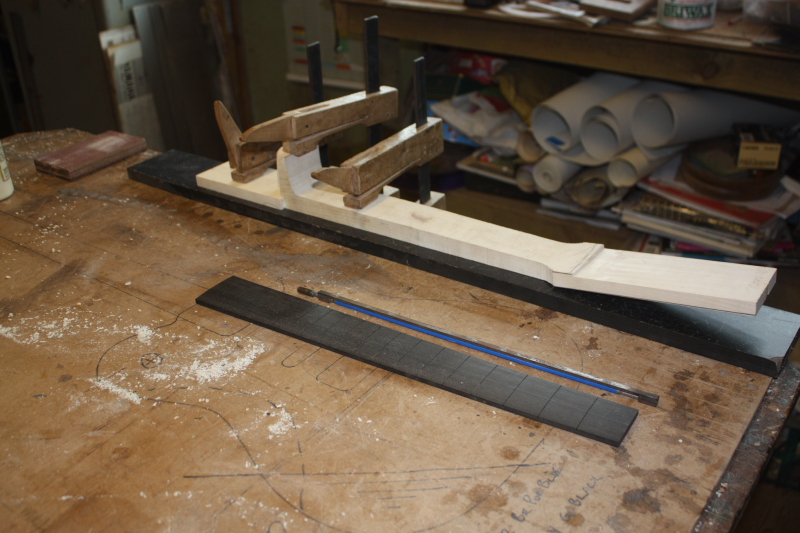
I installed the truss rod last time so the next big job was to glue the fretboard and while the glue was drying on that I decided to also glue the cap to the body.
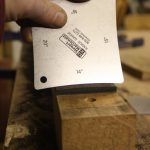
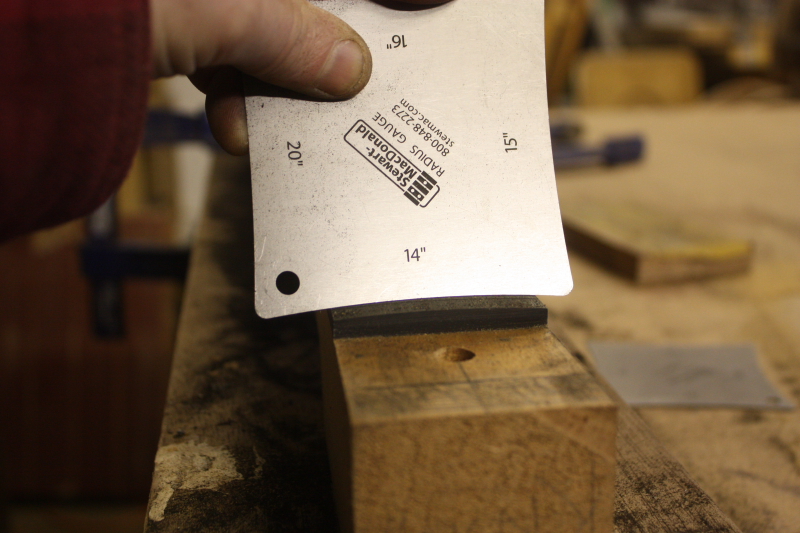
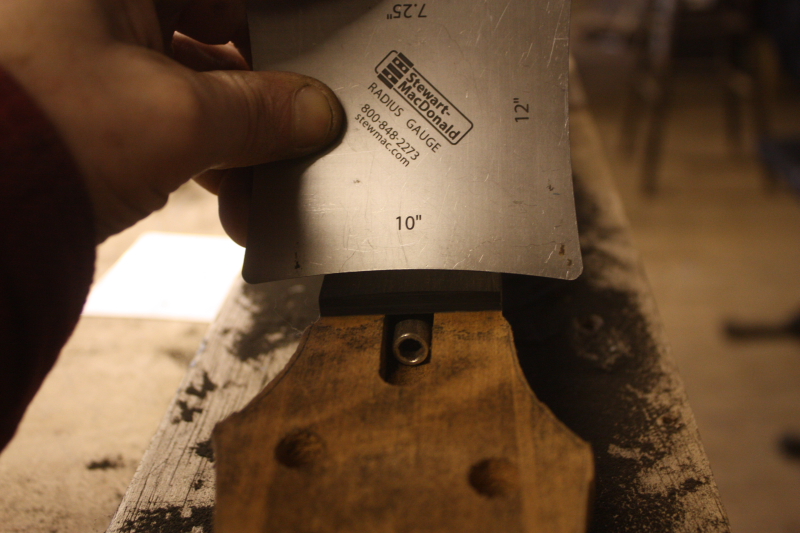
The compound radius of the fretboard was done by hand with a flat sanding block, a straightedge and the two radius gauges. Kristian has asked me for a 10″ (1st fret) to 14″ (last fret) compound radius which is strange as Rohan also wants the same. I guess compound radiuses must be like buses.
There will be no inlays on the front of this fretboard so when I was happy with the shape of the fretboard it was time to put the frets in.
Kristian has specified stainless steel frets which take a bit longer. Stainless steel is three times as hard as the tradition material used for fret wire, it takes about three times as long to do anything with it, wears out my files three times faster and should last three times as long. It is also three time as expensive to buy. I sense a pattern forming here but I can’t quite put my finger on it.
Actually installing the frets is no problem with stainless steel, I use by fret press to push them in as normal, but cutting and filing them is a different matter. Also when the time comes to level and dress the frets it will be hard work but my diamond files will do the trick.
The side dots are 2mm mother of pearl. I simply drill a 2mm hole for each dot and fix them in with superglue. The dots are left sticking up slightly and sanded flat later when the glue has dried.
The last thing I did on Kristian’s guitar today was to glue on the Ebony headstock veneer.
The Bareknuckle P90’s arrived yesterday, a ‘Nantucket 90‘ in the neck position and ‘Supermassive 90‘ in the bridge, but we are still waiting for the Ebony pickup covers as requested.
Nantucket’s are hotter, thicker, sounding, but still vintage, pickup – The ever helpful guys from Bareknuckle advised us they are a very versatile pickup as they offer lovely clean tones as well as being quite powerful and the Supermassive P90 should be a good match as it shares the same alnico v magnets.
The body is marked out but I will not do any work on it until the Ebony Pickup Covers arrive- there is a chance that they may not fit so I’ll hold fire until I can sure…
As all our guitars are individually hand made any of them can be ordered customised to your own spec.
Custom Guitar – Rohan
Custom Guitar Design Session
Full Spec and Design Session | Rohan Custom Build Part 1 | Rohan Custom Build Part 2 | Rohan Custom Build Parts 3 | Rohan Custom Build Completed Pictures |
Rohan contacted us originally about a custom version of the Bailey Bandsman and as I’d be building it from scratch I suggested he came to visit for a one to one design session.
Once he realised I could make him just about anything he changed his spec completely (which is normal) and he’d already done quite a bit of drawing before he got here (which is not). He lives in Cambridgeshire and by the time he arrived at the workshop he had lots of ideas and questions. Together we discussed all those and, by the end of the session had completed a full-scale working drawing.
This process enables us both to work out what is practical, and possible within budget. Much of guitar making is about making the right choices for the individual player. My job is to ensure the end result will be a guitar which is exactly as the person wants it to be.
When the session is over there may well be some things to think about and more decisions to make, but working through the process of making a working drawing helps to make everything a lot clearer to both of us, and I have a drawing with all the key info on it to refer to throughout the build.
We don’t usually film, but it seemed like a good way to show what the custom design session is about. If you are not able to visit don’t worry, I can get all the information I need using emails and pictures.
If you have wanted to design your own guitar or have one made for you, but don’t know where to start, contact Bailey Guitars– that’s what we do- Custom Guitar Design Session
Rohan’s Spec
Scale Length: 25.227″
No of frets: 22
Style of Construction: Set neck
Body: Meranti Body with flamed maple cap
Neck: Quarter-sawn Mahogany with ebony fretboard
Inlays: No inlays on front MOP 2mm side dots only
Mother of Pearl ‘Rho’ symbol on truss rod cover
Bridge: Hardtail string thru body
Hardware colour: Black
Pickups: Two Wilkinson humbuckers
Electrics: Master Volume, Master Tone with push pull to activate coils cut, and three way switch.
Finish: Natural Satin
Custom: Headstock and body shape, chambered body.

The SpaceShip – First Docking Procedure
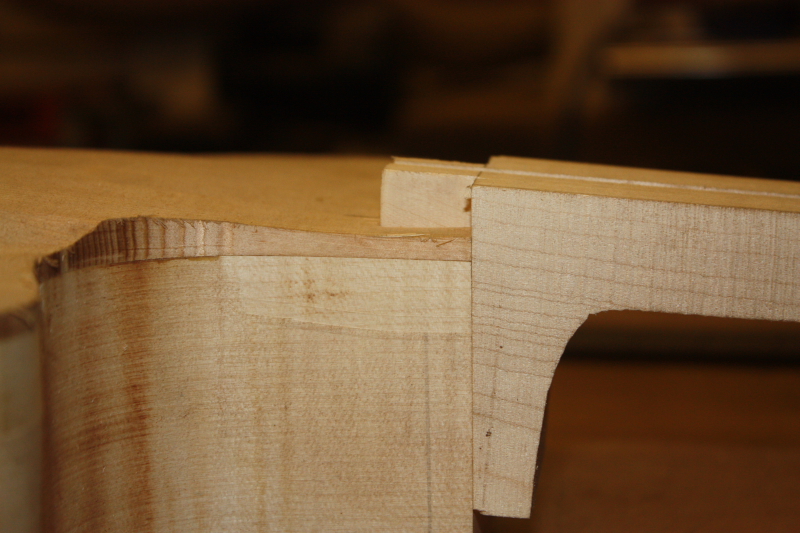
Fitting the neck to the body with a dovetail joint
-
- Archtop guitar dovetail jig

-
- The dovetail slot in the body
-
- Archtop guitar dovetail front view
-
- Neck dovetail ‘test piece’
-
- The neck dovetail jig
-
- The ‘neck test piece’ is dovetailed
-

- The actual neck is machined
-
- A perfect fit
-
- Gluing the neck extension
-
- Close up of neck extension
-

- Ready to fit the truss rod
-
- Installing the truss rod
-

- Aligning the fretboard

-

- Rear view
-
- Ready to glue the fretboard
-

- Clamping the archtop guitar fretboard
-
- Gluing the ‘wings’ on the side of the headstock
-

- Custom headstock designed by Steve
-
- Rough carving the neck
-

- The neck is now roughly carved
Captains Log
Stardate : 05312.5
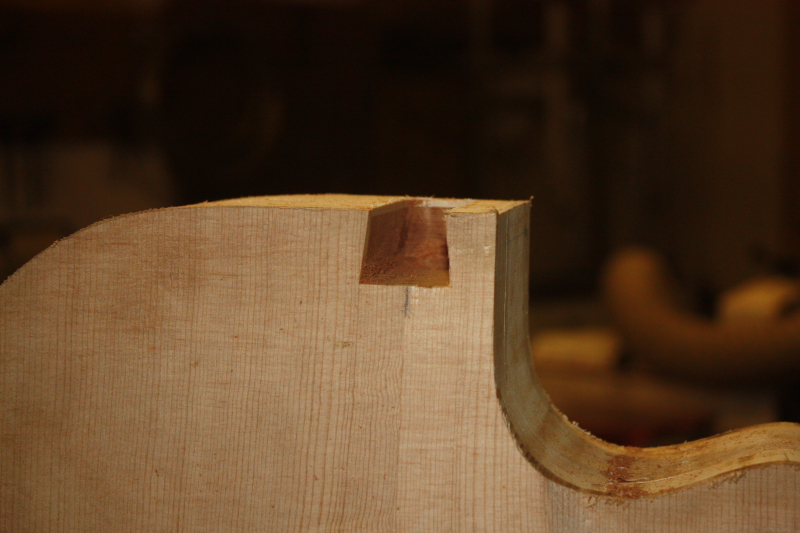
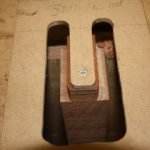
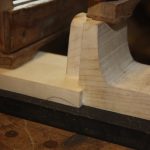
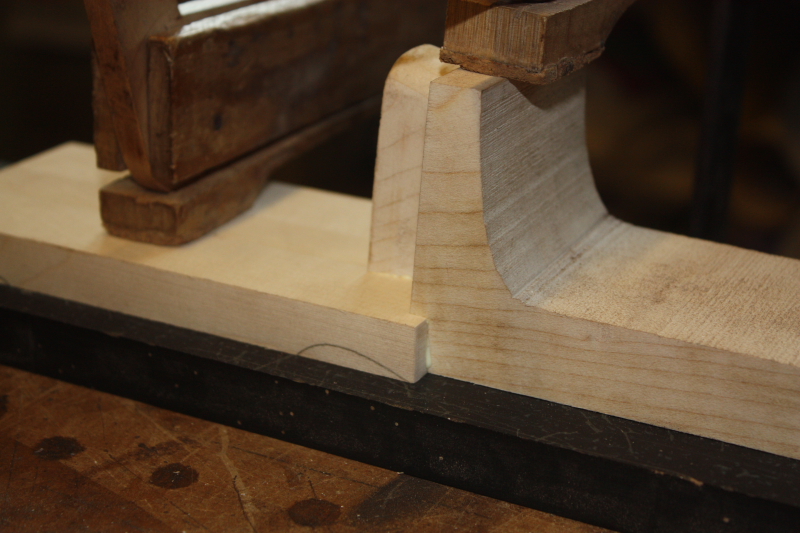
Today we passed a milestone in our continuing journey to go where no Jazz Archtop has gone before. It was my duty as captain to single handedly complete the first docking procedure with the new jazz class spaceship. It is necessary to ensure this runs smoothly as we do not want any issues to arise when the time comes to permanently attach the neck to the body.
The neck cannot be glued on until the guitar is just about finished during the final ‘docking procedure’, but the dovetail must be made before the fretboard is glued on or the neck would not fit into the jig.
Completing the neck joint is one of the major jobs when making an Archtop style guitar. It has to be a dovetail as there is no way to get hands inside the body to tighten any bolts.
This is also how the neck angle is set so that the strings will arrive at the right height for the bridge, and also the alignment- the centre of the neck must align with the centreline on the body.
The body mortice is cut first then the fitted neck to it, using a piece of ‘scrap’ to practice on until the angle and alignment is correct, then swapping it for the real neck to complete the dovetail joint.
After this I can glue the neck extension, install the truss rod and glue on the fretboard.
This headstock is going to be quite large so I added some ‘wings’ to each side to increase the width so the shape will fit on.
Steve designed his own headstock which I traced and marked out onto the wood before drilling the tuner holes and cutting out the shape.
Finally I rough carved the neck. I left it slightly oversized for now and will refine it after the frets are fitted. I may have to work on the fretboard first so it is good to leave a little leeway for this. Now I will let it settle for a while…
Contact us if you would like to commission your own epic custom build, or visit our online shop to see some ready made examples.
Guitar neck joint styles
Neck Style
Most electric guitars can be split into three main types:
Bolt on
Can be easily replaced, uses less wood with less waste and is therefore cheaper to make. This style of construction usually needs a ‘heel’ on the body for the neck to ‘bolt on’ to so it can be cumbersome for some players, but can be improved by using recessed neck anchor washers instead of a plate so the heel can be shaped for better access.
Variations:
- Parallel headstock – needs string retainers holding down the strings over the nut to create enough string angle.
- Angled back headstock- eliminates the need for string trees by scarfing the headstock.
- Bolt on/set neck-the same construction as set neck but bolted instead of glued. We don’t usually do this at Bailey guitars as we believe that if you’re going to go to the bother you might as well glue it in.
Set neck
Gluing in improves sustain by ensuring a more solid neck to body contact. There is no need for a heel on the body, but to get enough surface area for a strong enough joint the neck heel extends under the front pickup. This part of the neck is called the tenon. The neck heel is also bigger than a bolt on and set deeper into the body. This makes it more expensive as you need a bigger piece of wood for the neck blank. It’s harder to replace than a bolt on but it can be done.
Variation –
- Long tenon- same as above but the neck extends right to the bridge. We don’t do this style here at Bailey guitars as we believe that you might as well make it neck thru.
Neck thru
Possibly the ultimate construction style, ‘neck thru’, eliminates the need for a heel on the neck or body. The neck piece extends right through to the back of the body, so there is no neck joint as such. The area where the heel would normally be can be carved away so that the neck simply blends into the body. This means maximum possible access to the top frets. Also the nut, pickups and bridge are all mounted onto the same piece of wood for ultimate tone and sustain. The neck is not removable from the body so if something goes wrong you may have to replace the whole guitar.