Blog
Build your own guitar – 9 oct – 1 day
Steve has come to finish his guitar while Ciaren continues with his acoustic
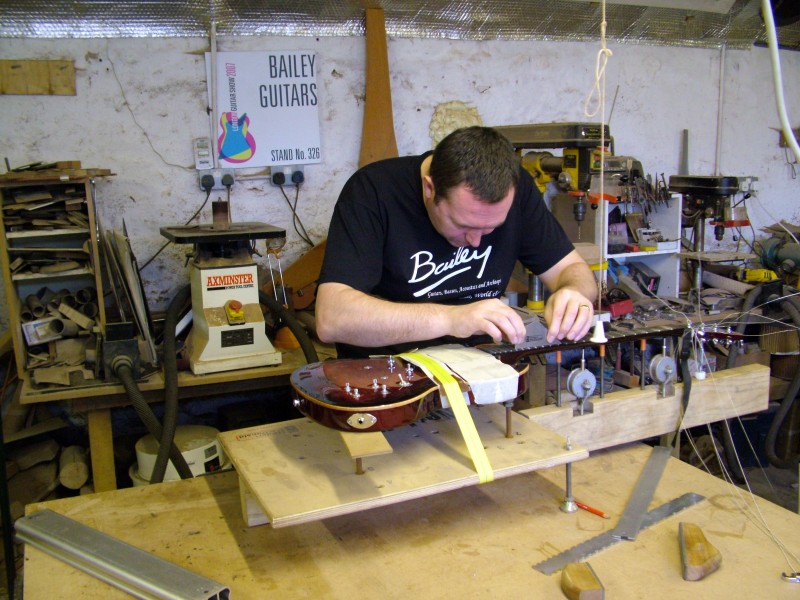
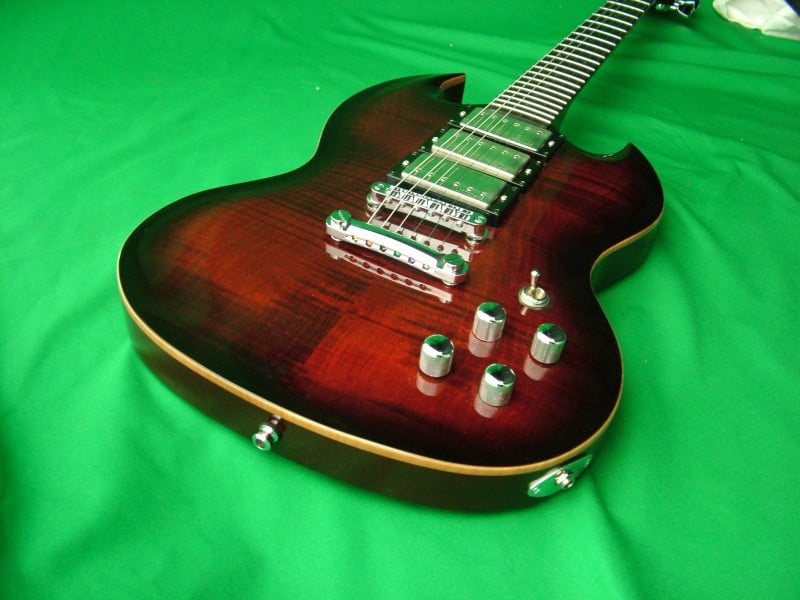
Today is mainly dedicated to getting Steve’s ‘Red Wine Burst’ guitar finished but Ciaren came as well as he wants to get his done before Christmas – we’ll do our best!
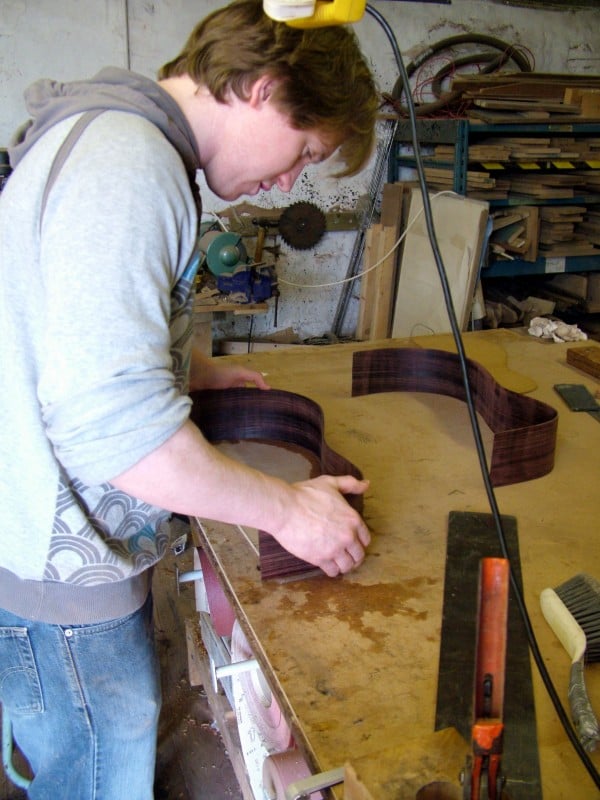
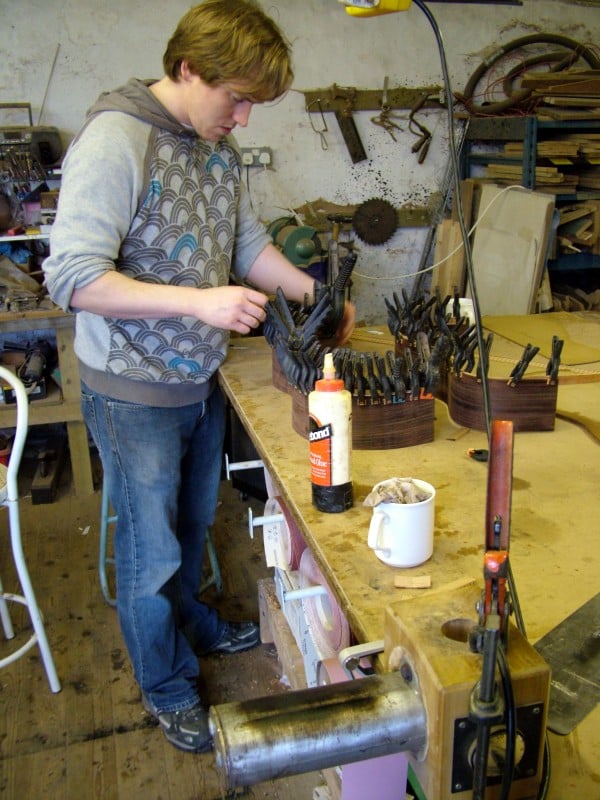
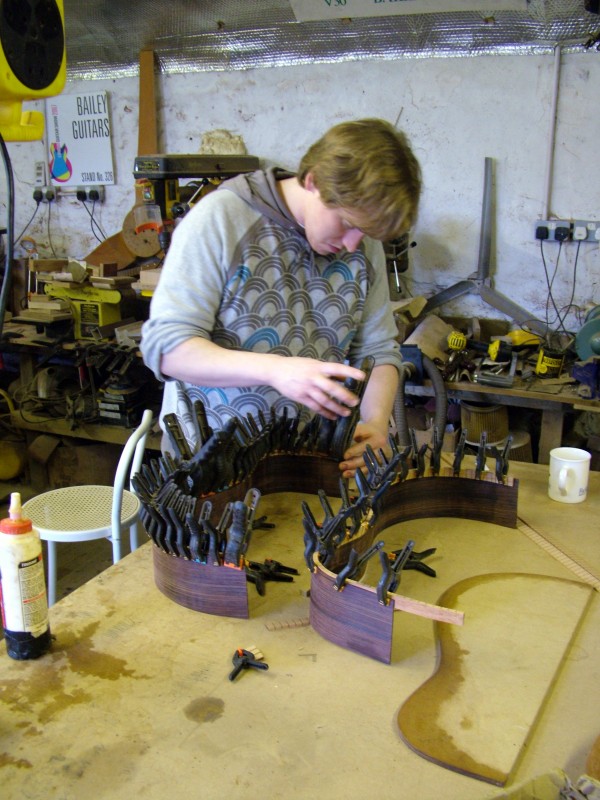
Ciaren was busy bending his sides and gluing the kerfed lining on – He has already made the front and the back so next time he can start assembling his body. He left about 5pm and left Steve working on his fretjob.
There are basically three jobs to do on finishing day but each one takes quite a long time so it is still a full day.
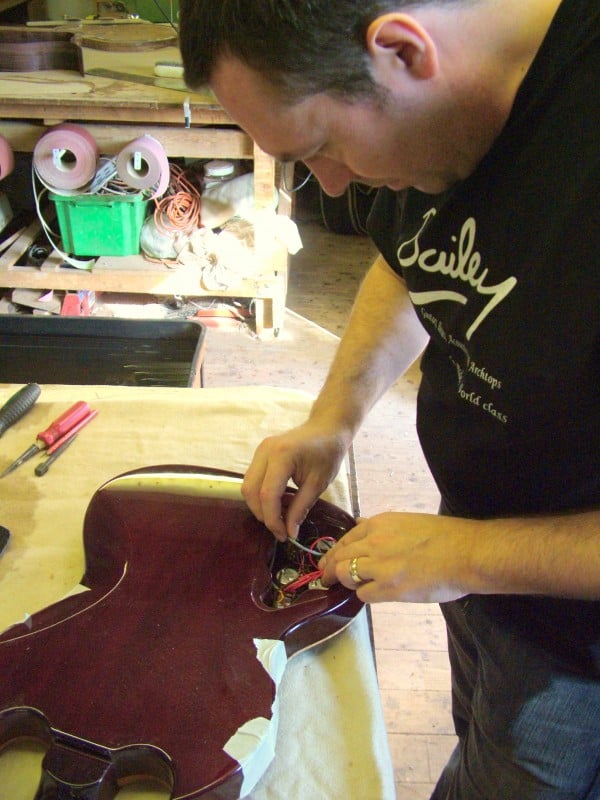
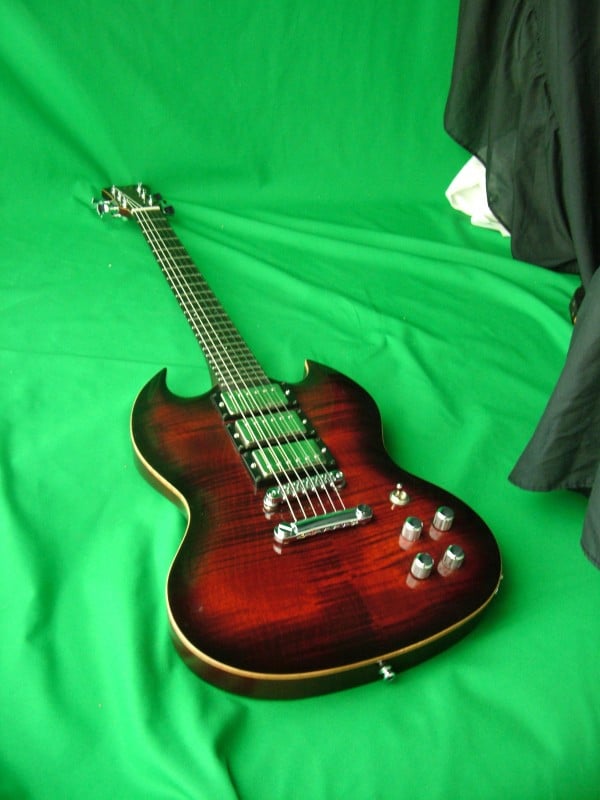
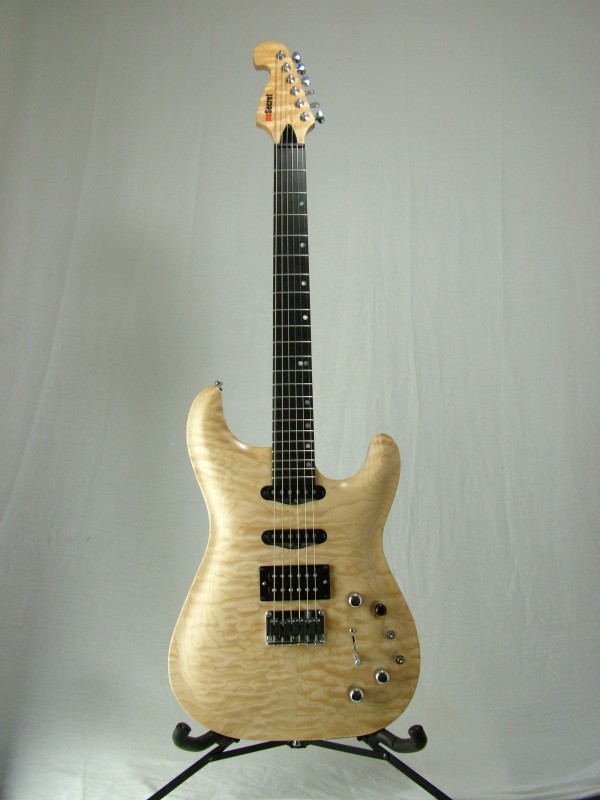
- Assembly – putting all the bits on and wiring up the pickups. Steve is the first on our course to use the new 6-way toggle switch. He has three humbuckers which can be a problem with normal 3-way toggle switches – you have to have the middle pickup always on. Another solution for 3 pickups is to have a 5-way slider switch but that can be very tricky to fit on a carved top guitar. Also it is possible to have 3 volume controls – one for each pickup but that cuts down the number of tone controls. The new 6-way gives us all the options we need while keeping the 2vol 2 tone layout. We used push pulls for the tones so we can also split each pickup for single coil sounds…..
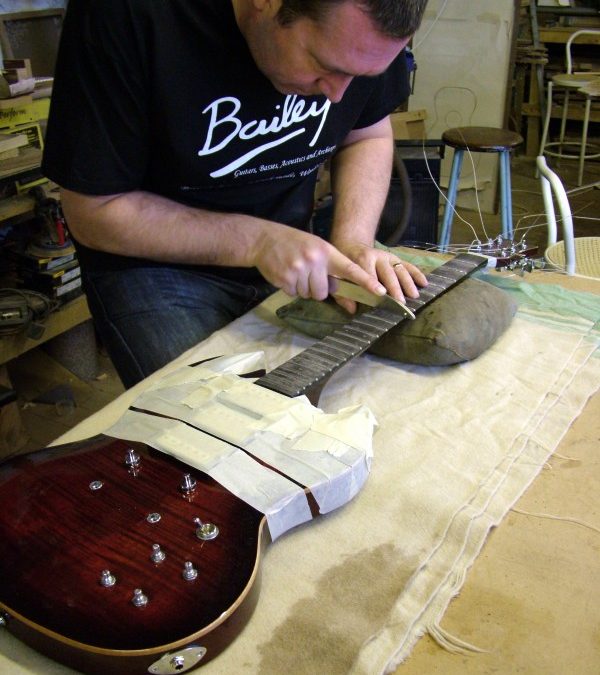
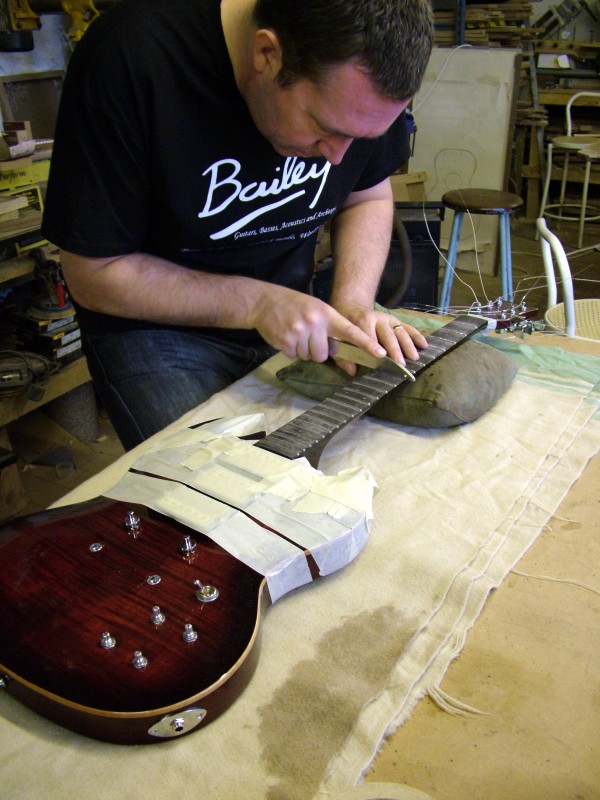
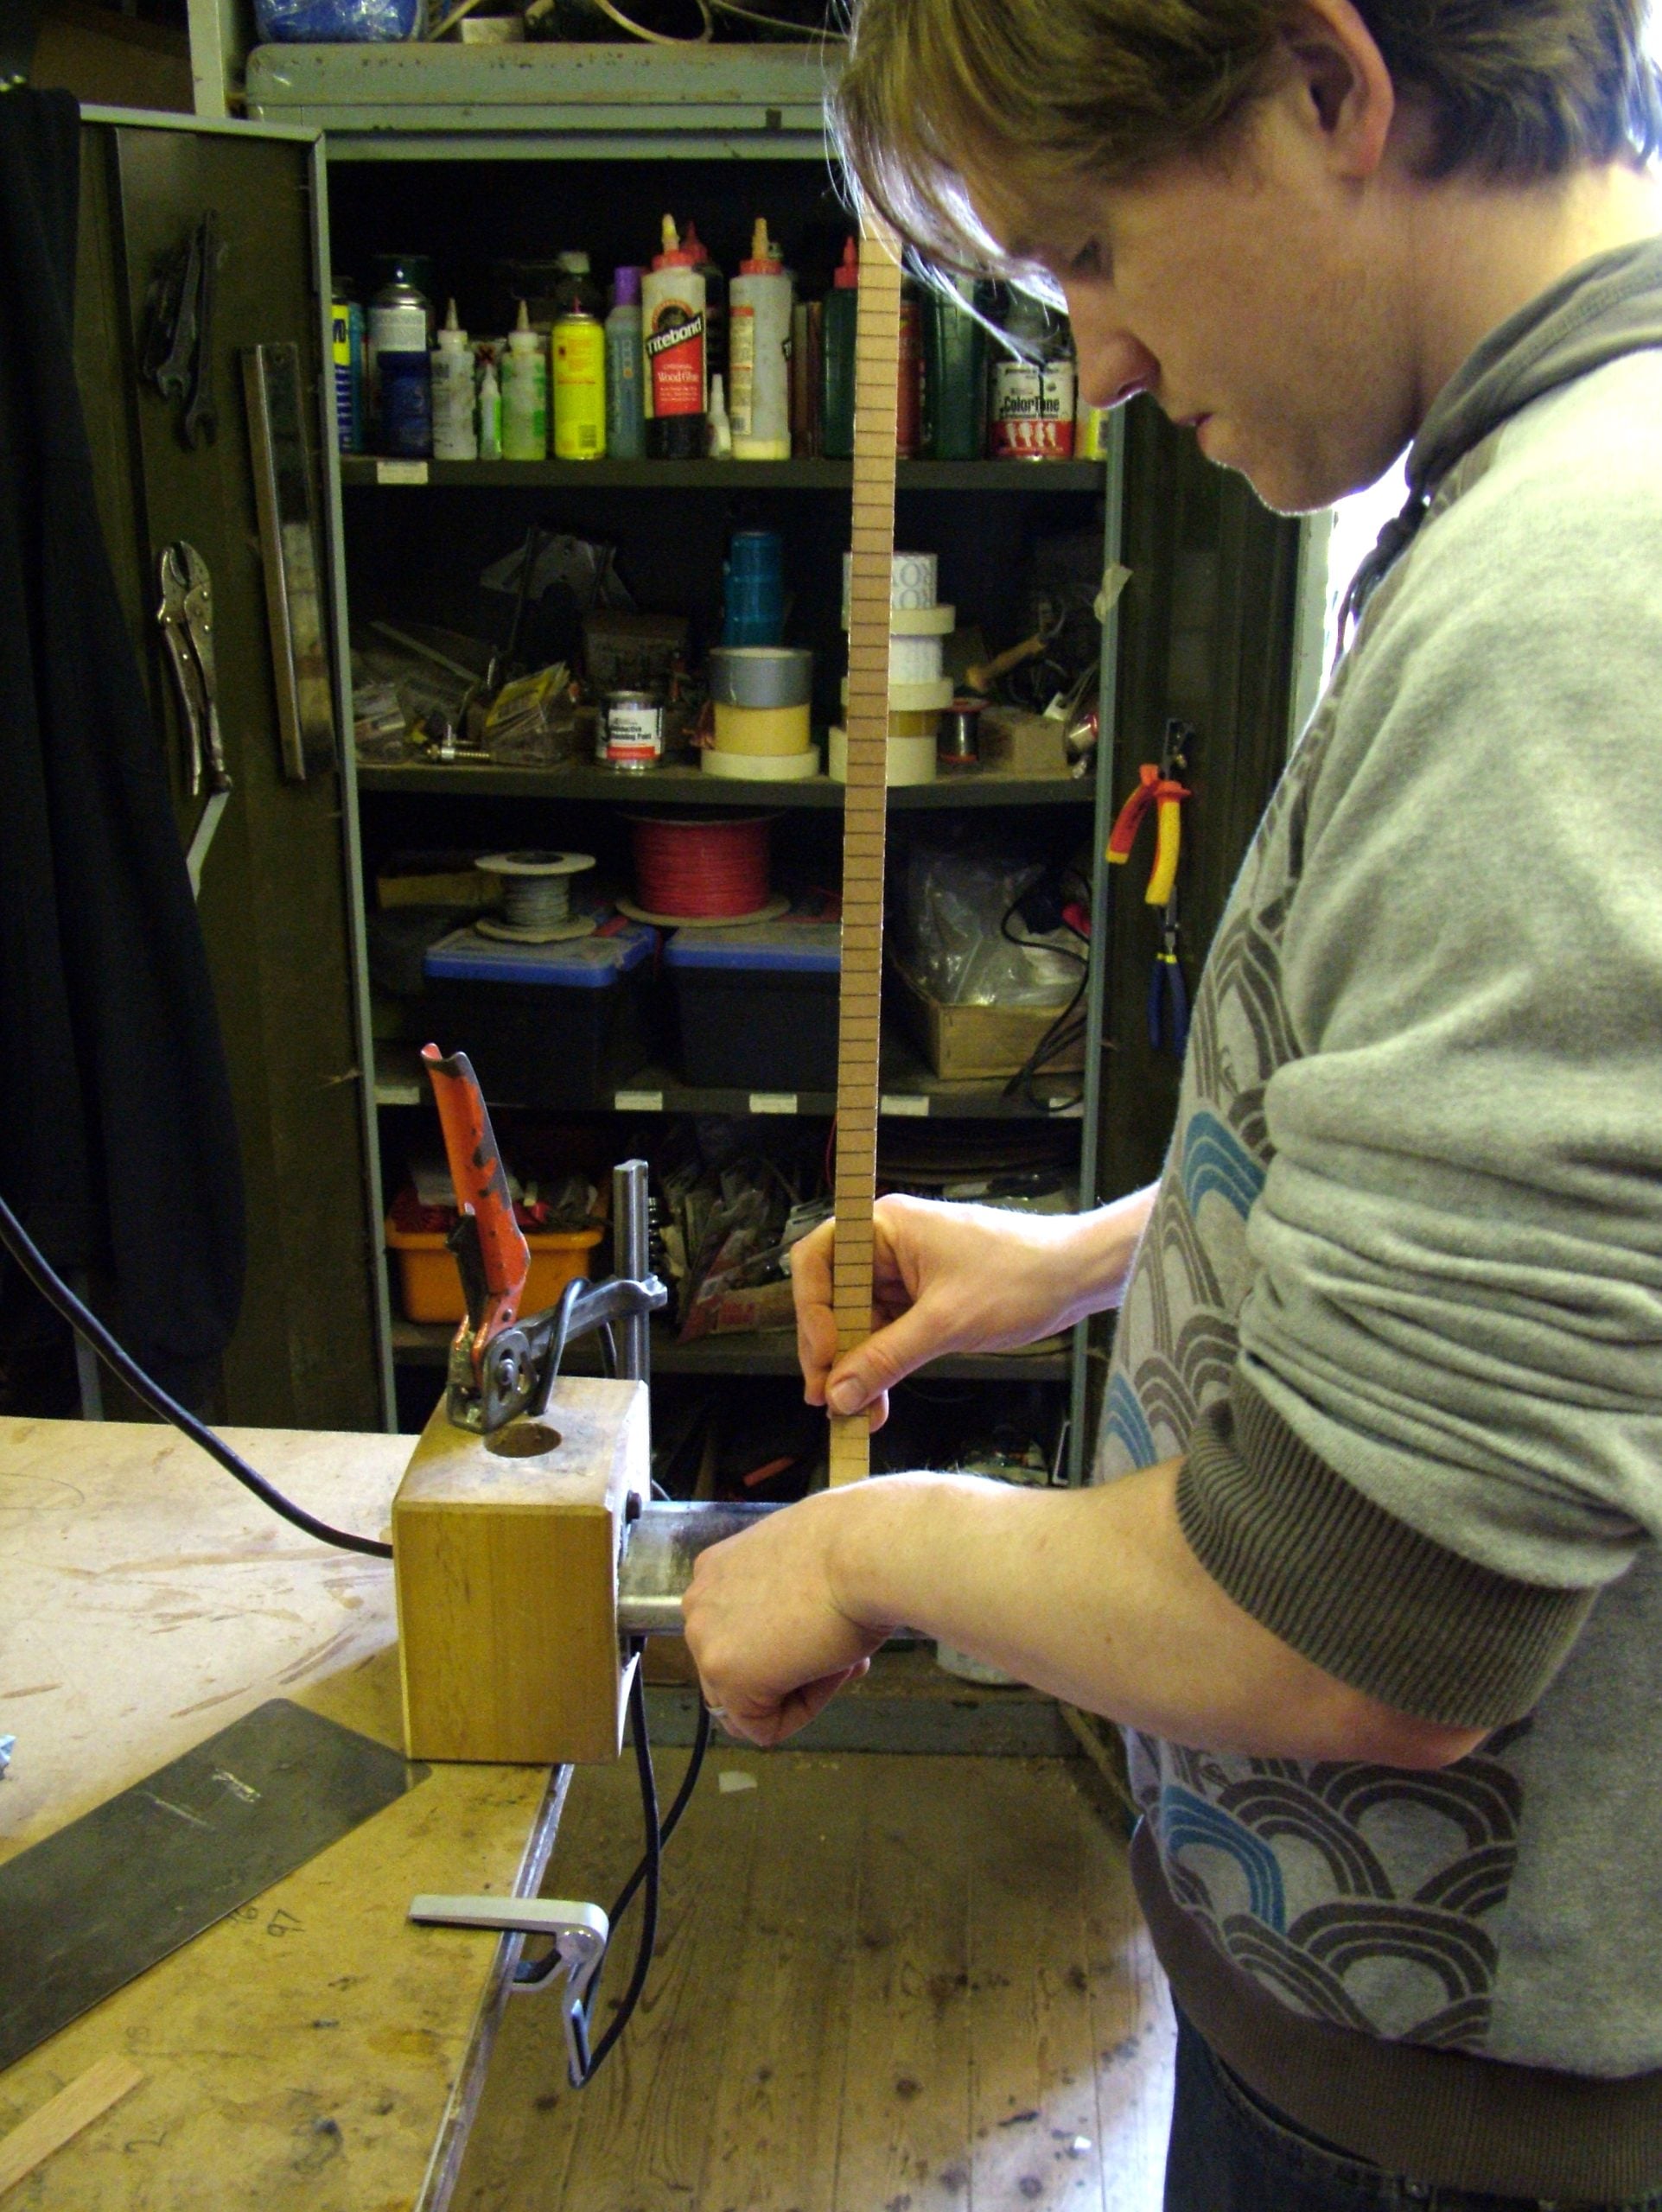
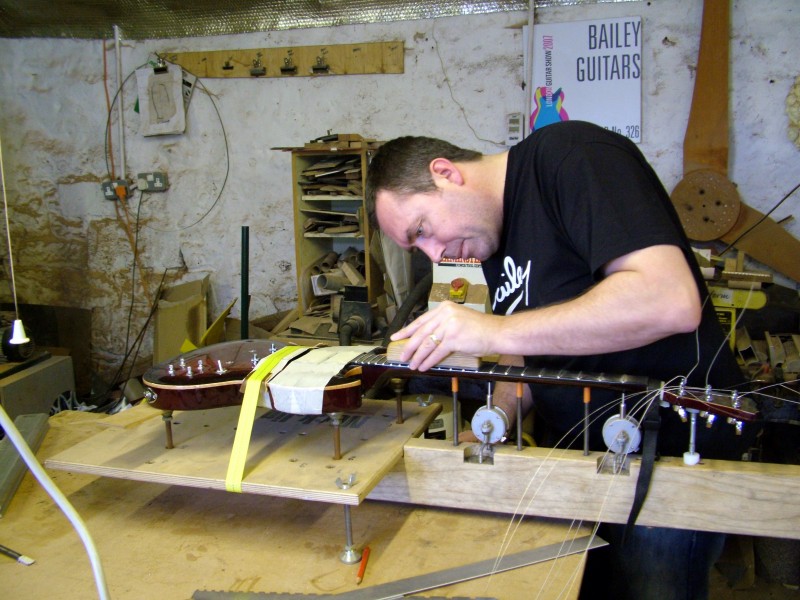
- Fret job – Levelling the frets, then reshaping and taking off all the sharp edges before polishing them. The guitar is strapped into a jig, to simulate the tension of the strings tuned up to pitch, for levelling the frets. This took quite a long time – Steve chose jumbo frets which needed a fair bit of work.
- Set up – Set the truss rod, set the action, set the intonation. This went very well – no problems setting the guitar up.
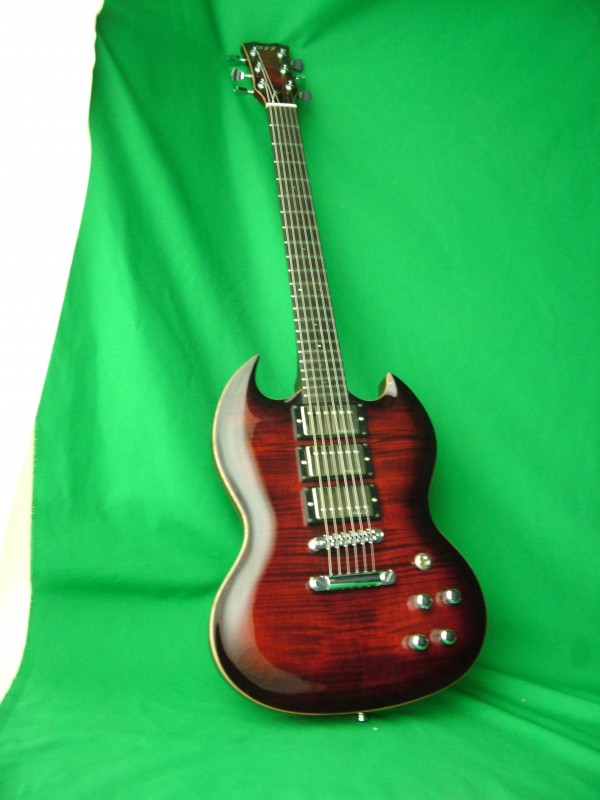
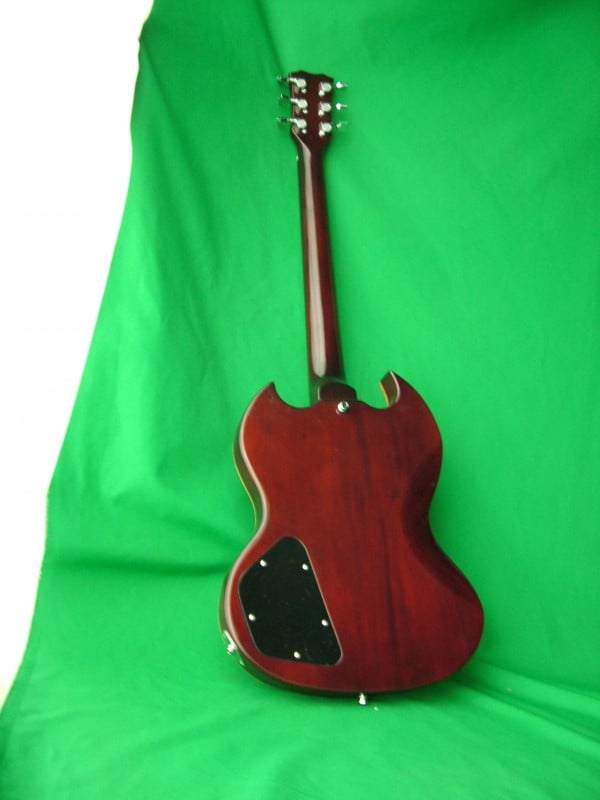
We took the guitar next door to take some nice pics of it finished – hope you enjoy them….
After that there is nothing left to do but play it!
Custom Build – Set neck, Single cut, Flamed Cap- P5
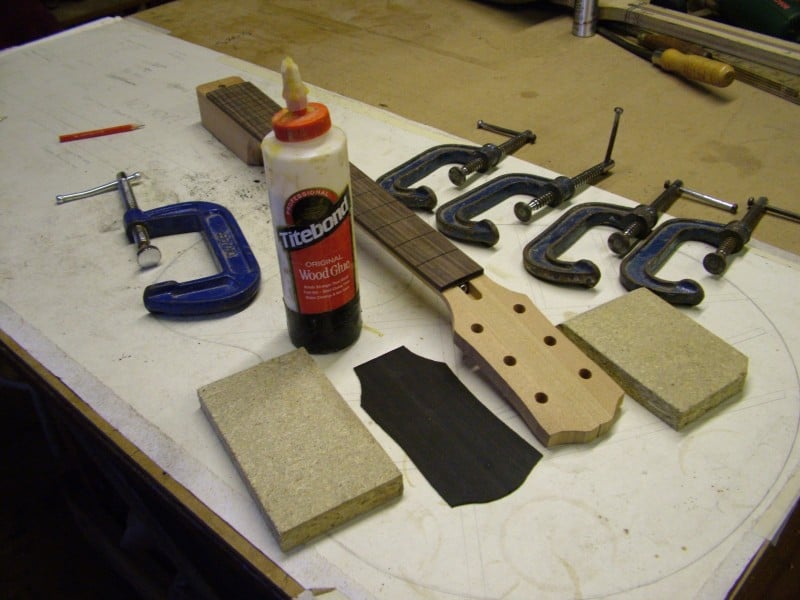
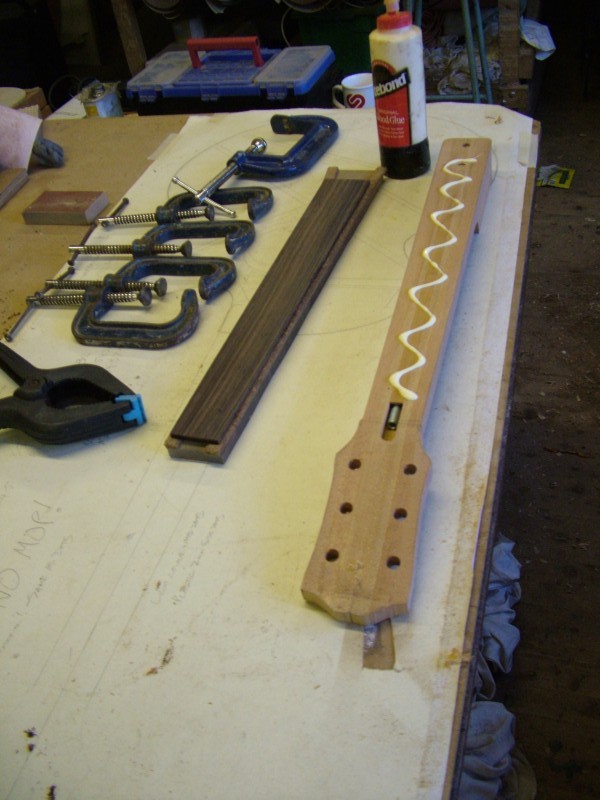
Gluing on the ebony headstock veneer

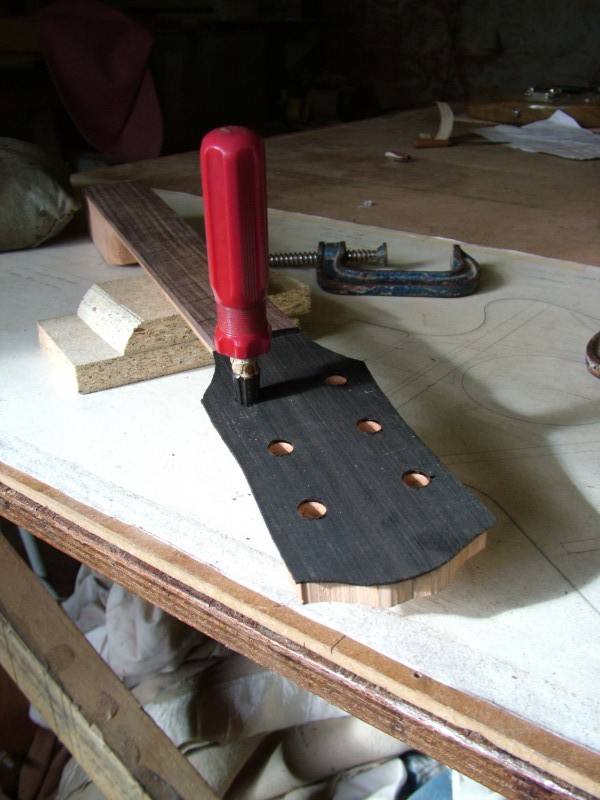
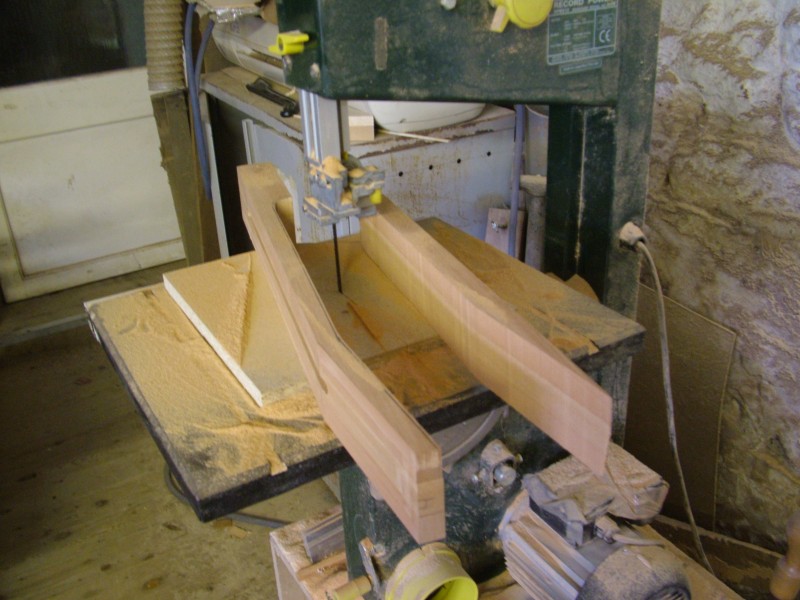
The ebony for the headstock veneer is about 1mm thick. I marked it oversize, then cut it out roughly on the bandsaw before gluing it on.
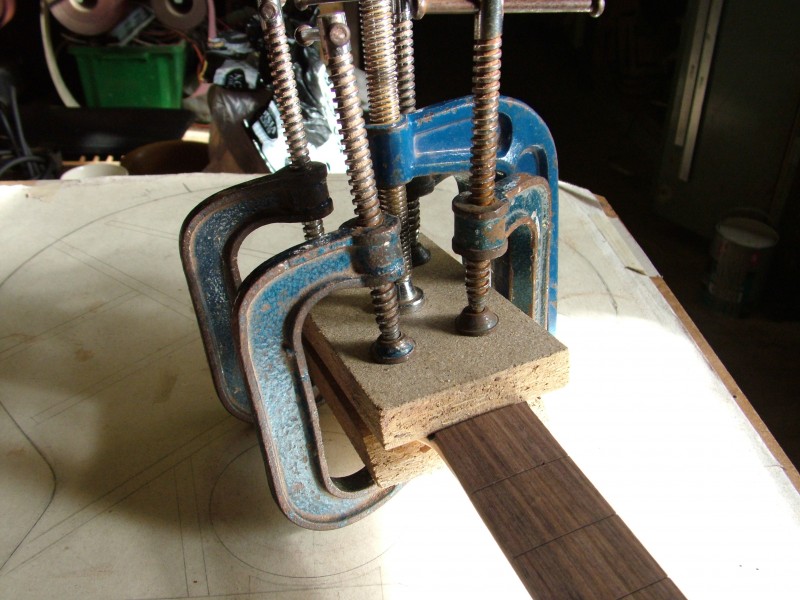
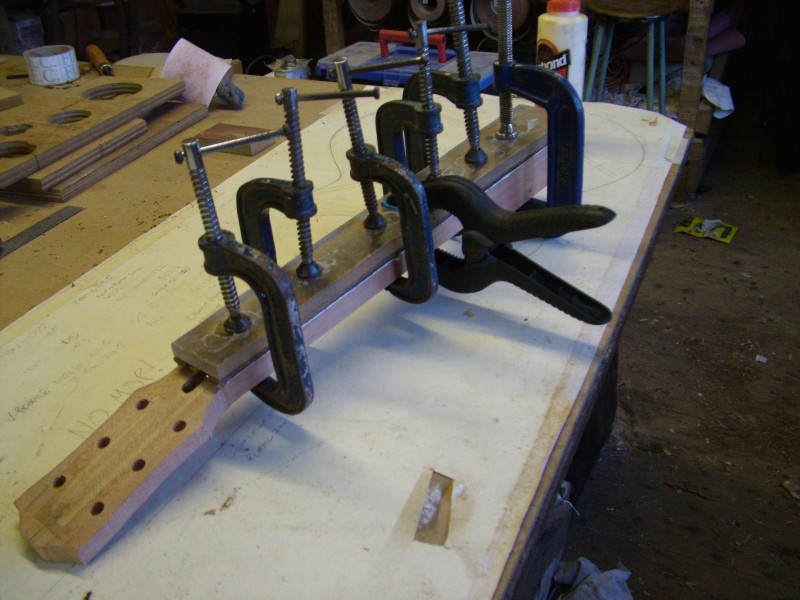
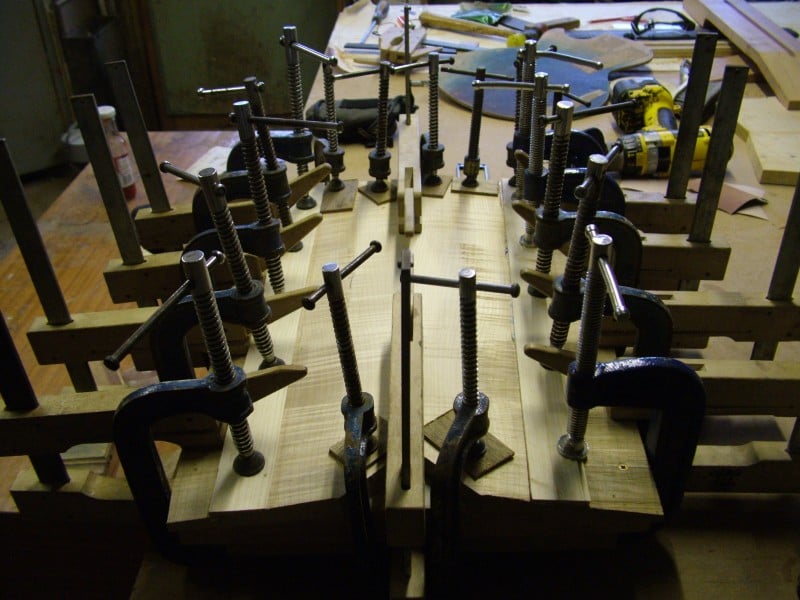
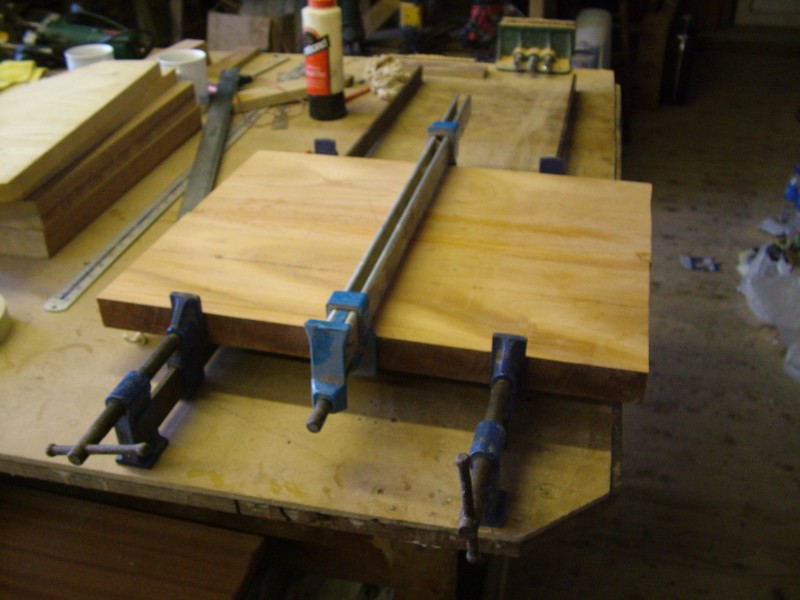
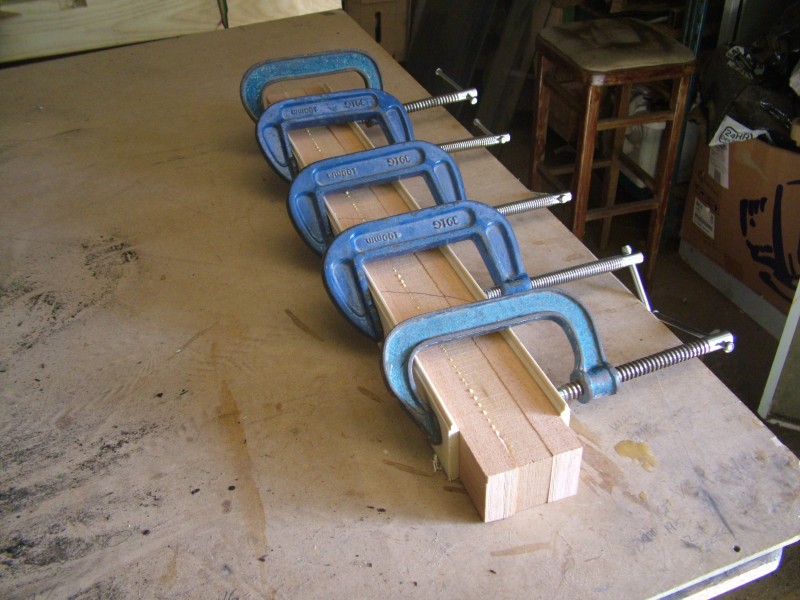
Blocks or ‘cauls’ are used to protect the wood while the piece is being clamped. I use titebond for this sort of job. The glue is left overnight to dry.
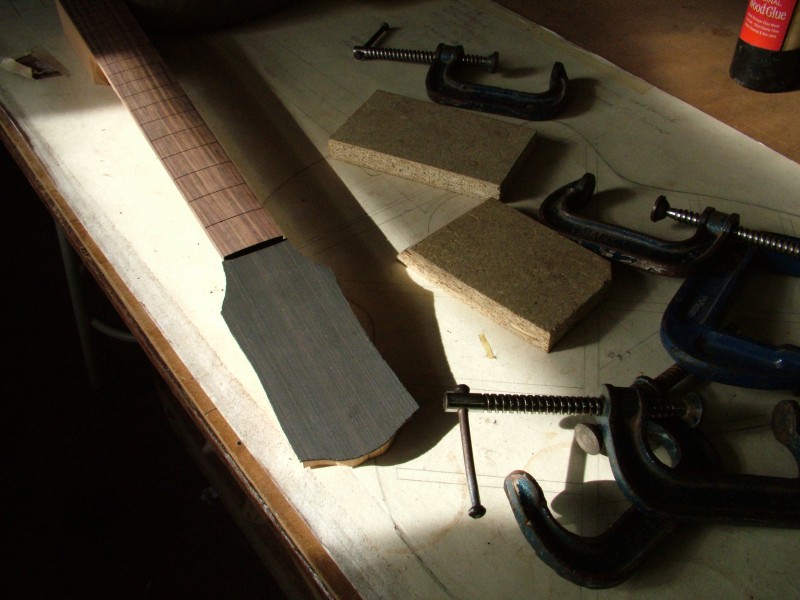
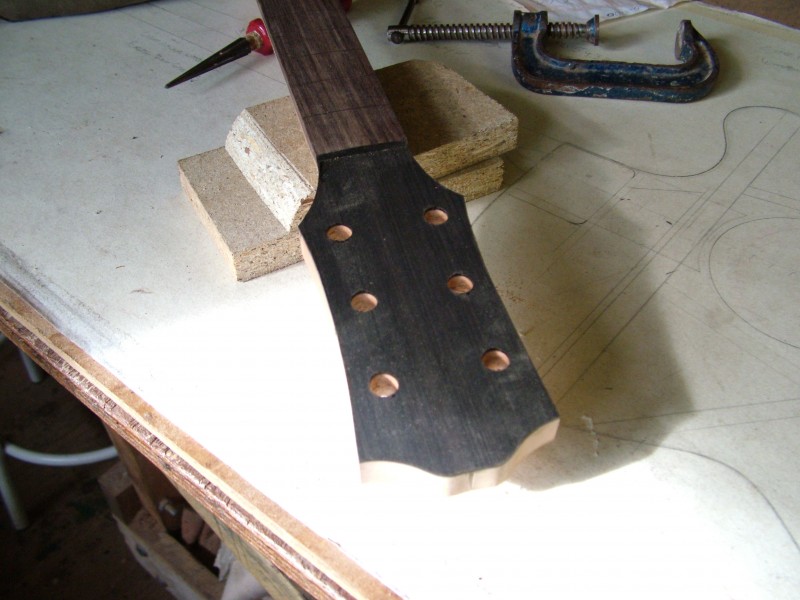
When the clamps have been removed the tuner holes have to be made through the veneer. A small drill makes the hole which is then reamed to size.
After this I tidied up where the oversized ebony veneer overhung the headstock shape. I did this with various sanding blocks and 80-120g sandpaper. It doesn’t take very long as the veneer is so thin……[email_link]
Custom Build – Set neck, Single cut, Flamed Cap- P4
…..The end of another week at the Bailey workshop……


That is about as far as I’m going to get this week. The body is routed and ready for the neck to be fitted to it – I won’t do any more work on the body until the neck is nearly finished. The neck is carved, and I’m ready to glue on the headstock veneer.
Next week I will install the mother of pearl crown inlays first, and then put the frets into the neck. After that I can finish off the body – so by the end of next week it should look pretty much like a guitar……I’ll have to start thinking about colour tests…….
Custom Build – Set neck, Single cut, Flamed Cap- P3
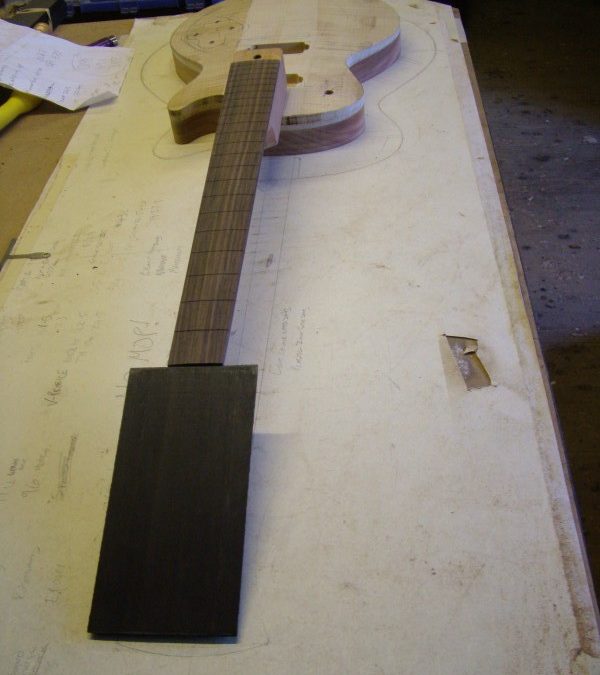
….Got the fretboard glued on and working on the body…..
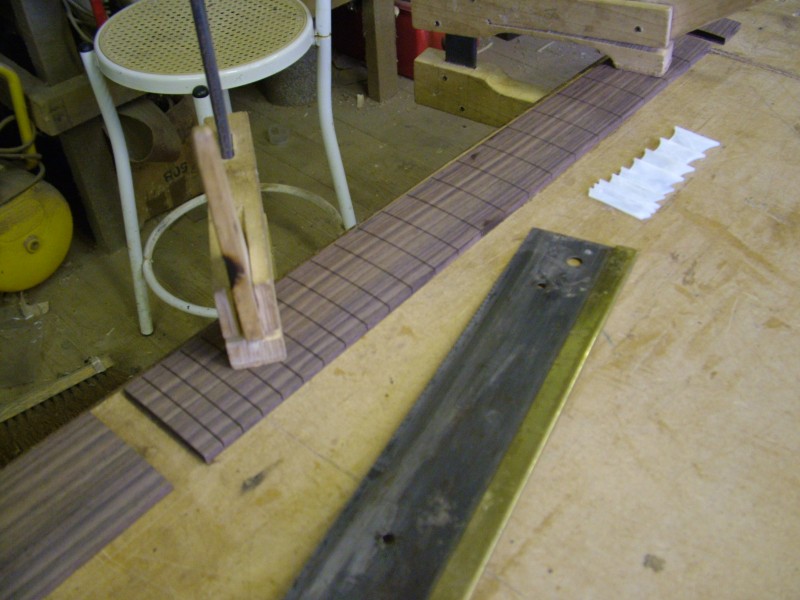
It’s been a very busy week…..I am working on several custom builds at the moment apart from this one. We also had three gigs this week instead of the usual two. Still, making good progress….
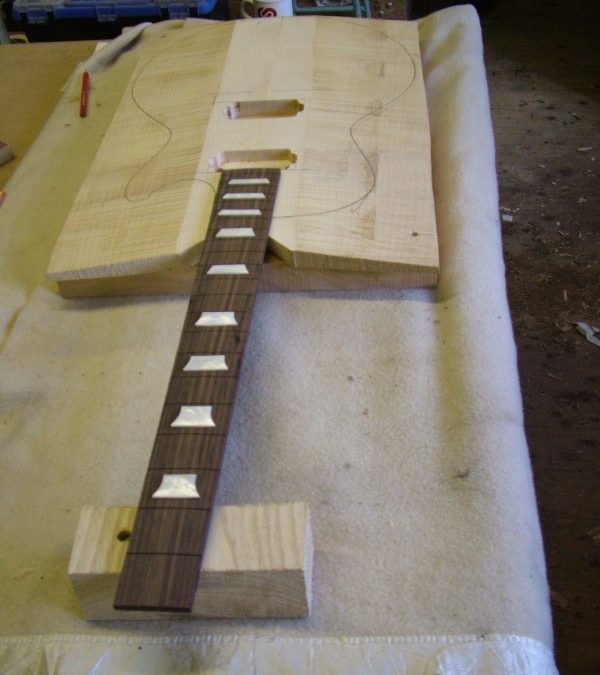
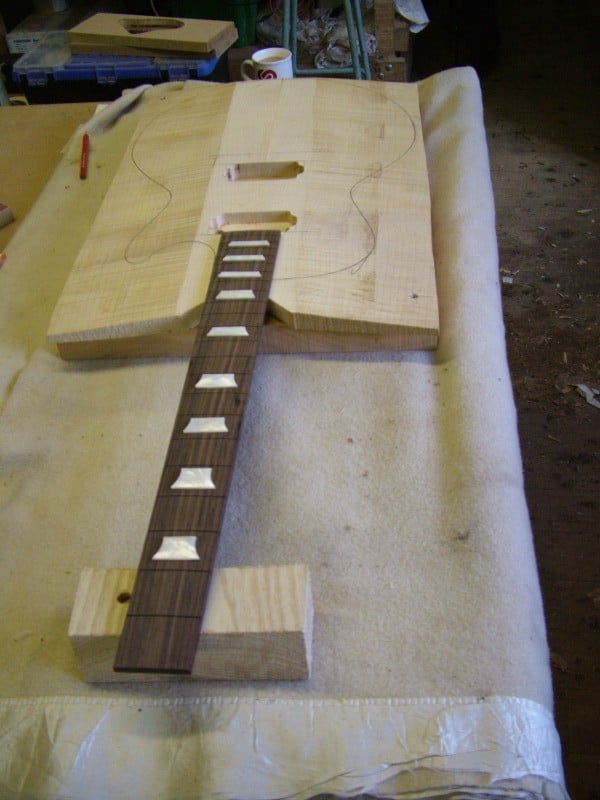
As you can see from the pictures I have made the fretboard and glued it on, but I couldn’t resist laying out the inlays to see how they looked first.
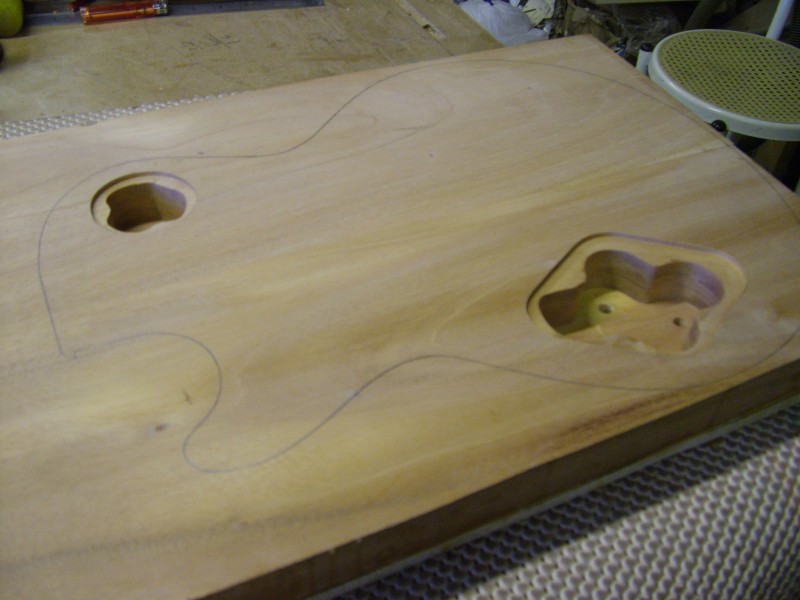
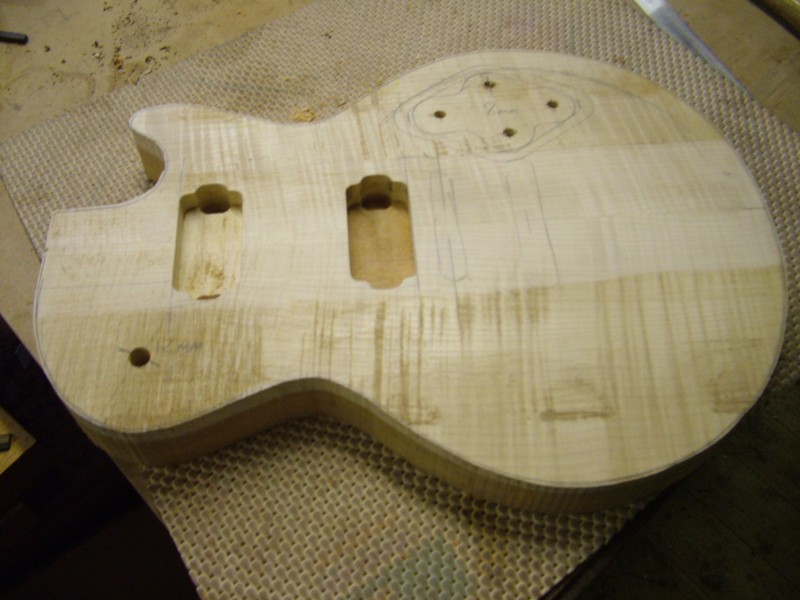
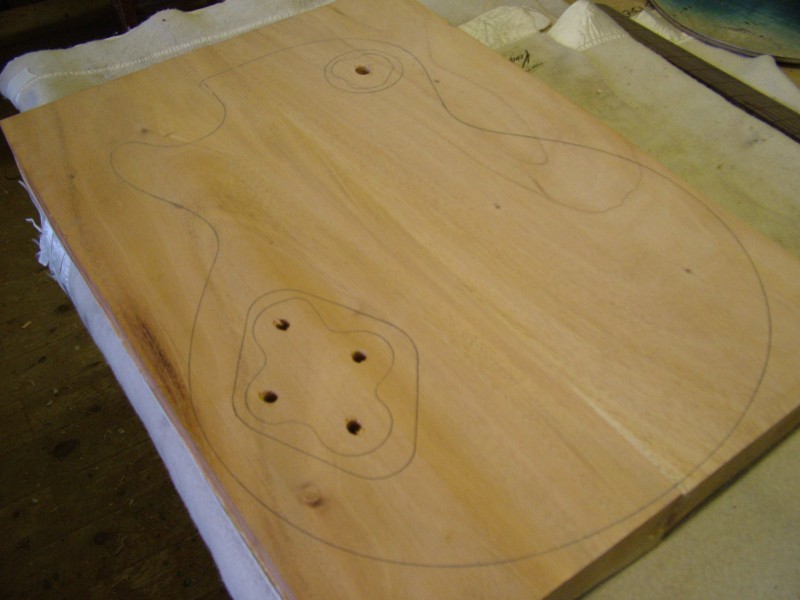
While the glue was drying I did some work on the body.
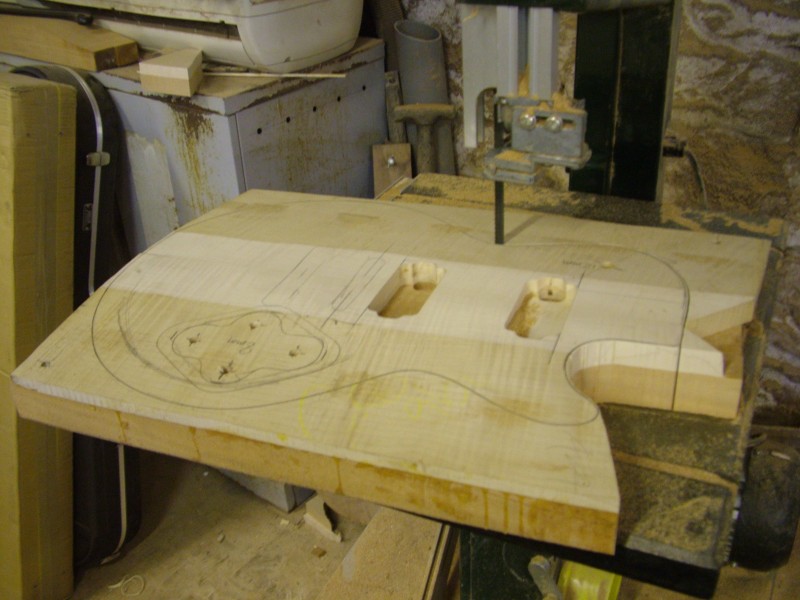
The pickup holes and control cavities were routed first then I cut out the profile. The body is now ready for the neck to be fitted into it.
Next I will finish the neck and fit it to the body……..
Custom Build – Set neck, Single cut, Flamed Cap- P2
….Working on the neck
After gluing the cap on I went back to working on the neck.
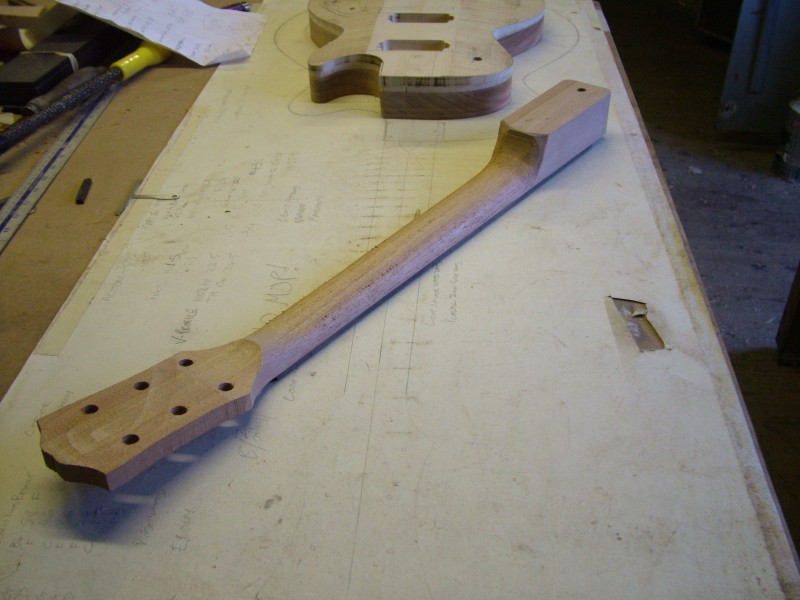
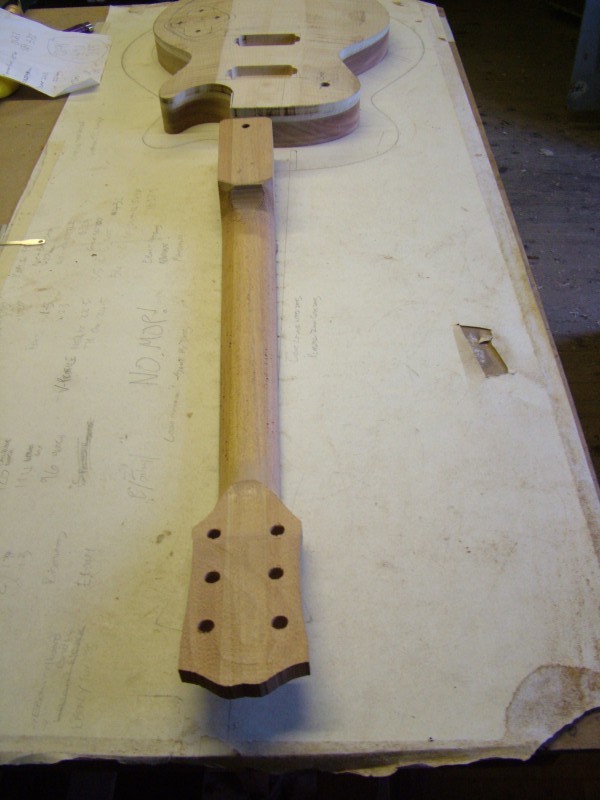
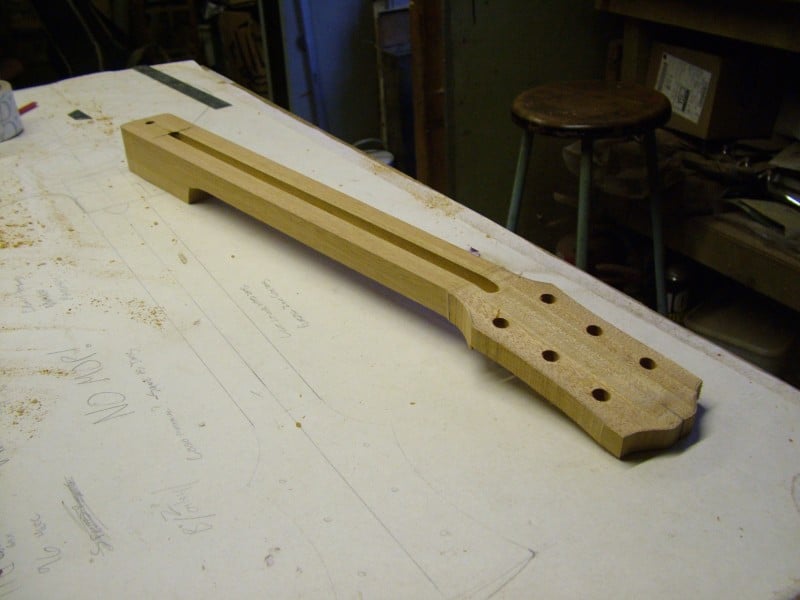
Cutting out the neck is a two stage process – I sometimes call it ‘Profiling’ some people call it copy routing……Profile – just means shape….necks have a side profile which I cut out last time, and a front profile (what it looks like from the front) which I cut out today…….
- Cut it out roughly on the bandsaw
- Route the profile
1. This does not need to be accurate as the router will take care of that in the next step.
2.The neck profile is routed by attaching a pattern and copying the shape into the neck with a profiling cutter. This is done in layers so there is less stress on the cutter and the router than trying to take it all off at once. When the router ‘bottoms out’ or cannot go any deeper, take the pattern off and you can get a few more passes. The final 1/2″ or so is done by turning the neck over and trimming the excess with a bottom bearing profiling router cutter.
note: I have cut out the headstock on the bandsaw but not routed it – if I was making a lot of guitars with the same headstock I would make a pattern with that headstock shape. I am using a B1 pattern here but just skipping the headstock which will be finished by hand instead.
Got it? Good…..
If you can do this you could make anything – all you need is a bandsaw and a router!
I make the pattern out of scrap – if it goes wrong, chuck it away and start again…if it goes right copy it with the router and keep it as a master.
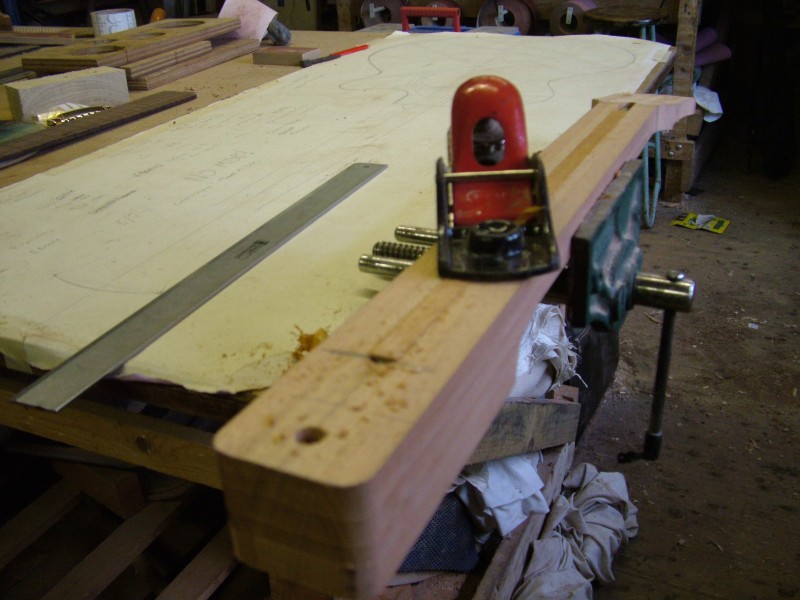
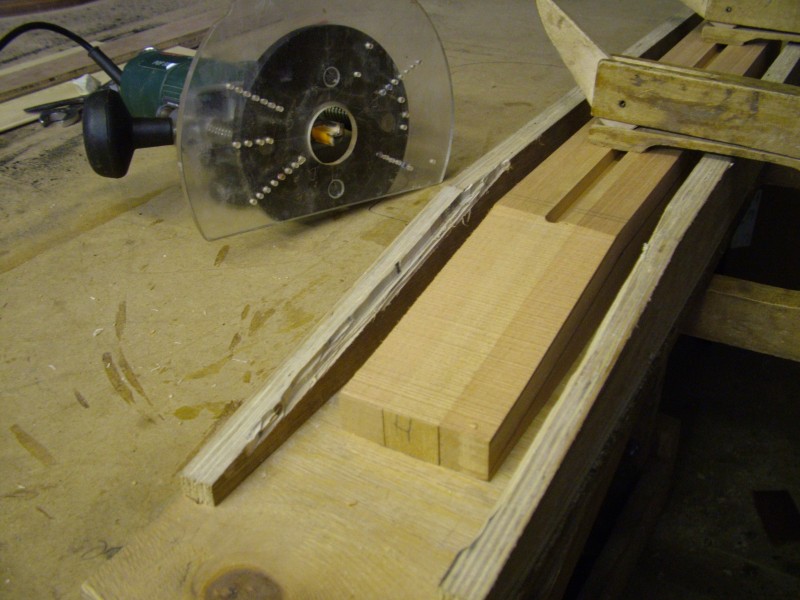
Next I did the back of the headstock
The headstock thickness jig is just a board with two lumps of wood glued to it (guide rails) which the base of the router sits on to do its job. I made a larger base for my router which screws on, allowing me to span a wider gap for larger headstocks.
The headstock is stuck face down on the board between the two ‘guide rails’ so the router can take off layers. This leaves it very flat and accurately cut to thickness easily adjustable with the depth stop on the router. I always cut around the edge first – it helps to avoid breakout. I want it to measure about 15-15.5 mm when finished – it will have a 1mm ebony veneer – so I took it down to 14.5mm.
I only route enough for the tuners to sit flat, or you could end up going into the neck. This leaves a step which will be carved off by hand later.
Drilling the tuner holes
I used the double sided tape again to stick on the headstock pattern so I could use it for a drill guide to make the tuner holes.
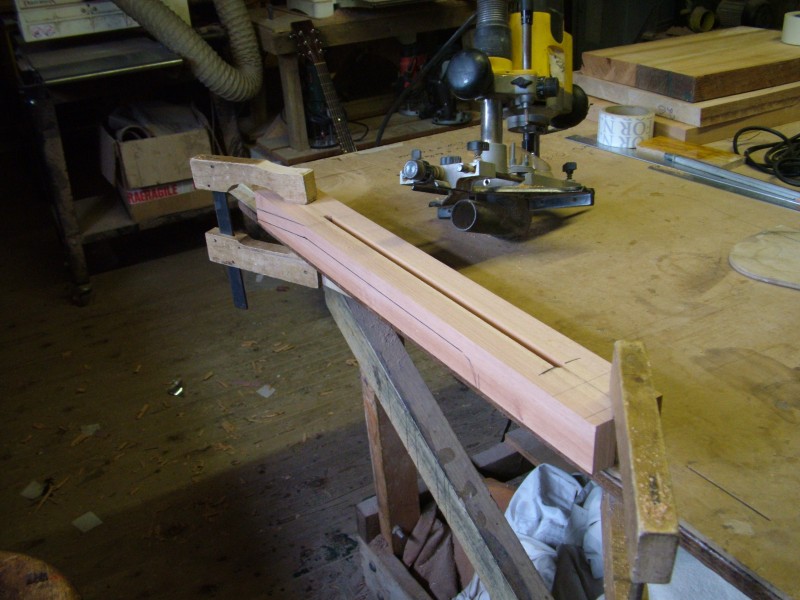
The last thing I did today on this guitar was to put the truss rod in. The slot for the truss rod is routed about 1mm deeper than the truss rod, so that a fillet can be glued in on top. This will act as a spacer to take up any slack, and prevent any truss rod vibrations and noise.
Hope you are enjoying the pics…….[email_link]
Custom Build – Set neck, Single cut, Flamed Cap- P1
…This will be Steve’s second Bailey custom guitar….

Here’s the spec:
24 3/4 scale length
22 frets
Wood
Body: Mahogany with flame maple cap
Neck: Mahogany with ebony rosewood fretboard and headstock veneer
Parts
Hardware colour: Chrome
Bridge: Tunamatic bridge with stop tail
Pickups: 2 Humbuckers (TBD)
Electrics: 2vol, 2 tone, 3 way toggle
Inlays
Trapezium mother of pearl
Finish
Honeyburst nitro gloss (TBD)
—
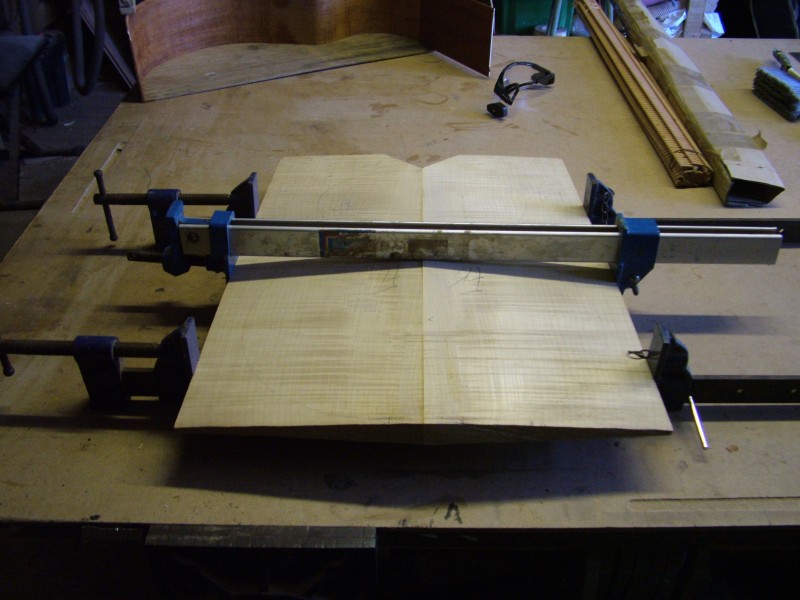
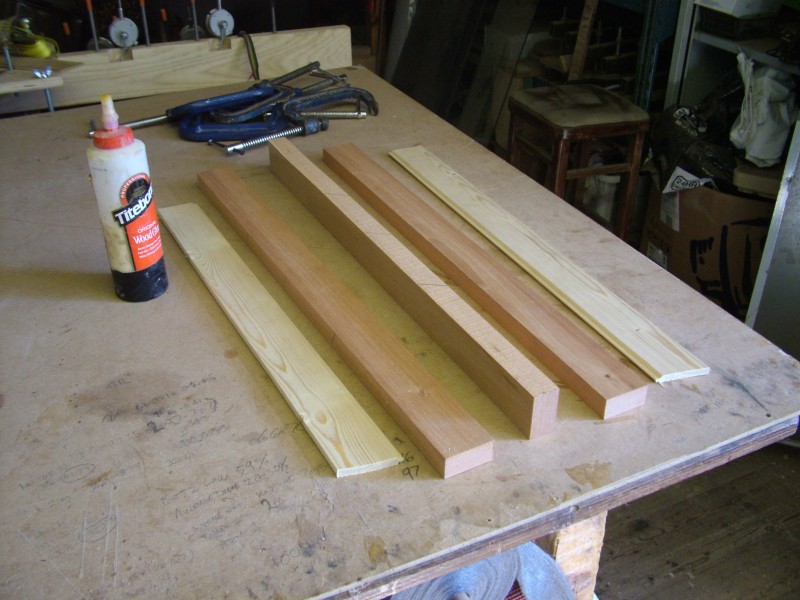
So far I have joined the mahogany and the flamed maple for the back of the body and the cap. The neck 3 laminates are also joined and the neck shape is roughed out.
I will leave the neck to settle for a while ( I am waiting for some more ebony for fretboards anyway)
I can continue working on the body – next job is to glue the cap on….[email_link]
———
Update
Added scale length and number of frets
Changed fret board to rosewood (just testing Steve!)
Build Your Own Custom Guitar – Sept 2010 – P2
…Trial by wiring….
This course is certainly not getting any easier….We have been running build your own guitar courses for over 10 years now, but as time goes on the guitars get more and more complex.
The course went really well for the most part. Kieran finished making the back and sound board for his acoustic and will return soon to continue building, but the other three have now finished. They made three really spectacular guitars, each with active electronics.
As normal there were a few problems on the last day. After the last course which got really manic at the end, we added a follow up session on the Sunday to iron out any issues with the guitars. That was just as well as we used every last minute:
Kai’s had EMG’s which didn’t work when we plugged it in. It had a very weak feeble sound – just like it would if the jack socket was wired the wrong way round. I told him to check it and sure enough 5 mins later it was rocking. Sorted
Mark’s set up included a piezo bridge to simulate an acoustic guitar sound, and also midi. I really thought we would have major problems with this but it worked first time! There were a few minor niggles though. The guitar made funny warbling noises if you played the 6th string past the 12th fret. I knew what that was – the pickups were too close to the strings – This only happens with single coils – The magnets in the pick up pull on the string creating the weird pulsing effect sounds. This was easily fixed by adjusting the pickup heights.
There was one other problem with Mark’s guitar…..Billy had done a great job on the spray job but in a moment of confusion caused by the reversed headstock had (ahem…) put the er… logo on (cof..) ….upside down….
Billy stayed late to fix it while I tried to sort out the wiring nightmare that was John’s guitar.
His guitar turned out to be the tricksiest. (deep breath)
The Nanomag turned out to be quite hard to fit, as it needed to be inlaid into the end of the fretboard, and wiring it up was another matter. The main problem was that he didn’t want to use the supplied circuit board. This had all the controls pre wired so everything just plugs together. Instead he needed a custom wiring job to include Seymour Duncan P-Rails. These pickups are switchable to sound like single coils, P90’s, or humbuckers. That makes for a pretty cool guitar but the Nanomag didn’t come with any instructions and none could be found on the net. We did find a wiring diagram but the wires were marked in different colours than the real wiring so it was really hard to follow….
When we plugged it in only the nanomag worked! I immediately suspected the nanomag wiring as I’d had to come up with the solution myself…..Also I had used the P-Rails before with no problems……by this time it was getting late on Sat night so I sent them all off to the pub while I pored over the nanomag wiring diagram for hours and twiddled wires.
Every now and then it would burst into life – I checked it twice against the diagram – looked ok. I thought I was going mad (not for the first time).
Three hours later I finally sussed out what it was – more by luck than judgment – Billy had finished turning the logo round and was helping me by plucking the strings while I wiggled the wires. I had loosened off the switches so I could lift them out to inspect the connections, and every now and then when I wiggled the wiring, one of the connections from the switch would touch the sides of the cavity which was covered in conductive shielding paint, and the guitar would work momentarily. There must be an earth wire missing from the switch that controlled the P-Rails. When I (finally) looked at the intructions there it was in the middle of the page in big writing – TO EARTH (arrow). (doh…)
After discovering this we immediately made straight for the pub to join the others…..and walked in to a party. Played the cheese sandwich song for Moyra’s birthday!
So it was a good job we had the Sunday morning for final tweaking – I think you will agree as usual the end result is worth all the hassle……

Build Your Own Custom Guitar – Sept 2010 – P1
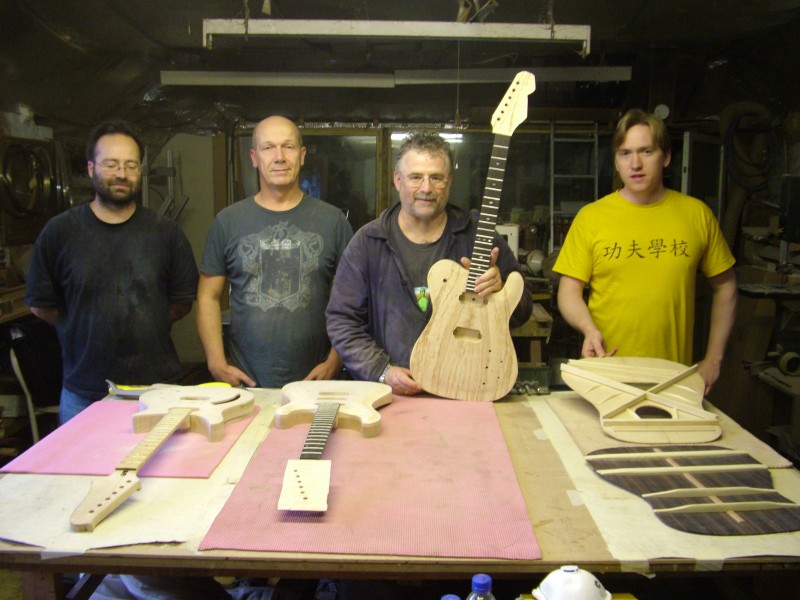
…One week…four students….four guitars….from scratch!

Left to right: Kai, Mark, John and Kieran hard at work
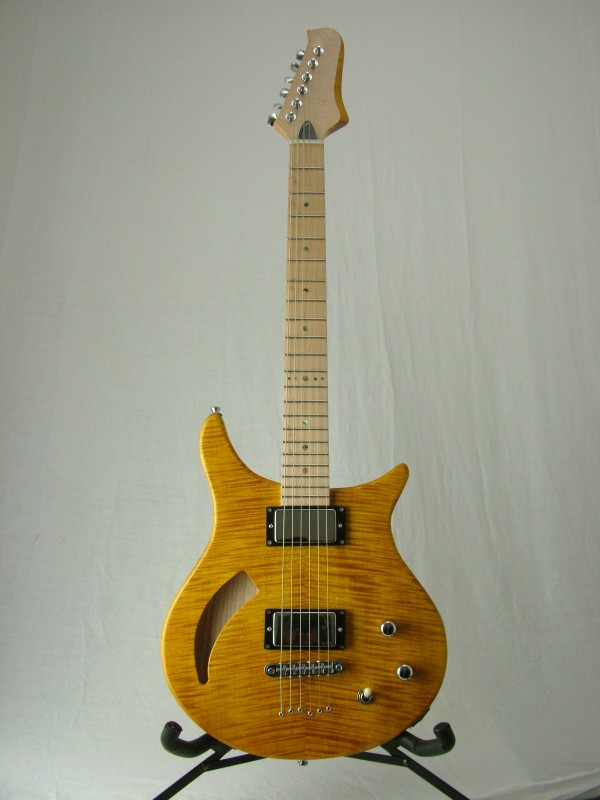
Kai is making a set neck double cut guitar with an f-hole
Mark’s set neck guitar will have acoustic and midi
John is having a ‘nanomag’ pickup inlaid into the end of the his fretboard
Kieran is making an acoustic with rosewood back and sides, and a sitka top.
So far so good – days 1-3 completed and the guitars are coming on well.
We have front loaded this course – Time seemed to run away with us a bit on the last one so this time we worked really hard early on – the necks and bodies are pretty much made. We still have 2 days to complete the woodwork so it should be fairly stress free, but there will be a lot of fiddly bits at the end to keep us busy.
The course finishes on Saturday when Kai, Mark and John will assemble their instruments and play them for the first time!
Keiran should have his body more or less complete.
I will add some more pics tomorrow of the guitars in progress…..