Blog
Rumbled…..
All work has been suspended due to holiday. I have been sneaking back in for the last couple of days to work on Jon’s 12 string, but Carol’s patience has run out. We are going camping.
Jon Gibbons Acoustic 12-string – Gluing the bridge
…..Last Kick of the ball….


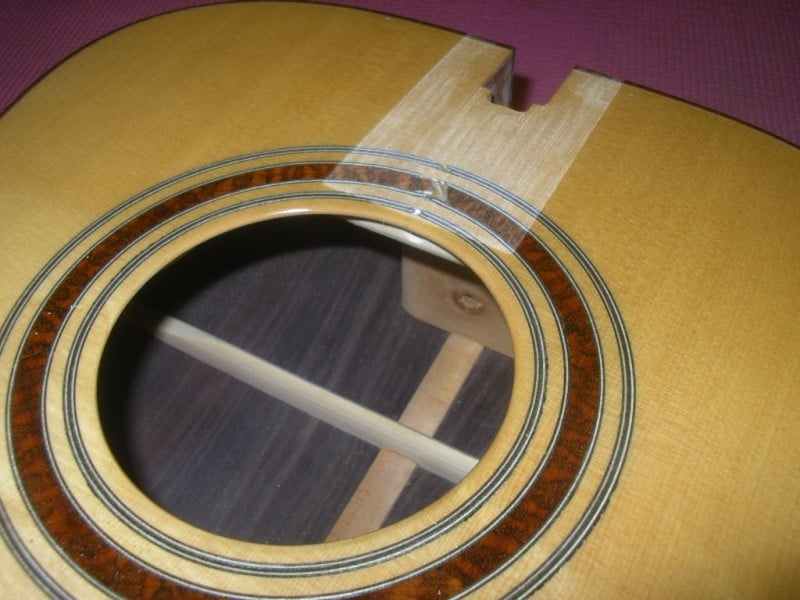
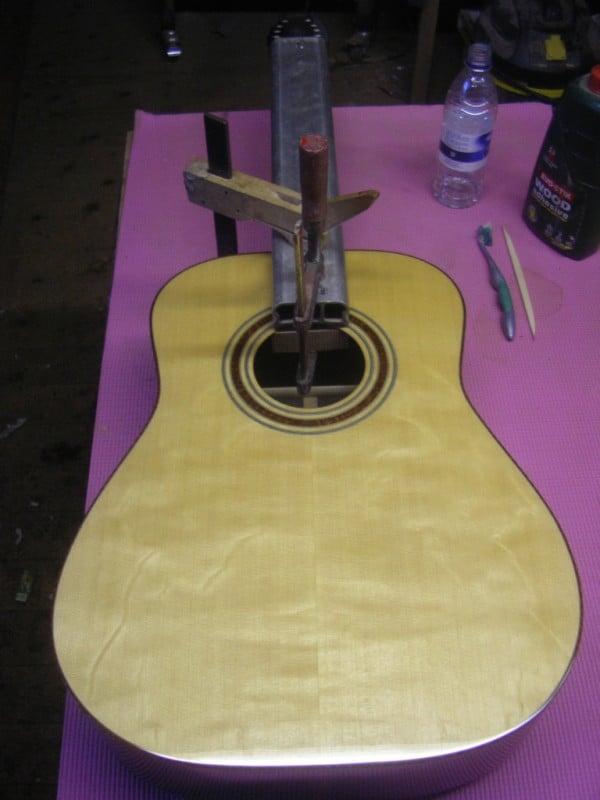
The bridge must be located very accurately – it’s a one shot deal. If it goes in the wrong place the strings will be over to one side or won’t play in tune.The only fix if this happens is to remove the bridge and make a new larger one to cover it up which is no fun at all.
To ensure it goes in the right place this is what I do:
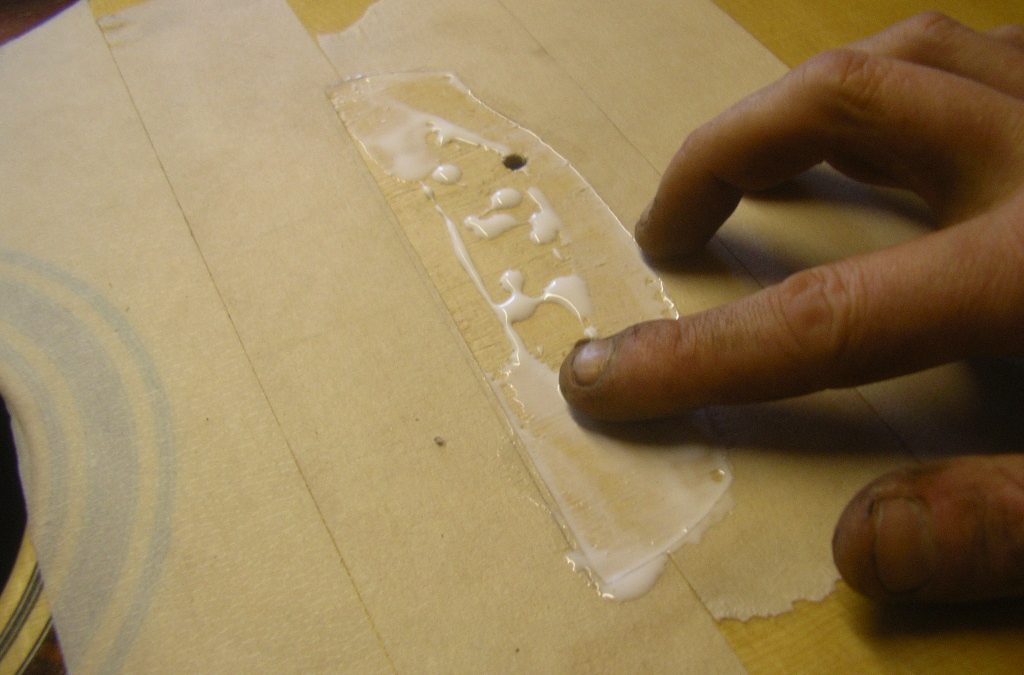
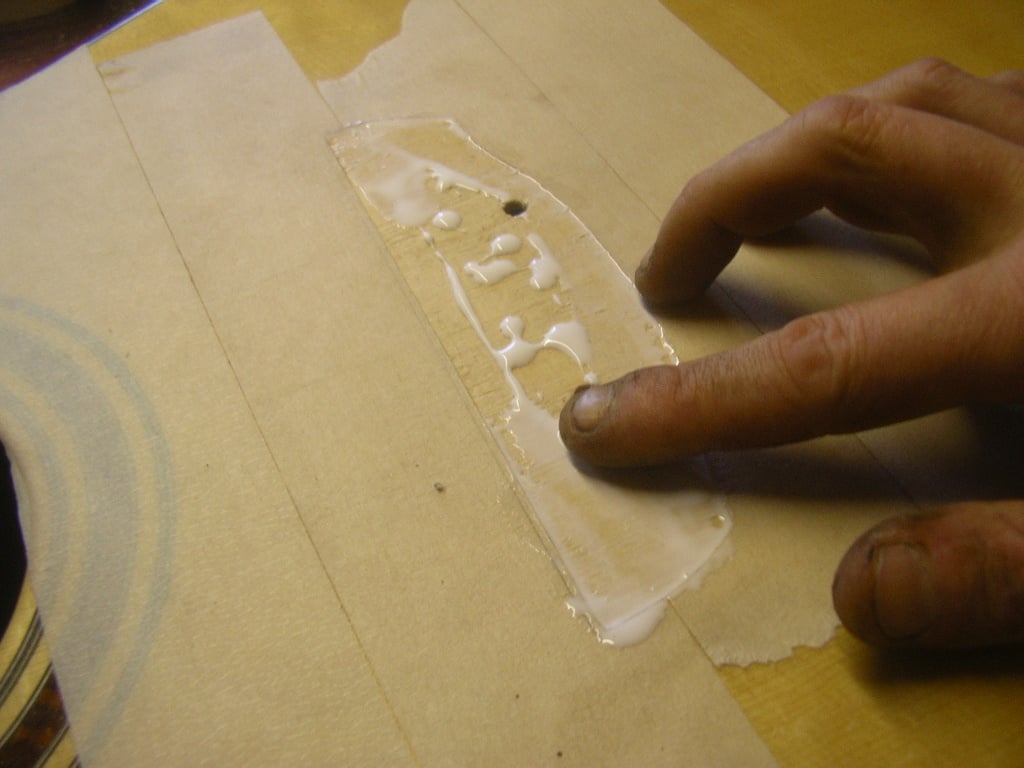
The area where the bridge will sit is masked off to protect the finish and two small squares of double sided tape are used to fix the bridge exactly in position. I always check this at least 3 times to be sure.
Then I drill the outside two string holes right through the body and use pins (same size drills) to hold it in position so it cannot move.
A scalpel is used to cut through the finish around the outside of the bridge and mark its position, then I can carefully remove the bridge and the masking tape underneath.
A mini router is used to remove the finish under where the bridge will sit – this is essential to get a good glue bond as the glue only works if there is good wood to wood contact. The router is set to cut just the lacquer and not into the wood. A chisel is used to clean off any excess and get right into the corners.
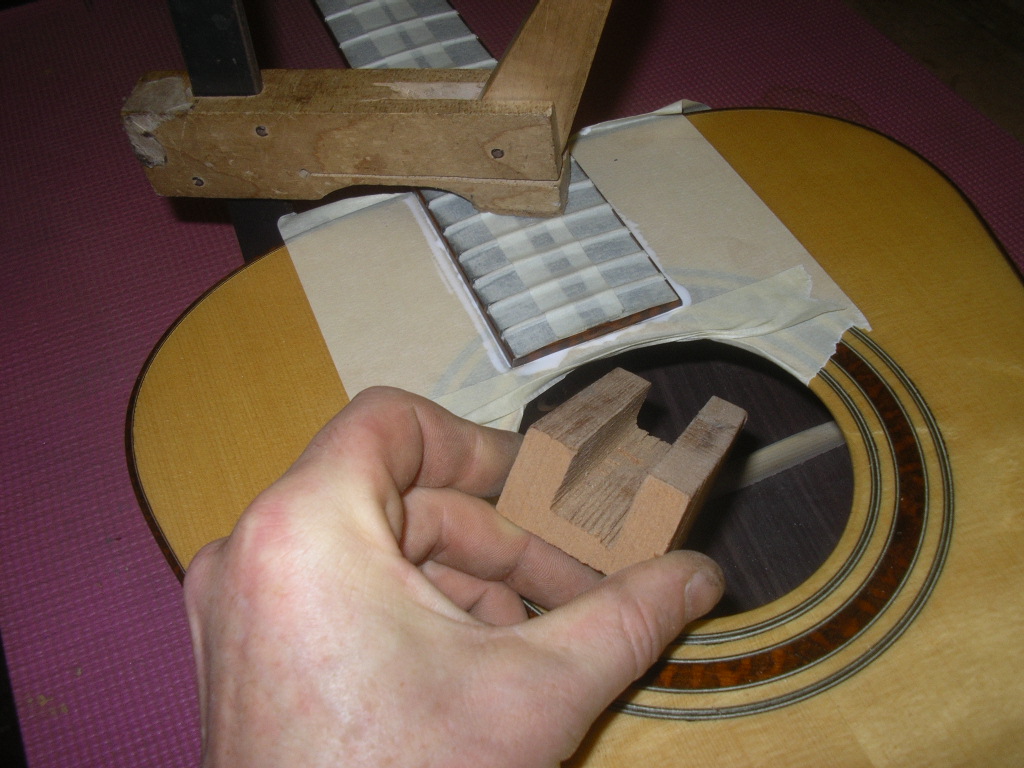
Now it is ready for gluing I always ‘dry (with no glue) clamp’ it first to make sure I have everything I need at hand and also to check how it looks with the clamps on. Once the glue is applied there is no going back!
A shaped block or caul is needed to go over the braces on the inside so you have a flat surface to clamp down onto. The pins are re insterted and the clamps are applied. If everything checks out ok then I remove the clamps and bridge and repeat the procedure with the glue.
The bridge needs to be left overnight for the glue to dry before putting the strings on.
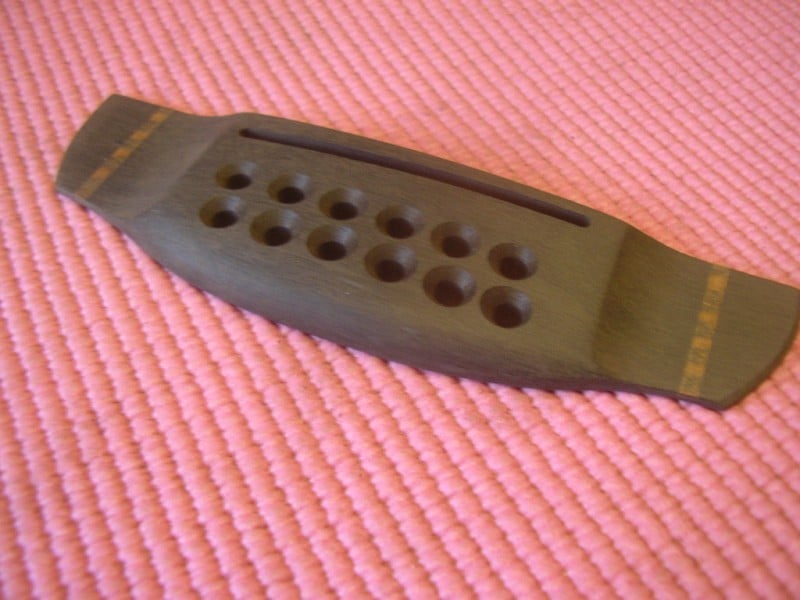
Jon Gibbons Acoustic 12-string – making the bridge
How to make a bridge
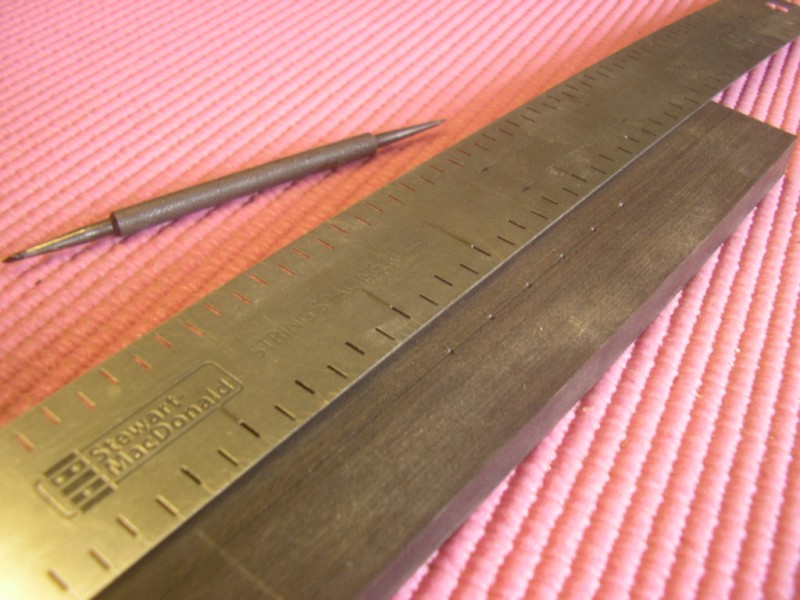

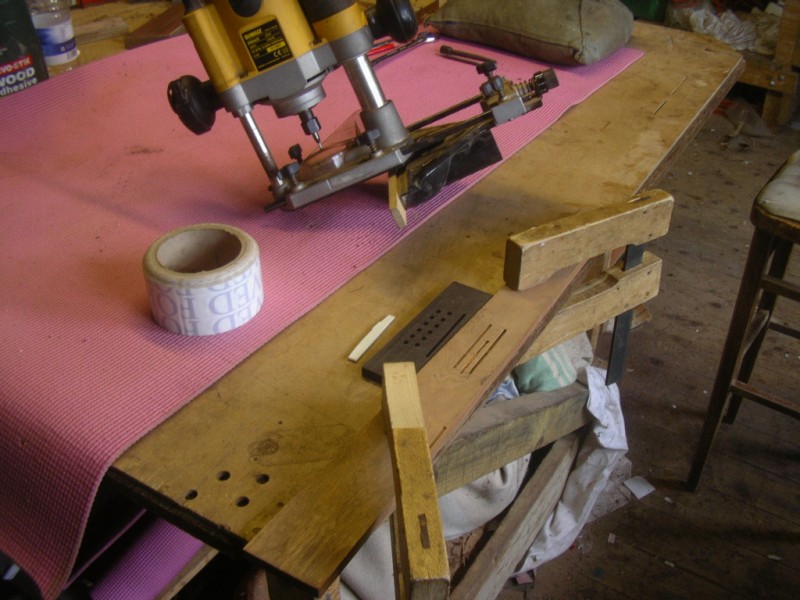

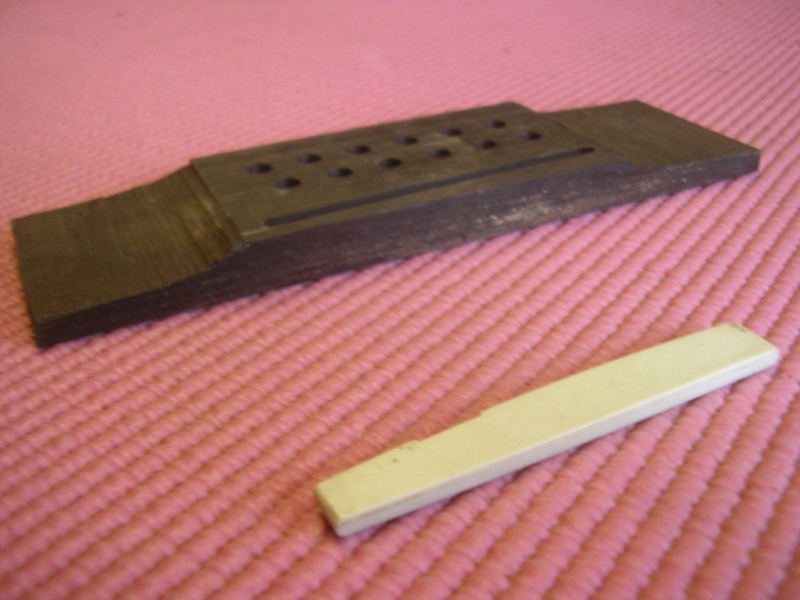
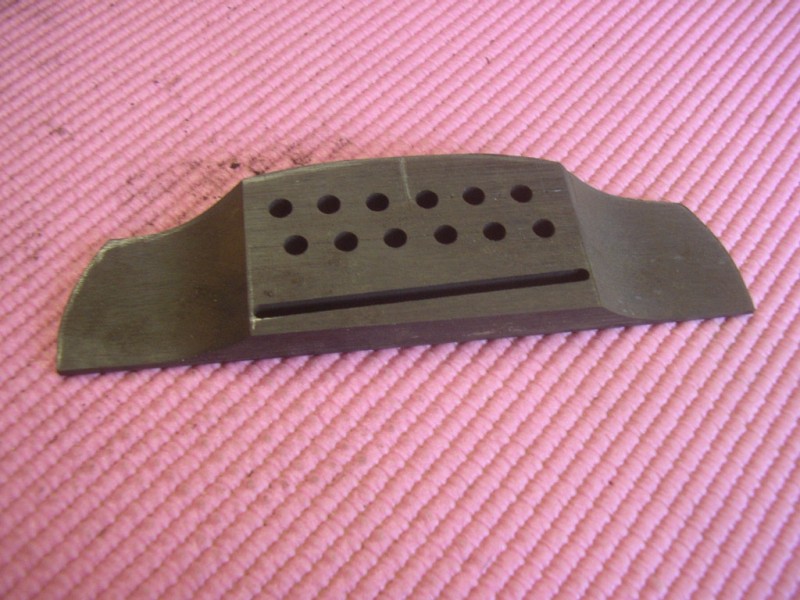
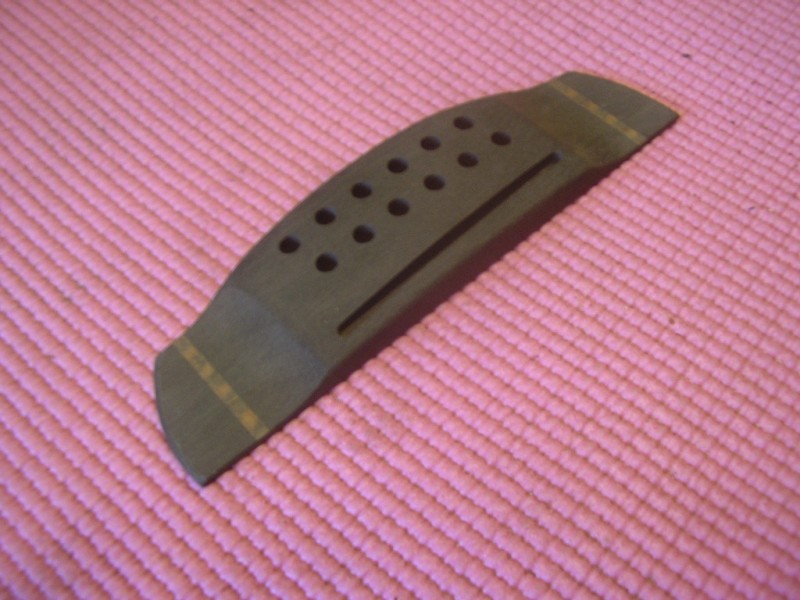
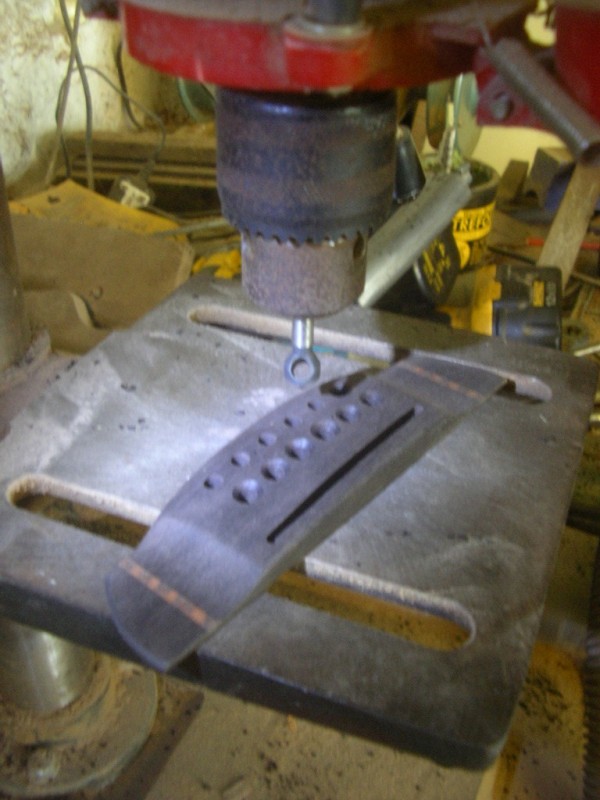
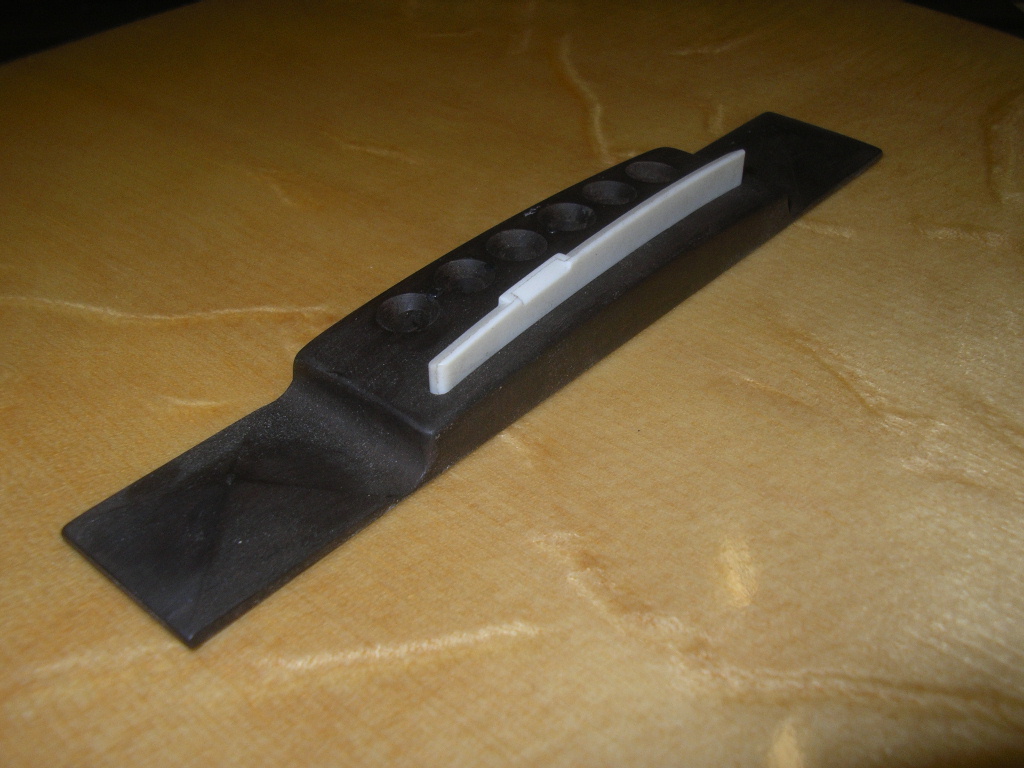
The bridge blank is cut to size, then the holes are drilled for the bridge pins. I like to drill the holes first in case anything goes wrong. It is suprisingly difficult to drill 12 holes (or even 6) in a perfectly straight line, and evenly spaced out. There is nothing worse than scrapping a piece of work after putting a lot of effort into it so it is best to get the trickiest job out of the way.
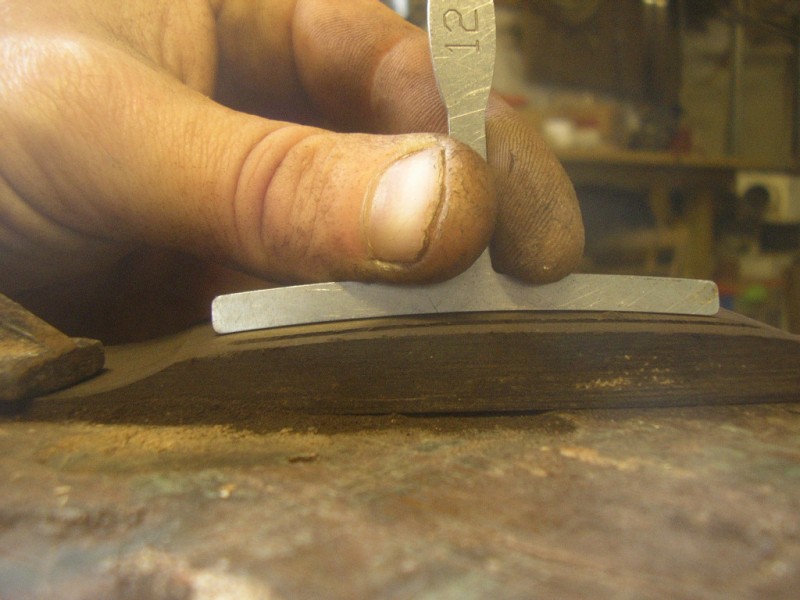
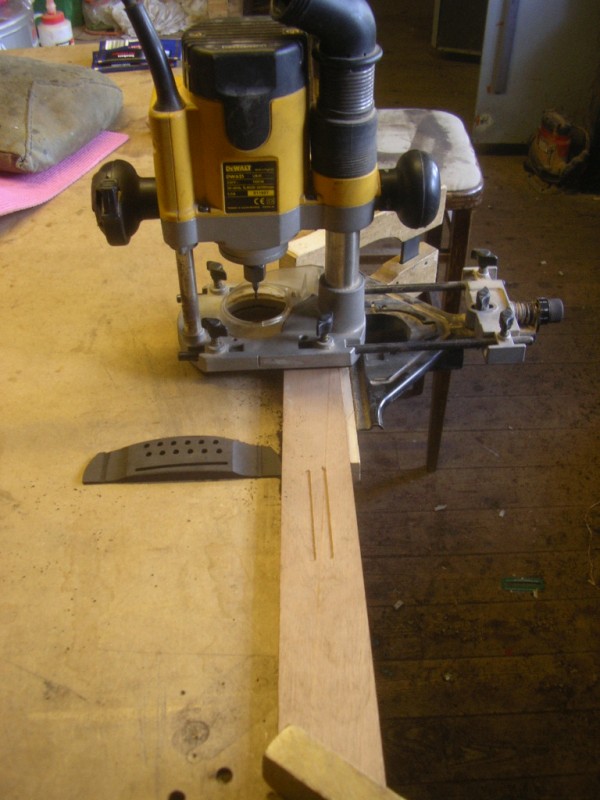
Next the slot is cut for the saddle. A piece of wood with a taper (1/8″ over 3″) is clamped to the bench and the bridge blank is stuck down next to it with double sided tape. Then a router with an edge guide cuts the slot. The clamps stop the router in the right place to control the length of the saddle slot.
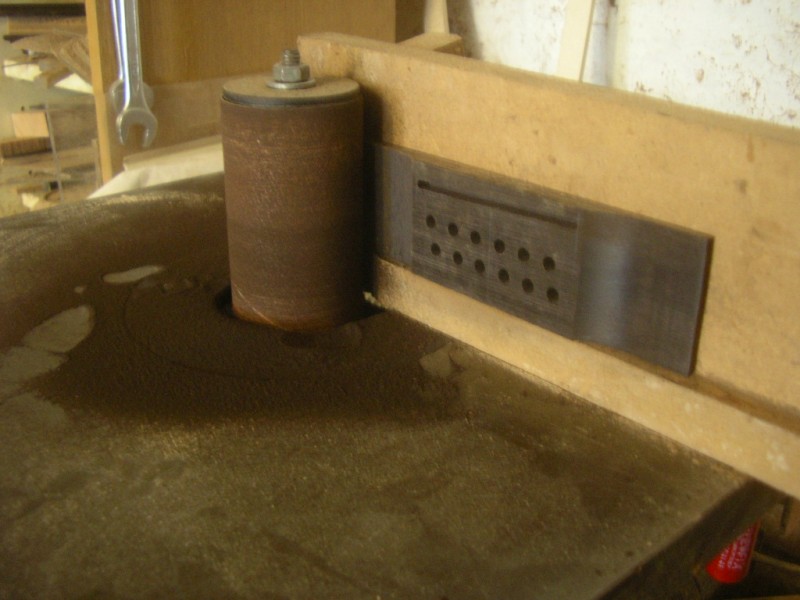
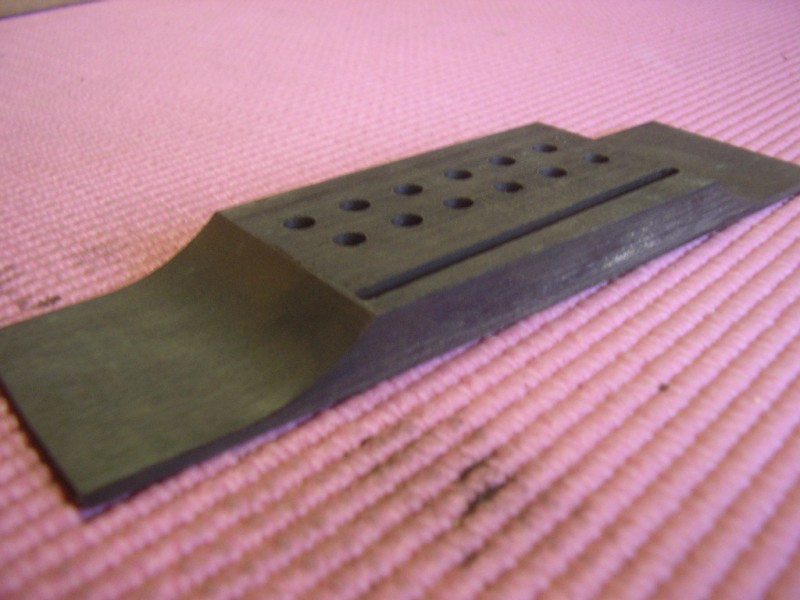
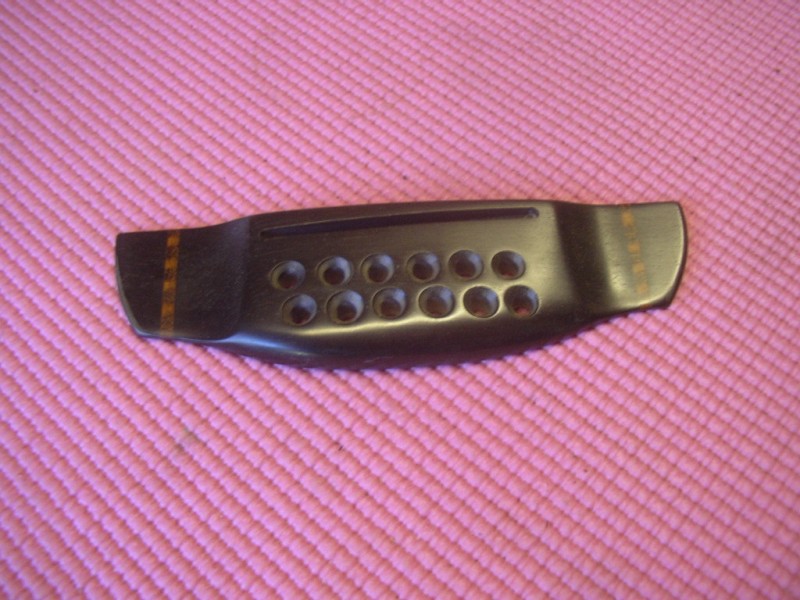
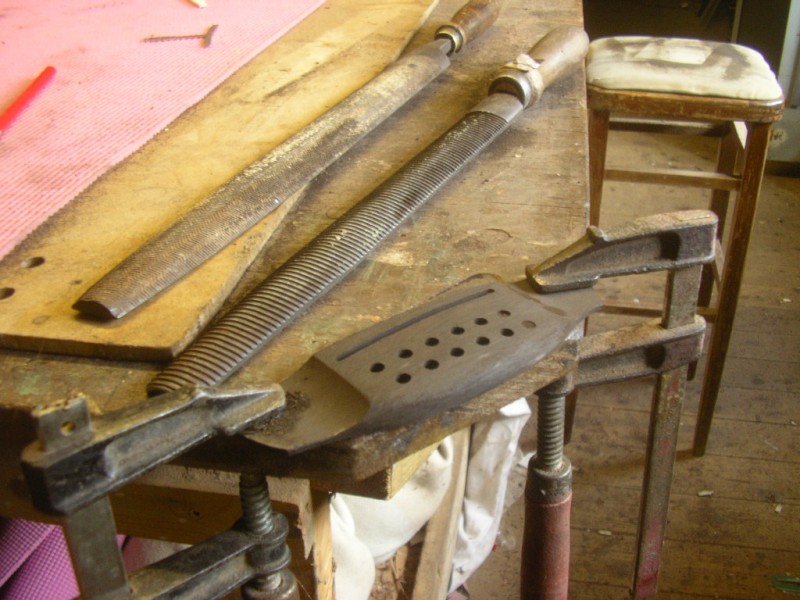
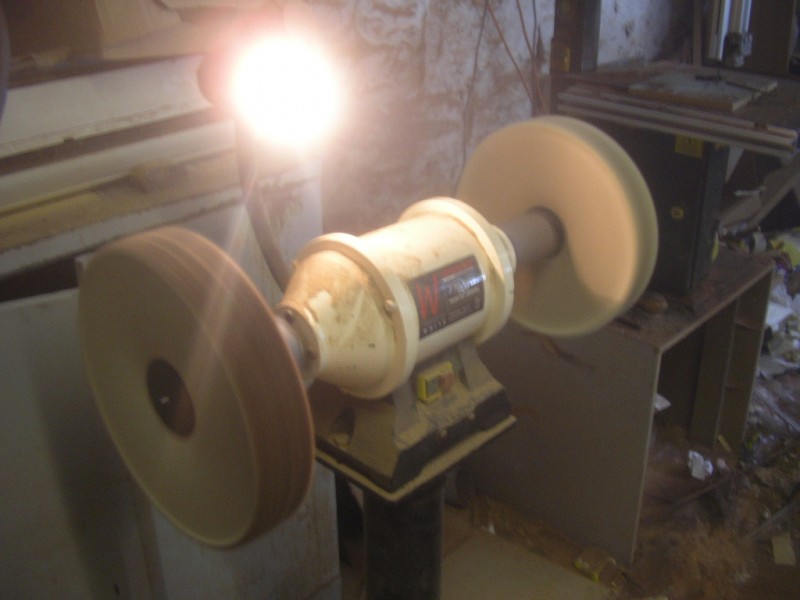
The wings of the bridge are cut roughly with a bandsaw and then sanded using a jig on the bobbin sander. After that the top face is arched to a 12 inch radius to match the fretboard. The holes are then countersunk, before final sanding and polishing the bridge, ready to be glued on to the guitar.
I added a few steps to make some Snakewood stripes on the wings of the bridge – just for the hell of it.
Alone in the Workshop – Part 15 – Spraying the Guitar
…Shinier than a shiny thing in shiny land (on a particularly shiny day)
Achieving a mirror like finish is not easy. It takes a lot of patience and practice. All our guitars are finished ‘in house’ by Billy who has spent years perfecting the art. If you want to have a go yourself, Stewmac have a great website with free infomation, I advise that you read this:
That is pretty much the way we do it here but with an acoustic guitar I like to finish the neck and body seperately before gluing them together. After that the bridge must be glued on and left overnight before the strings can be put on – but we are a while away from that yet.
I like to seal the guitar and then locate the bridge and neck to mask them off while spraying the top coats. After the guitar is sprayed and polished it is a relatively easy task to peel off the masking tape and clean off the sealer underneath to glue on the neck and bridge.
So the guitar was sealed and while it was drying I made the bridge. It is a pyramid style bridge often found on vintage guitars. It is smaller than a normal bridge so it suits these smaller guitars better. I think it looks classy!
The guitar is now hanging up in the back room after being sprayed. It will hang for about 3 weeks for the lacquer to fully harden before it can be polished.
You may be wondering about the other three….yes me too. Now I have three weeks while the ziricote guitar is hanging to finish the woodwork on the others…..
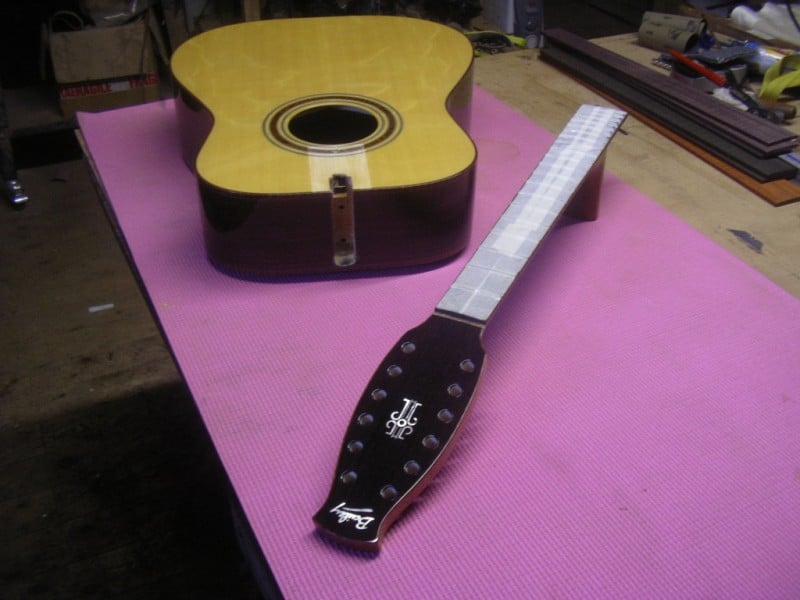
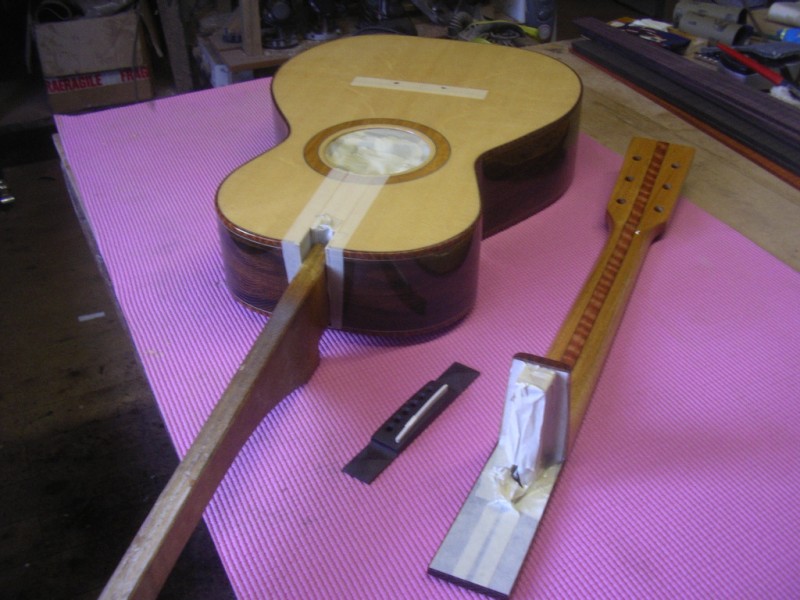
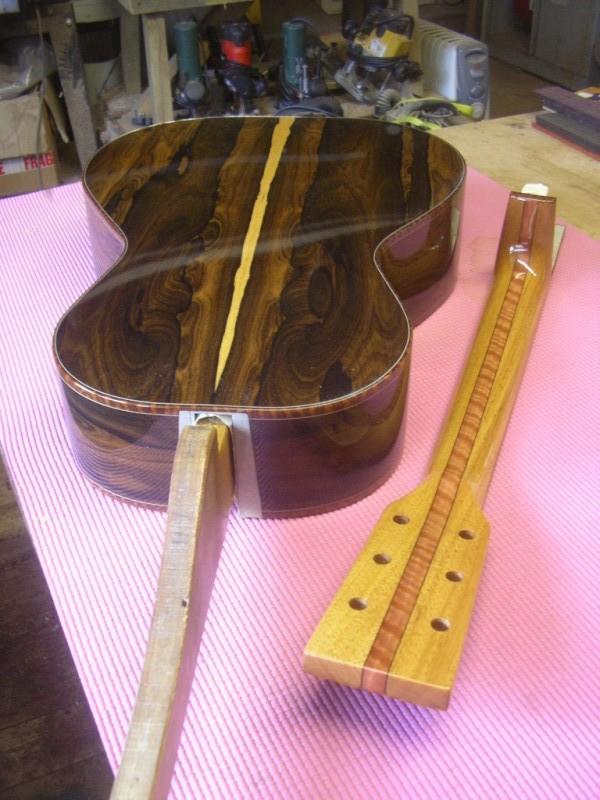
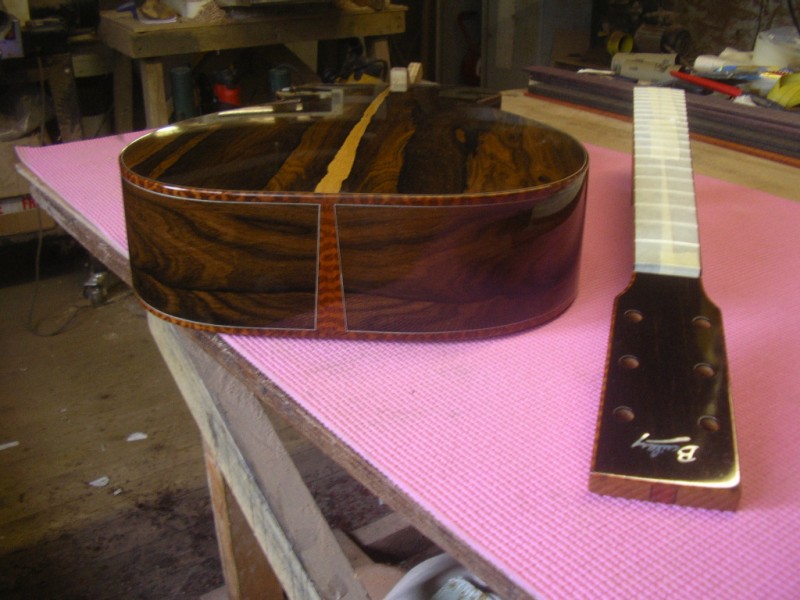
Jon Gibbons 12 string Acoustic – Gluing the neck on
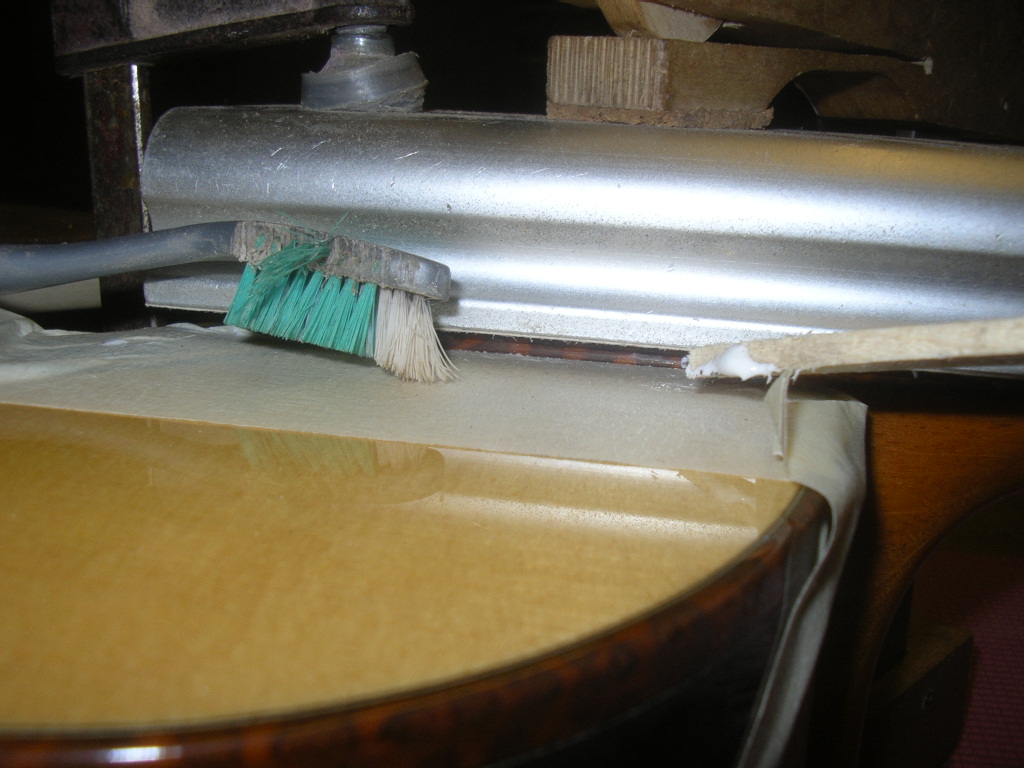
…Carol’s toothbrush comes in handy sometimes…. Don’t worry I always put it back when I’ve finished with it…..


This is a custom job that has been hanging in the back room for a while. The finish is well dry and has been polished on the buffing wheel. It will get a final hand glaze after the neck and bridge have been glued on.
I glued the neck on today, and tomorrow I will make the bridge and glue that on. After that It will need a good 24hrs for the glue to dry before stringing it up. I’m supposed to be on holiday but if I can get away with sneaking back into the workshop, then I will be playing it by Friday afternoon……Hope you like it Jon….Wait till you feel the neck it’s awesome!
BTW a glue chisel, if you are wondering, is just a piece of scrap wood shaped like a chisel and used to clean of excess glue- self explanatory really….anyway I’ve got to go and put Carol’s toothbrush back before she notices……

Custom Jazz Guitar – ‘The Spaceship’
We come in peace…..with jazz…

I finally made a start on Steve’s custom archtop….This is a long term custom build. Steve sends a small amount each month by direct debit. It’s a great way to commision a guitar – in 2 or 3 years he will have it in his hands and will have hardly noticed paying for it!
Steve is an old friend having come on the build your own course way back when we were based in Coventry. He popped in recently to have a look and talk about some of the finer points of the spec. It will have a lot of ‘art deco’ features – The tail piece headstock and finger rest will all be made in this style. The body and neck will be some kind of midnight blue burst with silver flakes – ‘I want it to look like a space ship’ he said. Hence the name!
The top and back plates are jointed and shaped to an arch on the outside. The inside will eventually be carved out to a bowl shape with an even thickness of 3/16″ all over.
The sides have been prepared ready for bending (not pictured)- one of my favourite bits – looking forward to that.
Steve and his partner Evelyn are founding members of the Highland Hotclub – Click the link to hear them play.

Bailey Guitars – Big in Holland!
Fame at Last….

Big Thanks to Marcel and De Bassist Magazine! And to our webmaster who just found this online.
I especially like:
‘De eerste jaren deed een dubbeldekkerbus dienst als werkplaats’
Read the full story: English version
Thanks Jane and Garth for the translations!!!That was way fast!
Or click here for the original dutch version.
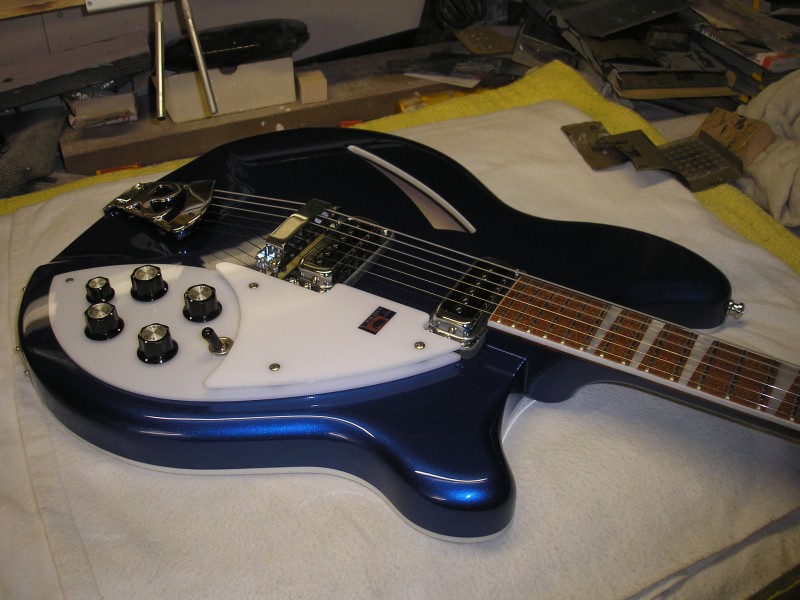
The Ricken’cracker’ Part 2
No longer a Ricken’cracker’
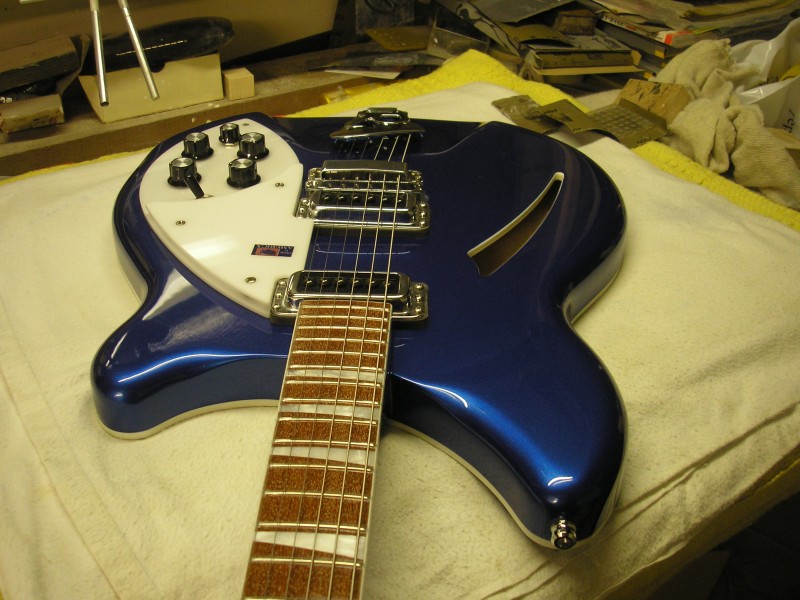
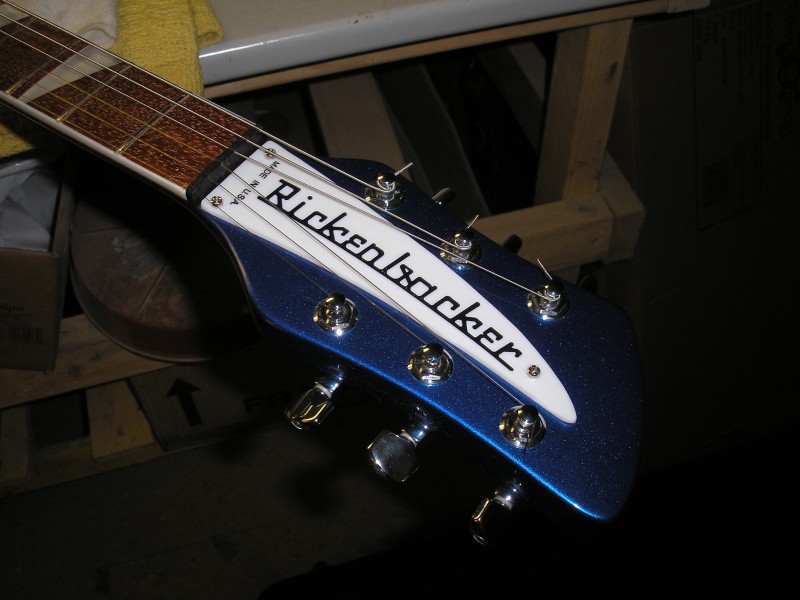
After part 1 the guitar was almost ready for spraying – only a final light sanding was needed. I masked off the binding and fingerboard and the guitar was ready for its first sealer coat. Scuff Sanding in between, it was given a further 3 coats. The last coat was sanded flat with 400grit and then sprayed first with a black basecoat then with the colour coat – a blue ‘pearl’. It was then given its final coatings of clear lacquer- again sanding between coats, this time using 800grit. When dry, it’s sanded with 1500grit and then polished to a high gloss and after final assembly the guitar is ready for Duncan.