Blog

Custom Build – Set neck, Single cut, Flamed Cap- P13
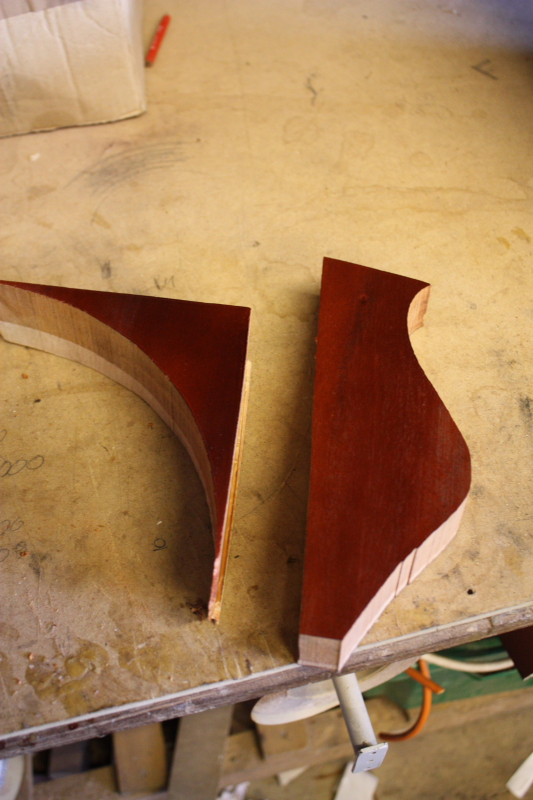
…’Fake’ or ‘Faux’ binding…


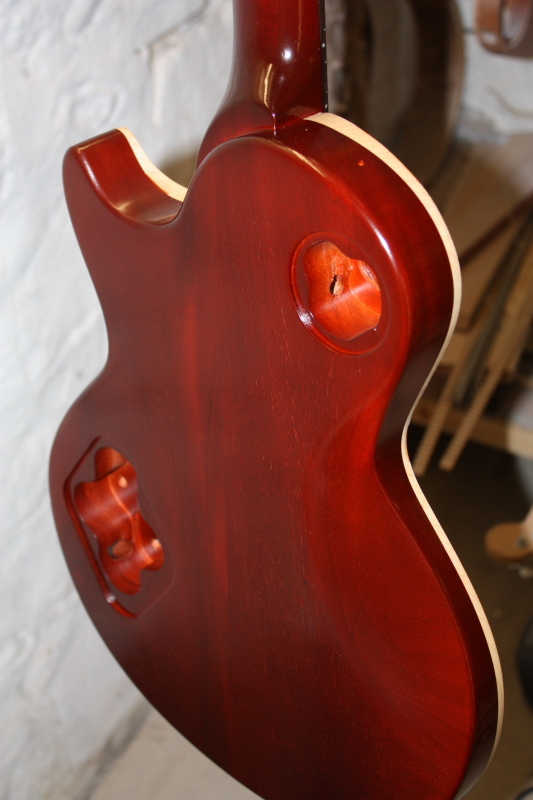
Fake binding (note: deleted rant – don’t ask) is when the cap is stained on the front but the side is left uncoloured so the natural wood appears like binding. It’s a gorgeous effect used by most top end makers. For me it is a lot nicer than plastic anyway…..
To get this effect the top edge of the cap is left sharp after sanding – we don’t round it off until after the colour is applied.
First the colour is applied to the front of the cap – in this case honeyburst – but it works with any colour.
The front and side of the cap is masked up to prevent any colour getting on it while the back is sprayed with red mahogany. You don’t have to colour the back but in this case we did.
When the tape is removed there should be a nice crisp edge where the colour stops to create the fake binding. If the line doesn’t come out crisp it can be cleaned up by carefully scraping the colour off with a blade.
Finally the edges are rounded off with fine sandpaper. The aim is to make the ‘binding’ look the same thickness all the way round. Its easier to do this by carefully sanding off the colour now rather than trying to mask up evenly all the way round – thats why we leave the edges sharp until this moment.
Looks pretty good eh? Ready for the gloss top coats………
Nice work Billy!!
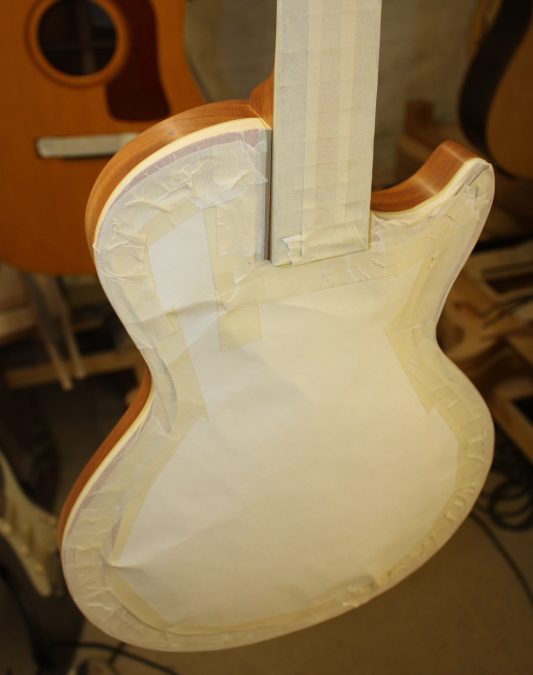
Custom Build – Set neck, Single cut, Flamed Cap- P12
…More colour tests….the back…
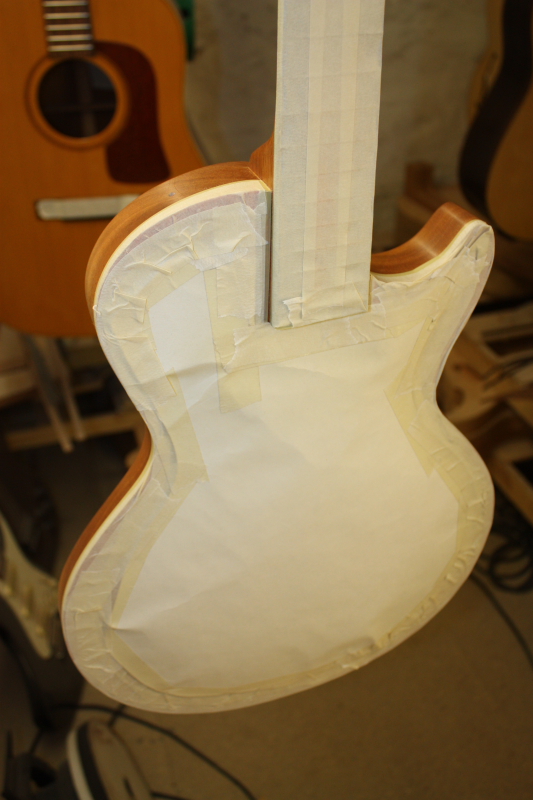
The cap, fretboard and headstock are all masked up and the back is ready for spraying with red mahogany. Will post more pics after the stain goes on…..
Custom Build – Set neck, Single cut, Flamed Cap- P11
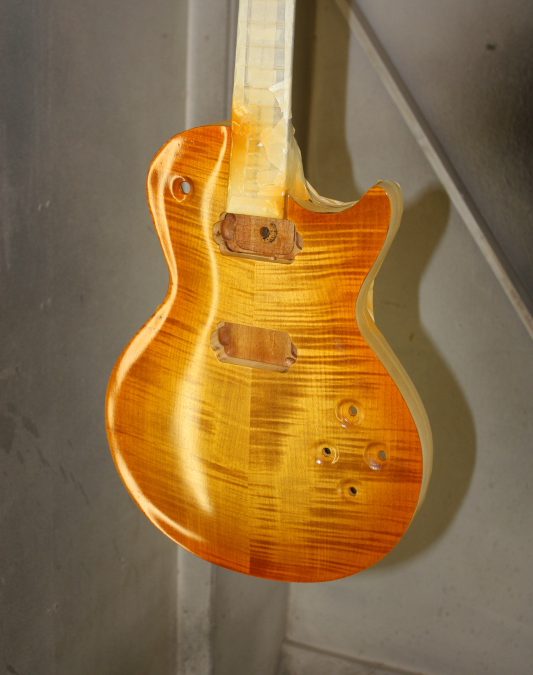
…..Finishing…..Honey burst…


I got confirmation on the colour for the front so the guitar is now in Billy’s capable hands for the spray job. I will post colour tests for the back tomorrow…..
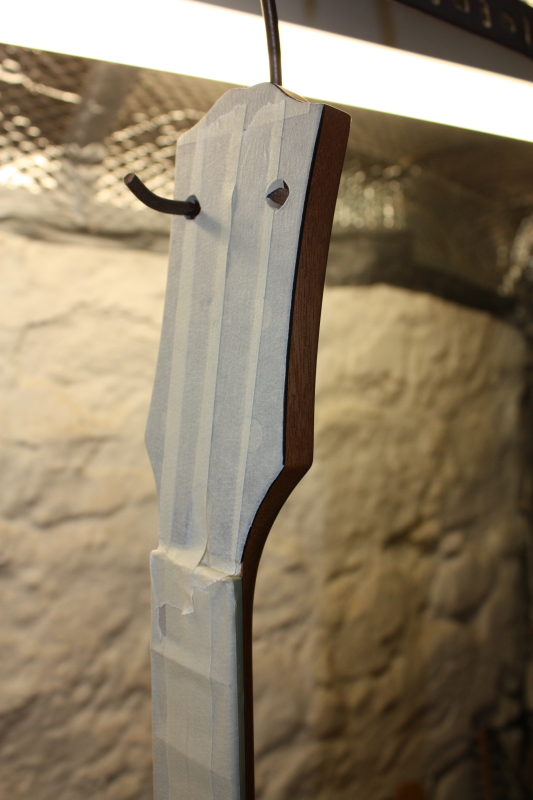
The fretboard has been masked to keep the finish off.
The back and sides were sealed first – this will stop the colour sinking in if any runs down the side while the front is stained. To make doubly sure the entire guitar was then masked except the bit we want to colour (the front).
The front was double stained – it is stained medium brown first then sanded off. The stain sticks in the ‘flames’ and comes off easily in between. After that the amber is applied. Both these stains are just applied with a rag onto the bare wood. Double staining increases the contrast in the figure of the wood enhancing the grain.
The colour is protected with a sealer coat before the burst is applied. This means if the burst goes wrong (it didn’t:) it can easily be rubbed off with a thinners rag without damaging the base colour.
The burst is created by spraying ‘off the edge’ with a darker colour – in this case we used orange. The fan shaped spray pattern of the gun makes the colours blend together for the famous sunburst effect. Hope you like it!
A final coat of sealer was sprayed over the front to protect the colour so the back can be worked on tomorrow…..
Note:
The colour looks slightly different depending on which side you look at it from. Notice in the first pic the colour of the ‘flames’ look fairy even – this is because the camera was directly in front of the guitar. If you look from the side like in pic 3, the flames one side looks darker. The effect is reversed if you look from the other side. Don’t worry, this is normal. The effect is to make the flames look 3 dimensional – the flames ‘curl’ as you tilt it in the light. That’s why some folks call it ‘curly maple’. The only time they really match up is if you look straight at it from the front……

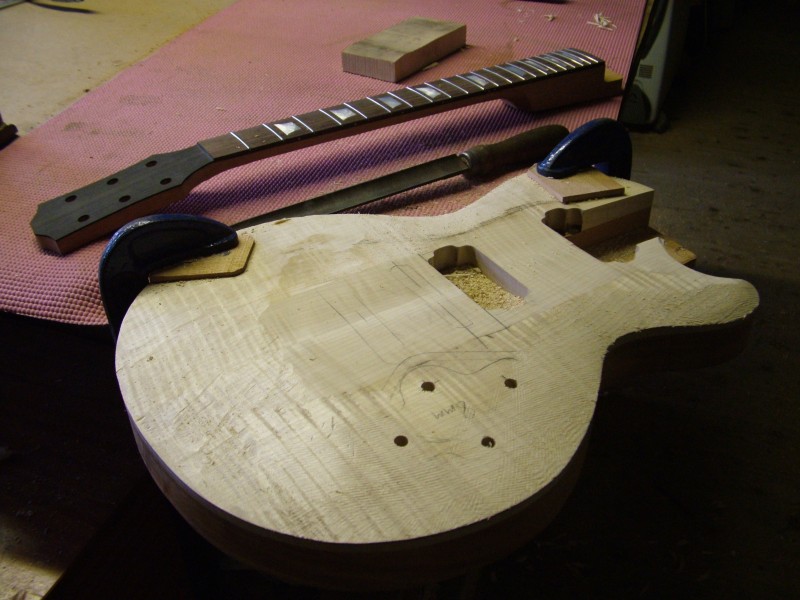
Custom Build – Set neck, Single cut, Flamed Cap- P10
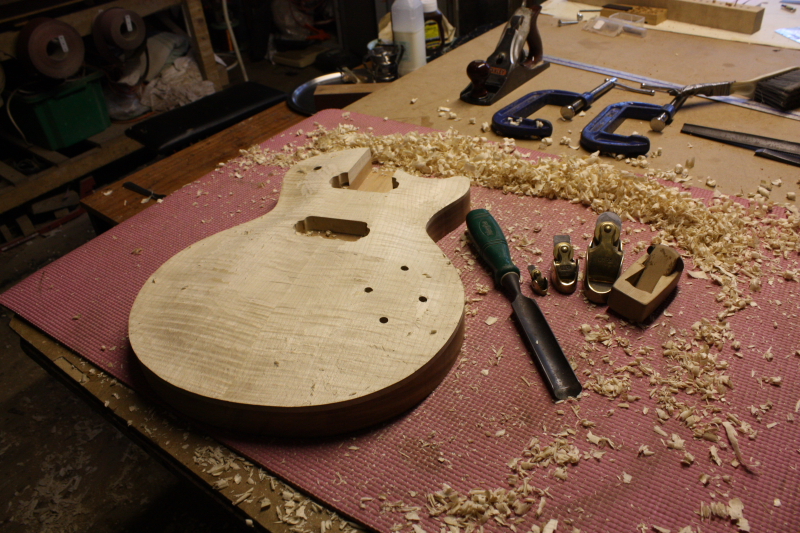
…Fitting the controls and gluing in the neck (or the fiddly bits)


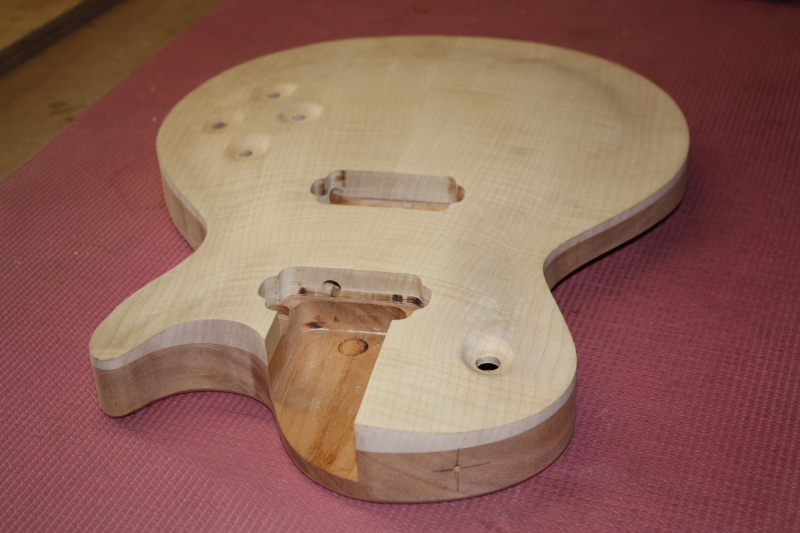


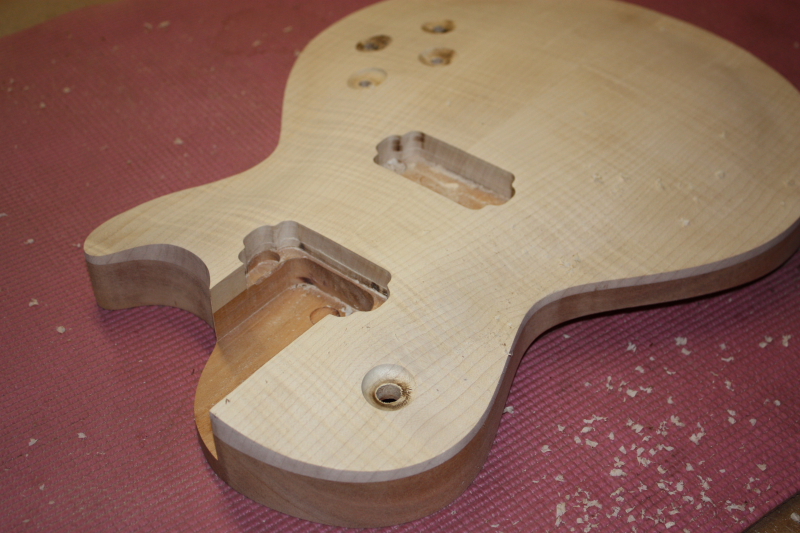
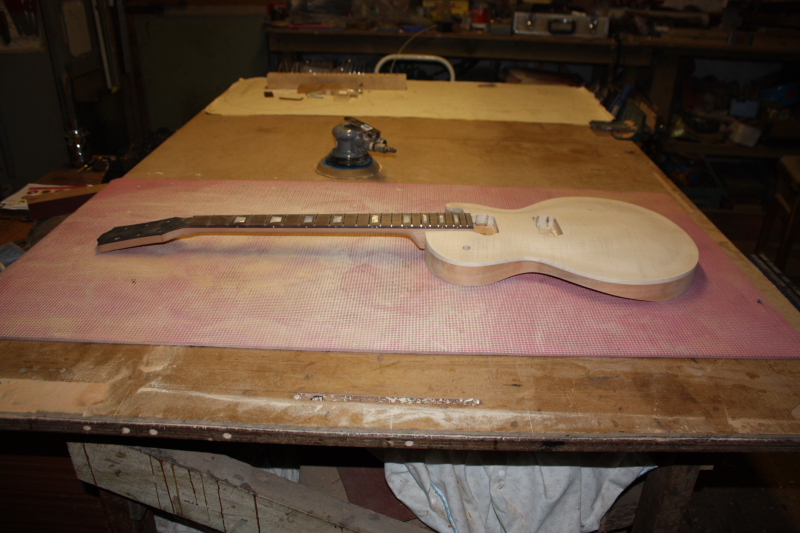
The woodwork for the guitar is nearly done now, just a few finishing touches before the neck is glued in, then it is ready for spraying….
First the pots and switches were fitted….
A ‘pot’ is a volume or tone control – short for potentiometer – pots is quicker to say….guitar makers are not lazy (always) – we just don’t like wasting time….or showing off with big words (lie).
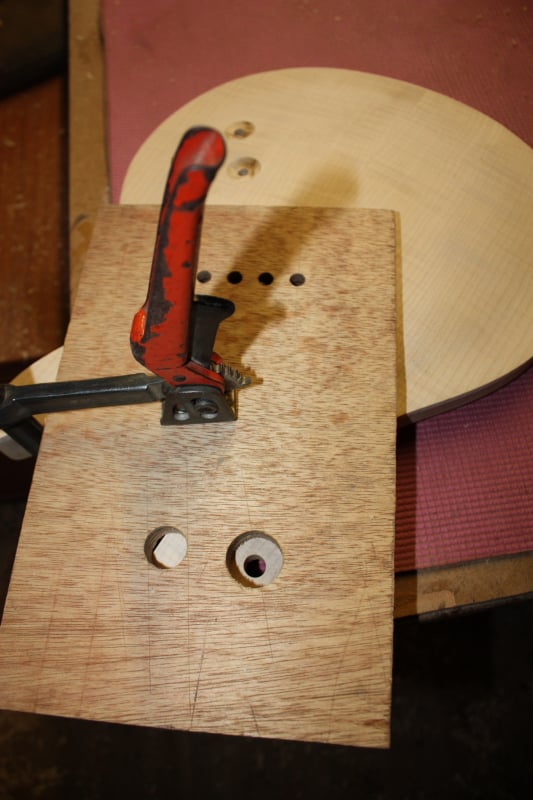
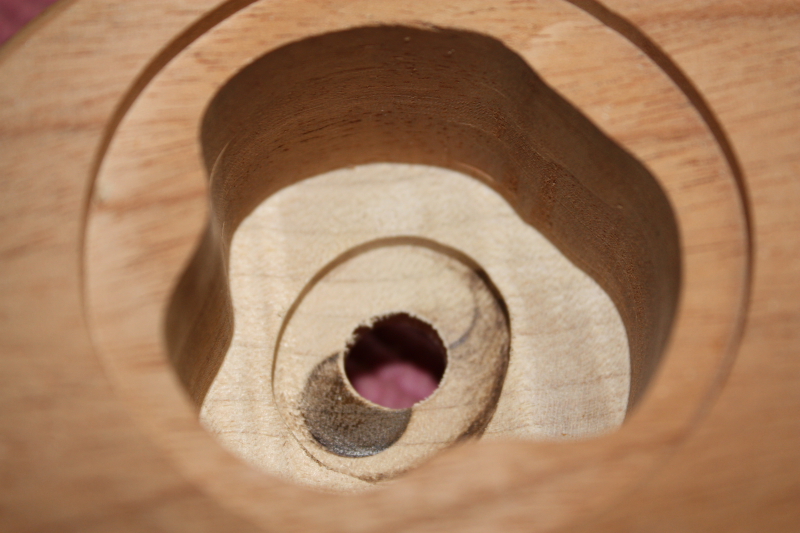
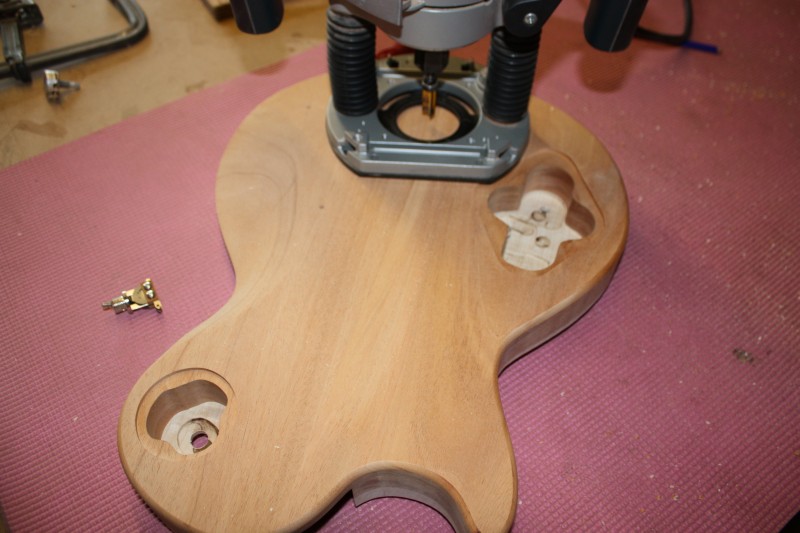
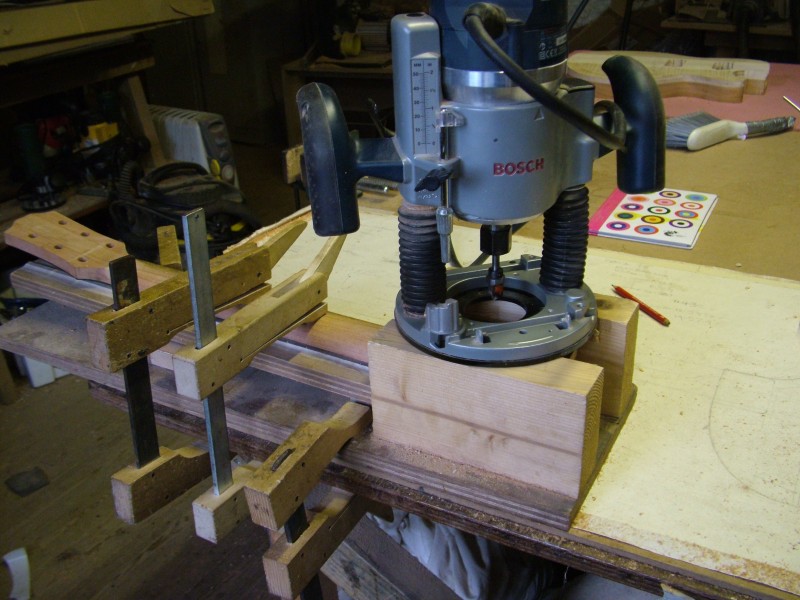
Because the guitar has a carved top this is slightly more tricky as each control must be fitted individually. A flat top is much easier – just route the control cavity for one and they will all fit. This doesn’t work on carved tops because of the curve – the nut and washer need a flat spot to tighten against so the control sits straight.
There are several ways around this – some makers angle the control cavity the same as the front so the nut and washer will sit flat. I prefer to make small dishes for each one – I have a round bottom router cutter with a bearing which follows a pattern to make them.The pattern is just a piece of scrap plywood with a large hole (28mm in this case or as big as you want them) which is lined up and clamped so that the control hole is in the centre. Then the round shape is copied into the guitar with the router. I cut just deep enough to leave a large enough flat spot for the nut and washer. It leaves lovely little round dishes which I think looks a lot more classy. It takes a bit more time to sand them but I think its worth it.
Then the holes are drilled…
A very long 10mm drill is used to make the link holes for the pickup wires – mine is a auger bit. This screws itself through as it drills (also the cheapest way to get a very long drill bit). The pickup link holes must be drilled before the neck is glued or it may be (nearly) impossible.
A 22m Auger is used for the jack socket and a standard 2.5mm is used for the strap studs.
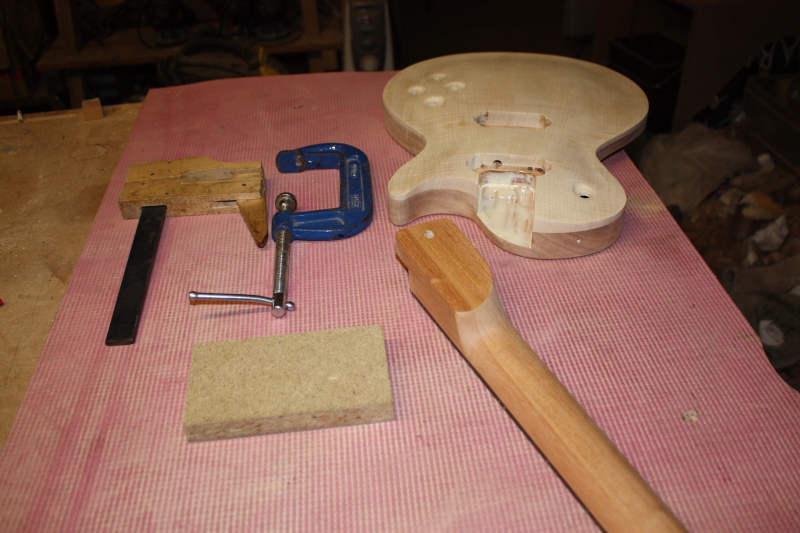
This done, it is time to glue the neck in…..
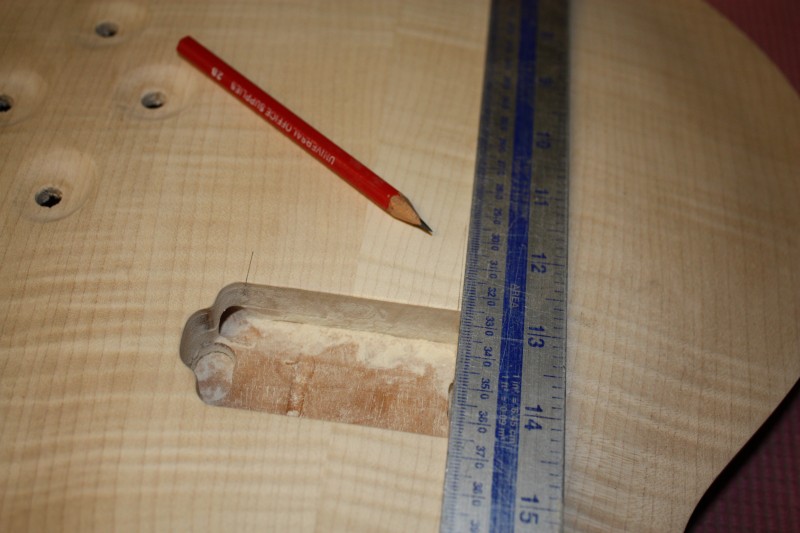
I always dry clamp it first (no glue) so I can check its position. The neck must sit centrally or the strings might not line up with the pickups.
To check this I lay a long (1m) ruler along one side of the neck, mark where it crosses the back of the bridge pickup, and then repeat on the other side. These marks should be an equal distance from the centreline – in most cases this is the glue line down the middle.
This checked out OK so I went ahead and glued it in. The glue is applied to the body and the neck is pressed in and clamped in place. It is worth checking that the neck is still aligned correctly – you can lay a ruler down one side of the neck and check it still lines up with the marks made earlier. The other side is blocked by clamps, but if it lines up on one side you can be sure it will still be the same on the other, so you don’t have to worry.
The guitar was then left overnight to dry……

Custom Build – Set neck, Single cut, Flamed Cap- P9
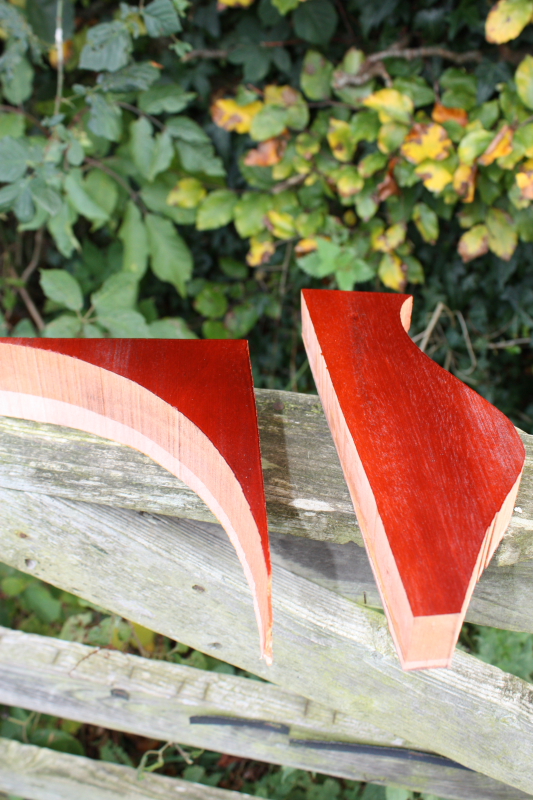
…Colour tests…


Just done some colour tests for the custom single cut – what do you reckon?
I took pictures inside and outside to show the difference. It is amazing how different they look under different lighting conditions.
Also the larger piece is ‘double stained’. In this case we stained it medium brown first then sanded it off again. The darker colour sticks in the grain adding contrast and making it stand out more. Then the next colour is applied, in this case amber. Finally the burst is sprayed around the outside.
I’ll wait for confirmation on the colour before doing any more……[email_link]
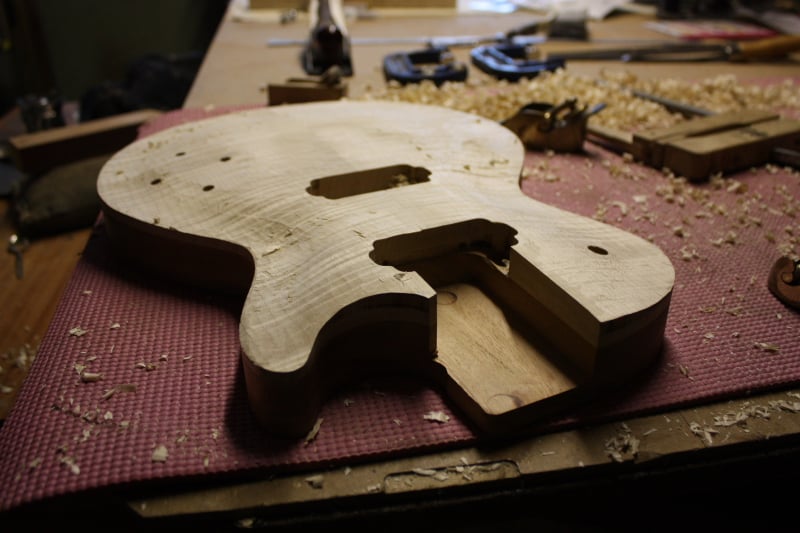
Custom Build – Set neck, Single cut, Flamed Cap- P8
…Carving the body…
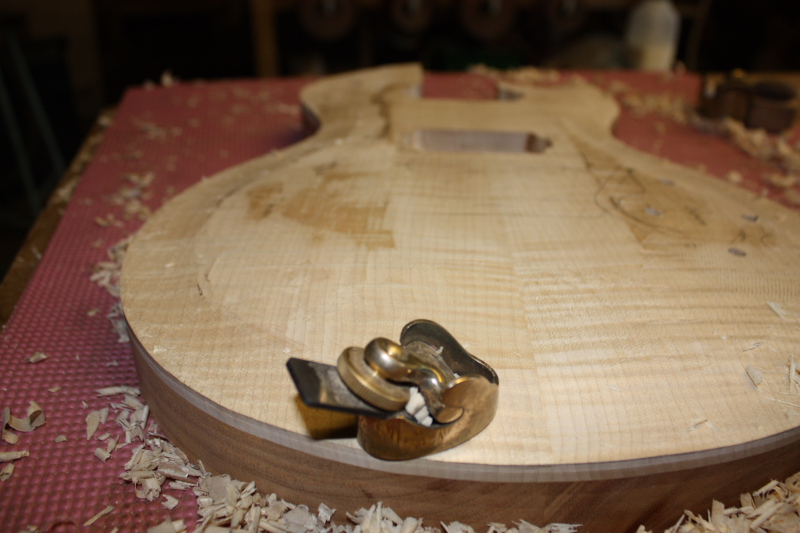
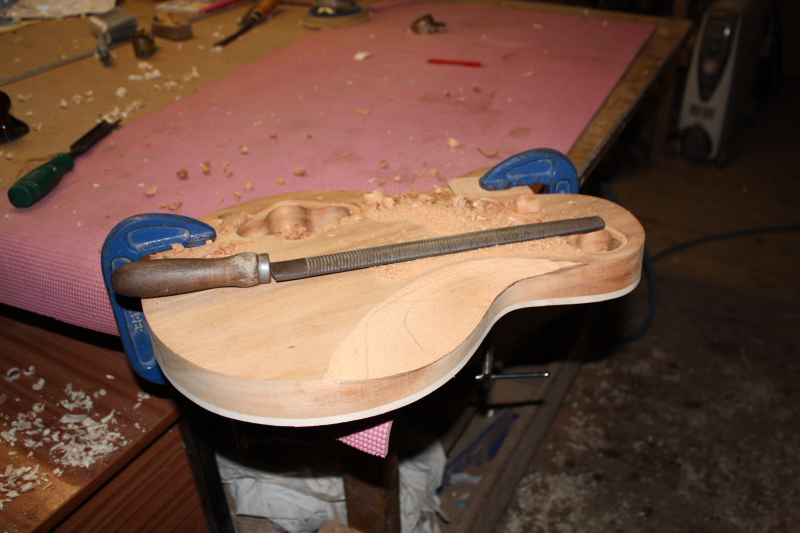
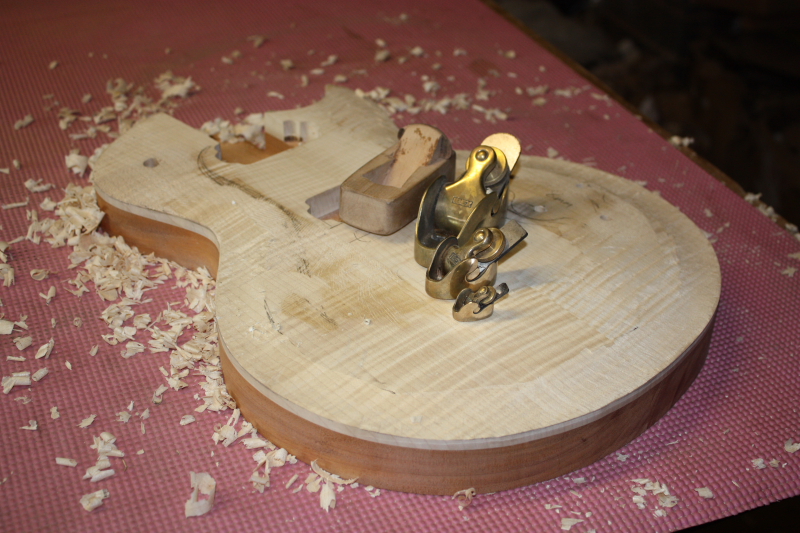
The body was carved by hand. I really enjoy this part as I get to use the little curved planes which are reserved only for this purpose. Well, there is one other thing I do with them….I like to whip them out to show off to visitors. I always get a few oohs and ahhs. They are the guitar makers equivalent to puppies…..would you like to see my little planes? Trust me I’m a guitarmaker………
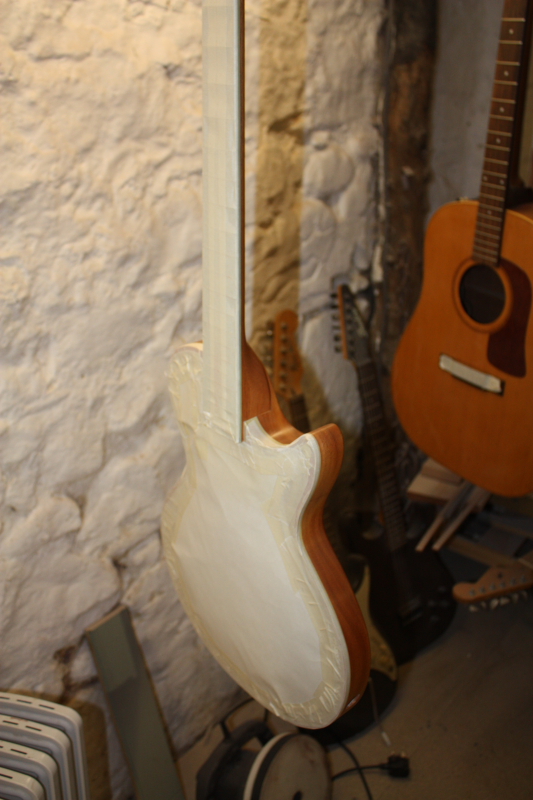
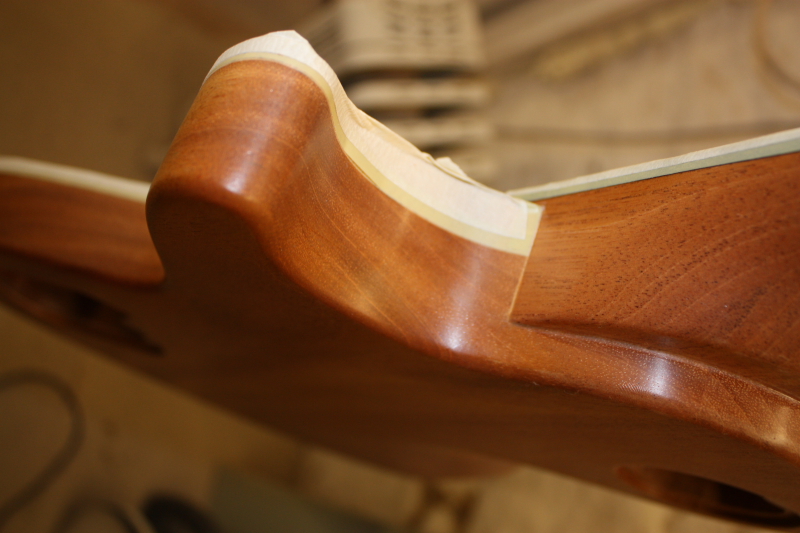
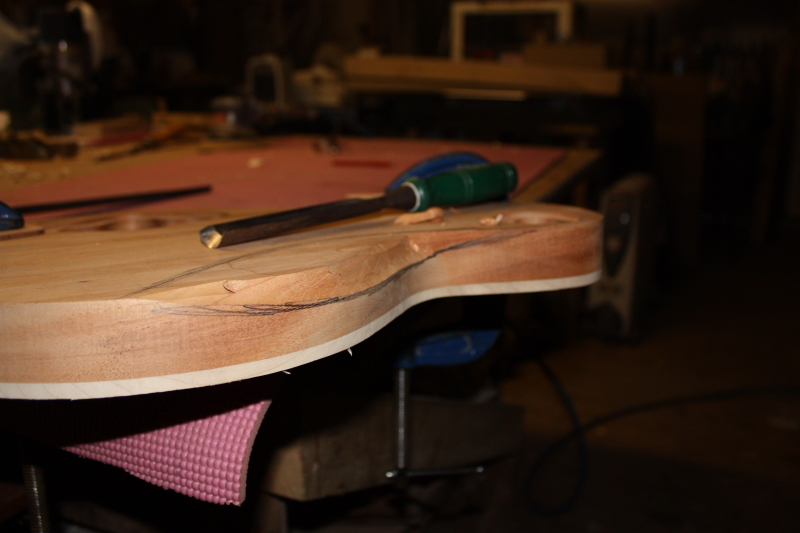
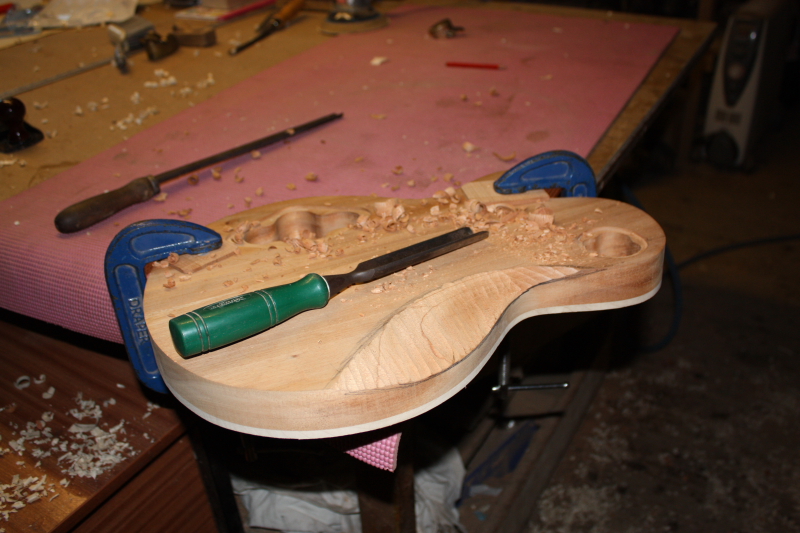
There are a couple of different types of top carve – this is what I call a full carve – it has a ‘recurve’ – that is a flat or slightly concave ridge all the way round the edge. This is done in stages:
- First draw two lines – one around the side to determine the thickness of the cap at the edge and one around the top to define the top edge of the carve.
- Join the lines with a flat facet – This is done with a rasp and a flat plane. As it is impossible to watch both line at the same time I always work down to one line first by increasing the carving angle, then the other by decreasing it. I am then left with a lump in the middle which is easy to carve off. This guitar has a flame maple cap which came wedge shaped so some of the work was already done for me.
- The recurve – The size of the recurve is marked out around the edge and a flat or slightly concave area is created with the small curved planes.
- Blending in – there are always a few lumps and bumps which need to be taken care of where the facets meet. I might decide to take a little more off here or there until I feel happy.
- Sanding – Smaller lumps and bumps can be removed by sanding with a block. A cork covered block is good for curvy bits. Only when it feels smooth will I go over it with a power sander. Mine is air powered and very powerful but the best results are achieved by rough sanding it by hand first.
Incidentaly, if you skip no.3 then you have what I call a semi carved top or half carve. The top just gets blended into a gentle curve all the way over.
Also:
I got the confirmation about the neck modification so went ahead and did it – also the belly carve on the back. Both these should make the guitar more comfortable to play.
I still have some finishing touches to do before I glue the neck on but I’m on schedule for starting the spray job on Tuesday……………

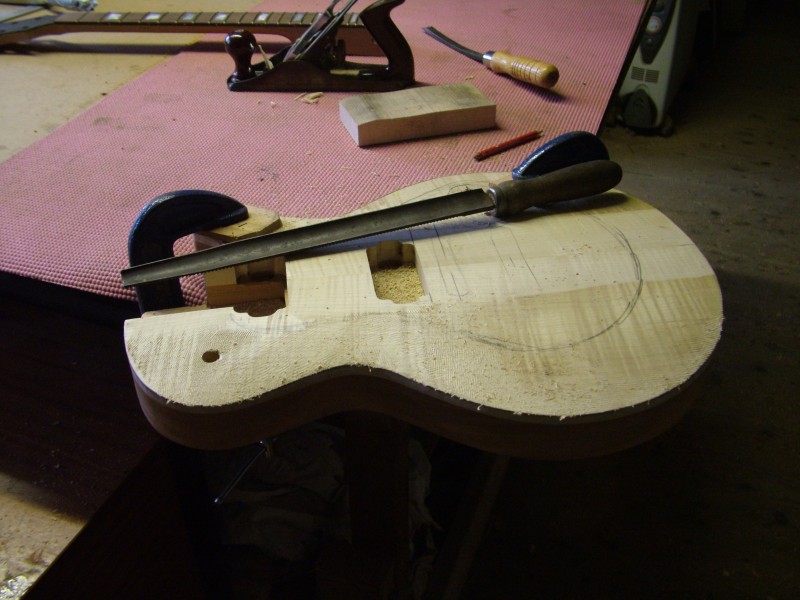
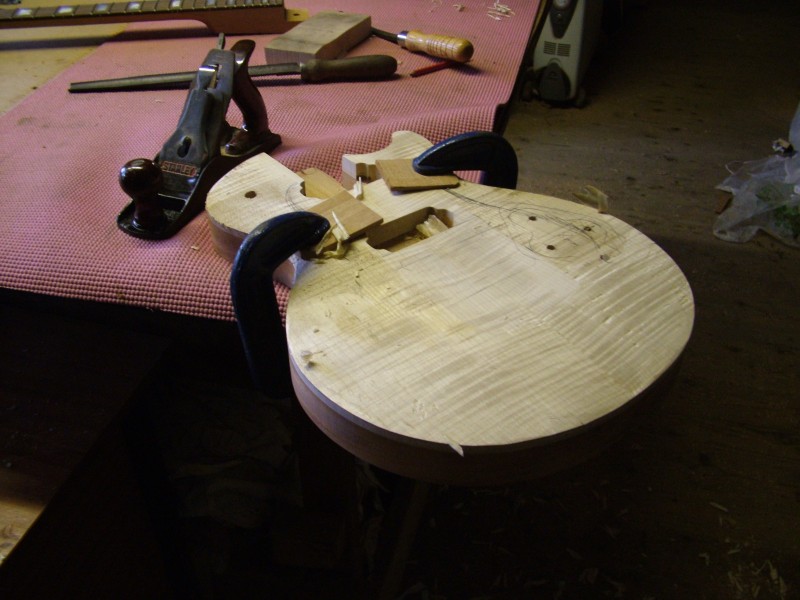
Custom Build – Set neck, Single cut, Flamed Cap- P7
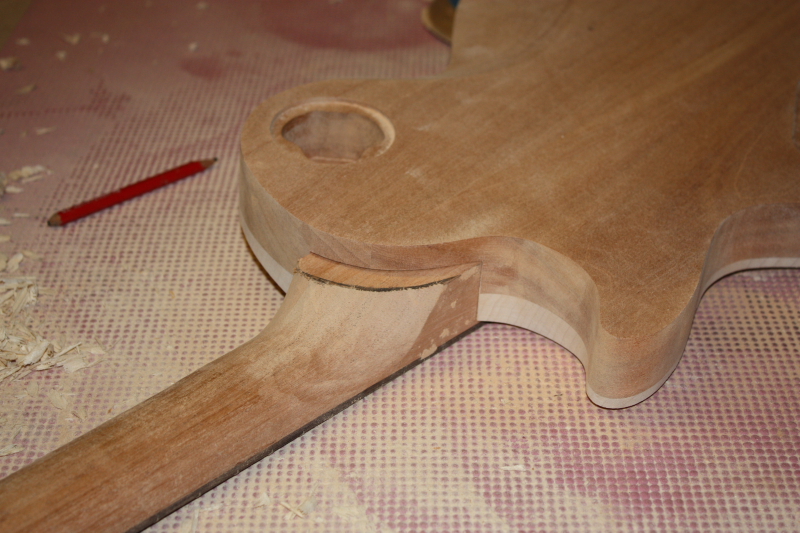
…Frets, side dots, and joining the neck to the body..


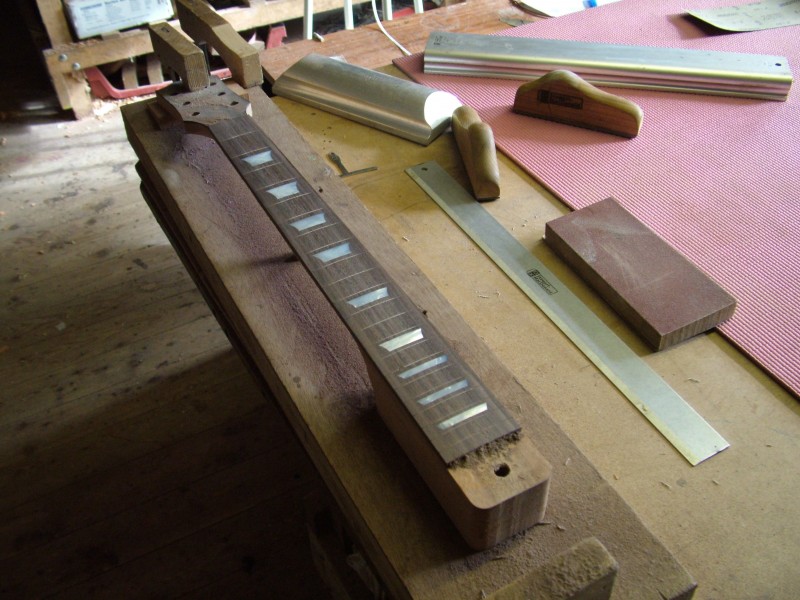
The frets and mother of pearl side dots went in with no problems and the heel of the neck has the angle routed into it, so that the strings will arrive at the right height for the bridge to get the correct action. So the neck is pretty much finished apart from the ‘Bailey’ headstock logo which I will have a go at early next week. I am hoping to start spraying it by mid week so I will post some colour tests on Tuesday.
On this style of guitar I usually modify the heel to take off the large chunk on the body, as I have marked out in the picture. The neck heel can then also be trimmed back to the same shape. This gives better fret access and feels more comfortable…..I will wait for confirmation before I chop it off just in case……Next job is to carve the shape onto the front of the body….I’d better get on with it then….

Custom Build – Set neck, Single cut, Flamed Cap- P6
…Inlaying a Mother of Pearl Crown set…
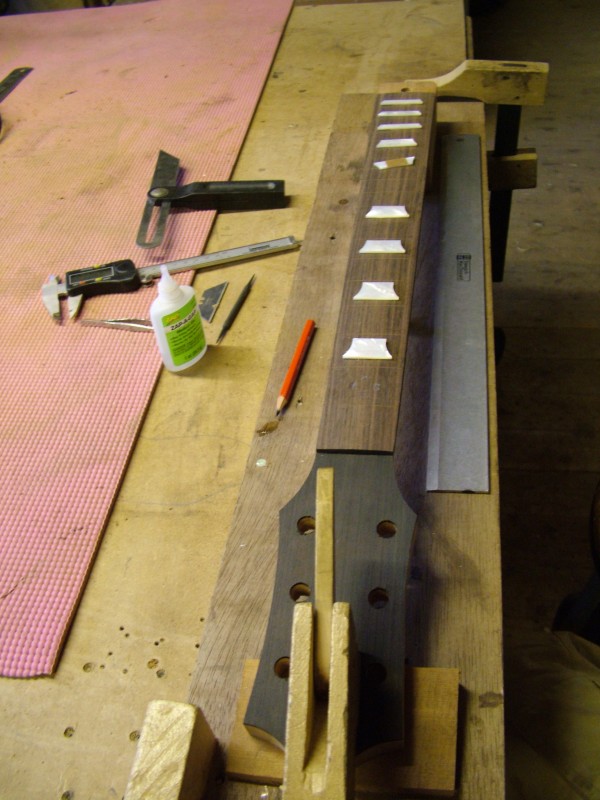


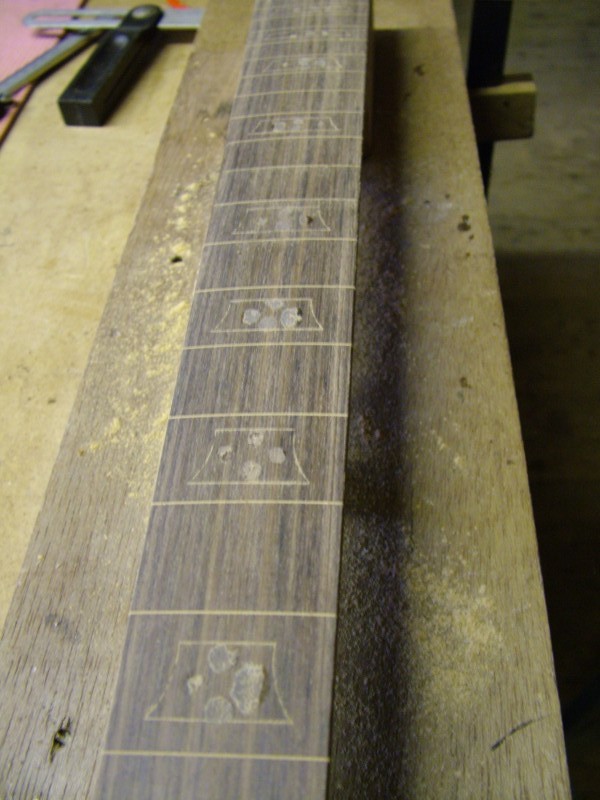


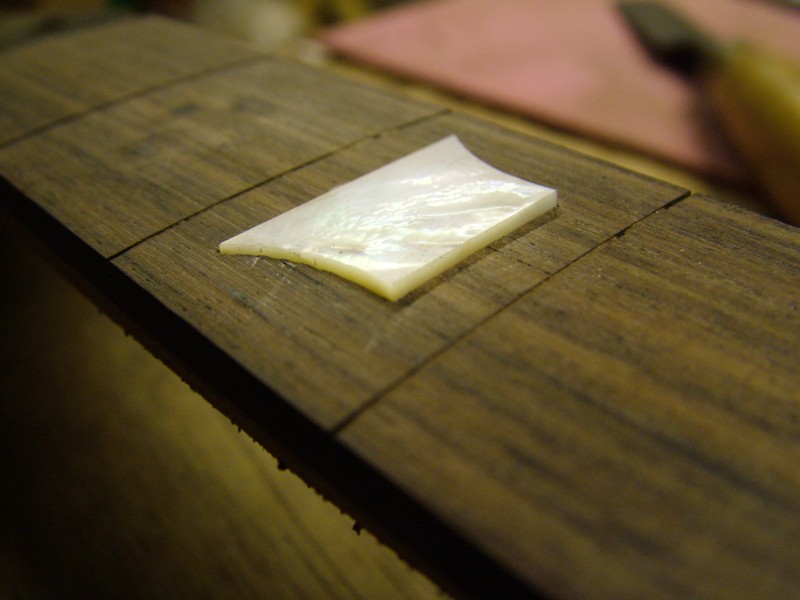


The inlays look great, I am very pleased how they came out. It’s worth taking a little time over to make it look like they just grew there….There are a few stages necessary to make this happen…..
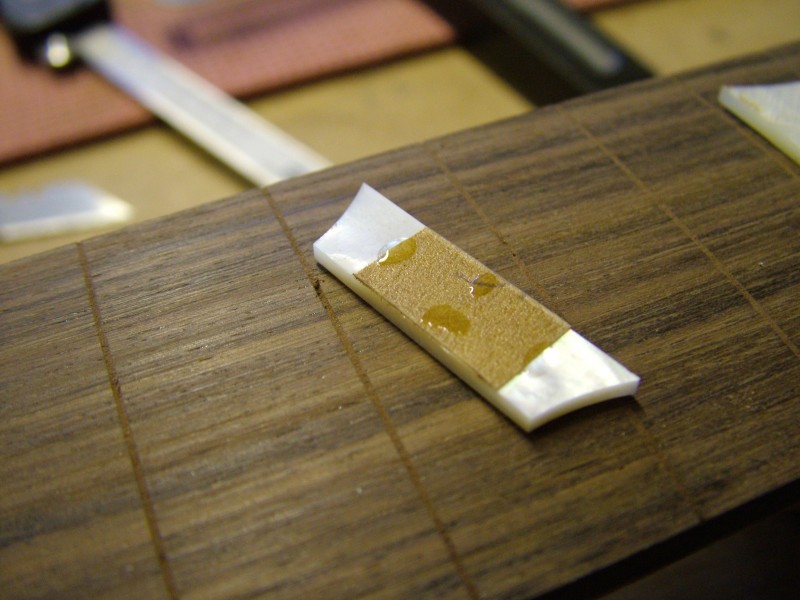
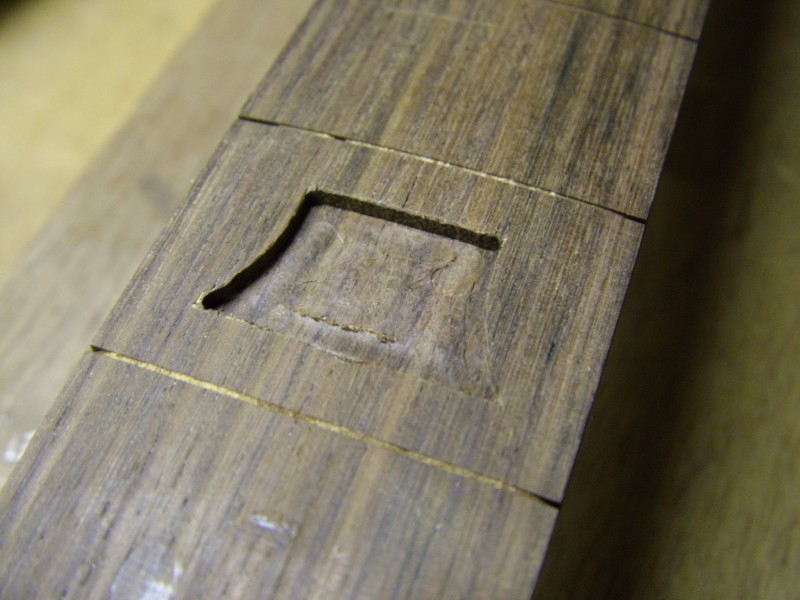
- Mark out. The pieces are laid out in place then stuck down with a tiny amount of superglue. A scriber (pokey thing, sharp thing, pointy thing) is used to mark around the edges. Then the pieces are removed by prising them off with a large chisel. If they are well stuck you can heat them up with a soldering iron to loosen the glue.
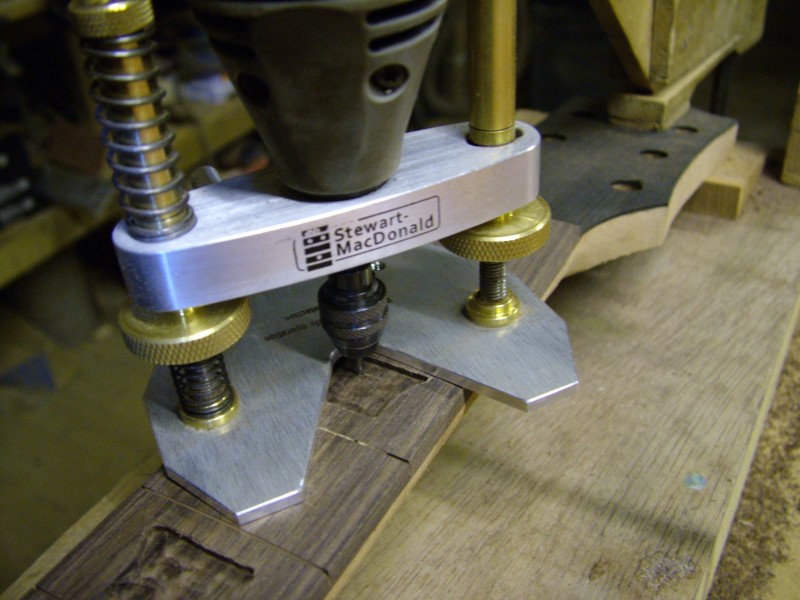
- Rough cut. A mini router with a 3mm cutter was used to remove most of the material. The depth is set to just less than the thickness of the piece so it will sit proud in the hole – it will be sanded flush later.
- Second pass. A smaller cutter is then used to go around the edges as neatly as possible.
- Finish by hand. Some shapes (like these) have sharp corners which the router cannot get into. Finish these off with a chisel until the pieces drop in.
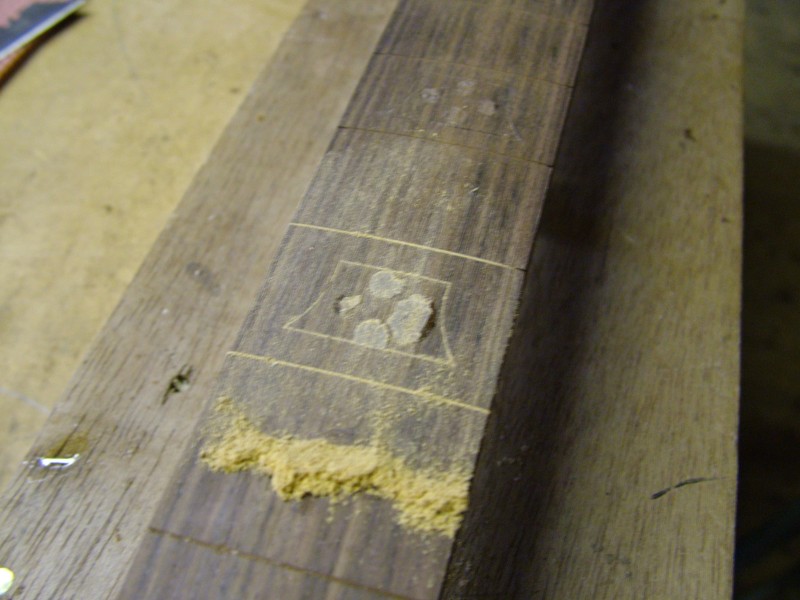
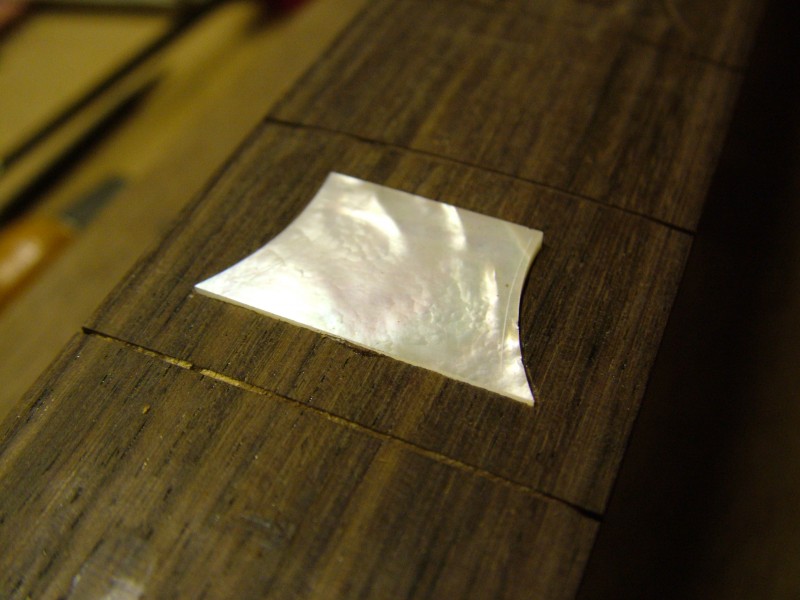
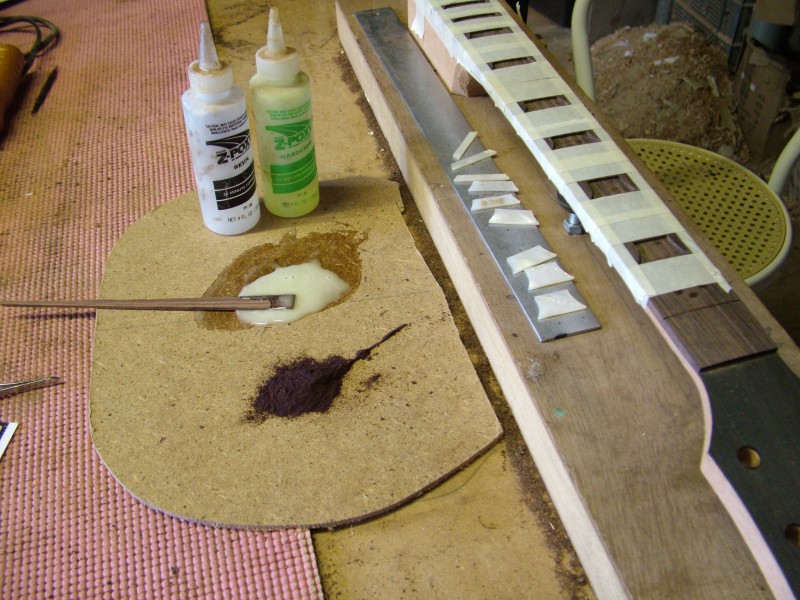
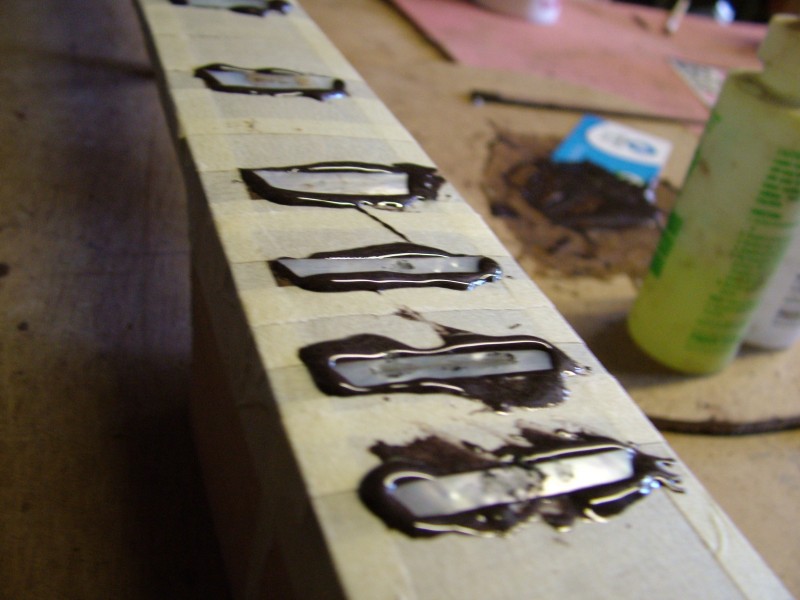
- Glue them in. The rest of the fretboard is masked off and the hole is filled with glue paste made up by mixing 2 part epoxy with wood dust.
- Clean up – When the glue has had sufficient time to dry the fretboard is sanded level once more.
Rosewood is slightly harder to inlay than Ebony, here’s why: Because Ebony is black you would use black glue and the join vanishes, but with Rosewood you have to mix up a paste of Rosewood dust and glue so the colour matches, but you can always see the joins if you have done a bad job fitting the pieces – just look at any production guitar with inlays like this and you will see what I mean. It is impossible to get such a good fit without doing it by hand – even then it takes a bit of practice.
The pieces should drop in neatly without forcing them or you may have problems getting them in when the glue is applied – everything becomes slightly more tricky at that point. Tight fitting pieces might not fit anymore as the glue and dust paste does take up a little space.
If you are attempting this for the first time I would recommend Ebony for the fretboard.
The Inlays came from our friends at ‘Small Wonder’ – these are fairly standard shapes so it’s better just to buy them. I can make them but I prefer making custom inlays. Next time one comes up I will blog it!